Experiencing an emergency? Call 972-914-0833

Ready to Experience the Dial One Johnson Difference?

Your go-to resource for HVAC and plumbing solutions, DIY guides, and home maintenance tips.

Got an emergency? Call 972-914-0833 or …

Explore by topic:
Posted in

Install a Flex Hose on Kitchen Faucets

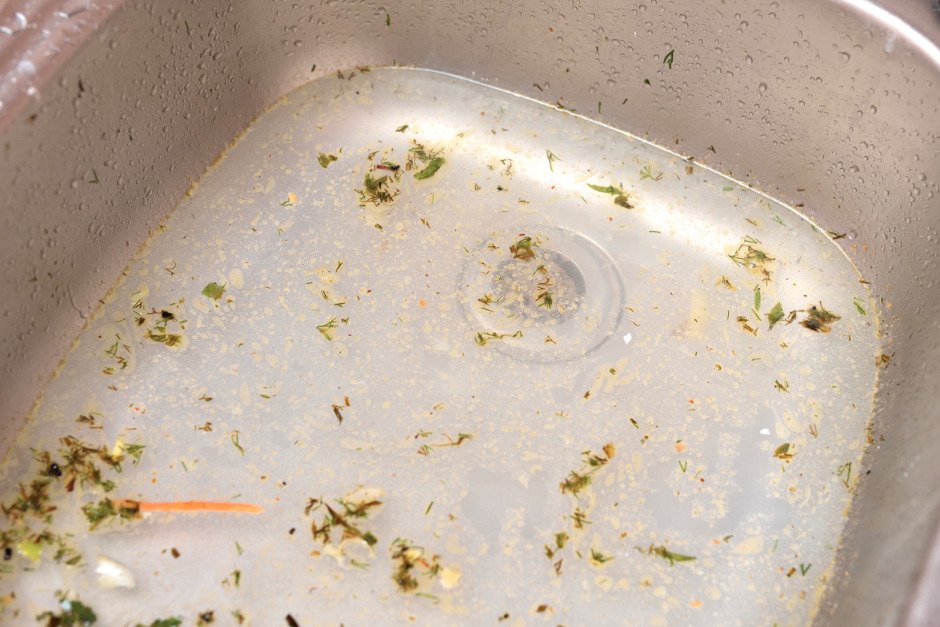
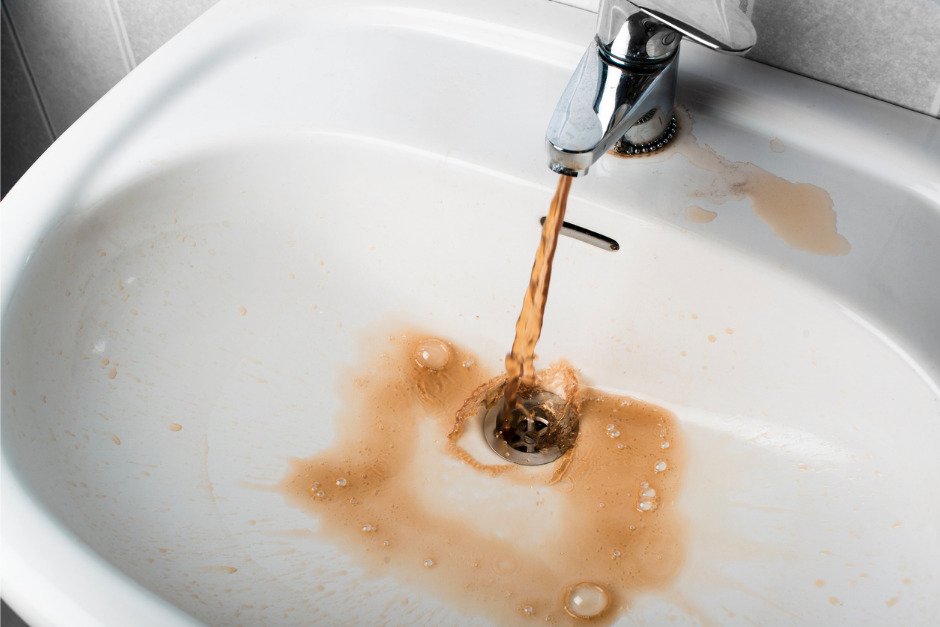
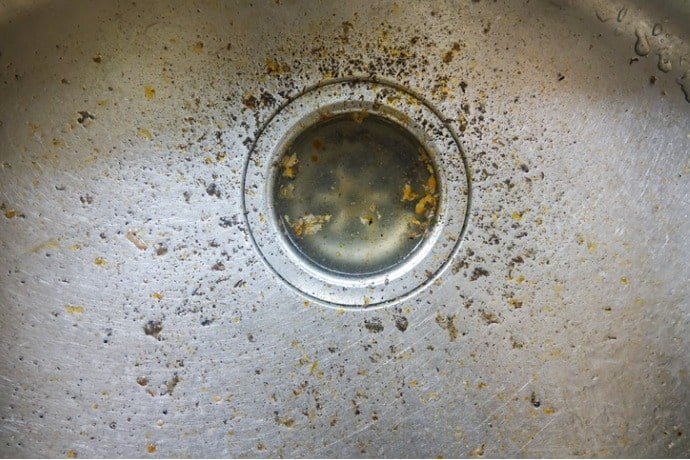
When you’ve grown up with indoor plumbing, it’s easy to take it for granted. The ability to enjoy a hot shower, fill a glass with cold water and flush waste away instantly is a luxury. However, modern plumbing systems don’t run flawlessly forever; they require maintenance to perform optimally. Without proper maintenance and repairs, each home would eventually have a kitchen sink clogged, a toilet backed up and countless other plumbing issues

That’s why homeowners should have at least a basic idea of how their plumbing systems work and how to perform routine maintenance. Although homeowners shouldn’t necessarily try to install new flex hoses on their own, many do. If you want to install a new flex hose on your kitchen sink, it’s important to know the right steps. Keep reading to learn about flex hoses, common flex hose problems and how to install one. 

DIY plumbing fixes can save homeowners money on repairs, but they can also end up causing expensive damage. When in doubt, call the best plumber Duncanville has to offer: an expert from Dial One Johnson Plumbing, Cooling & Heating

What Is a Flex Hose? 

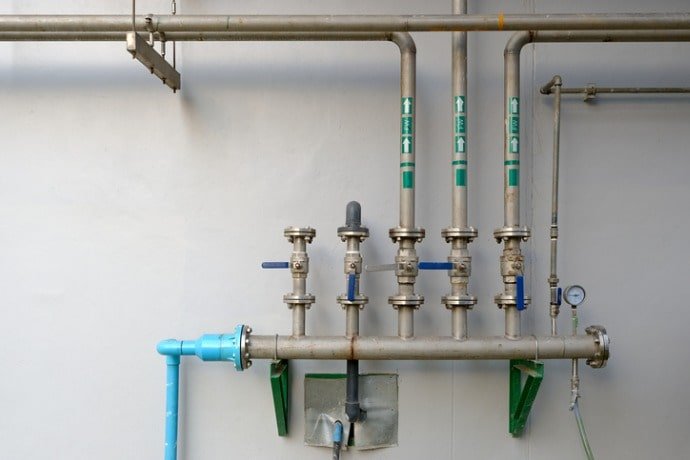
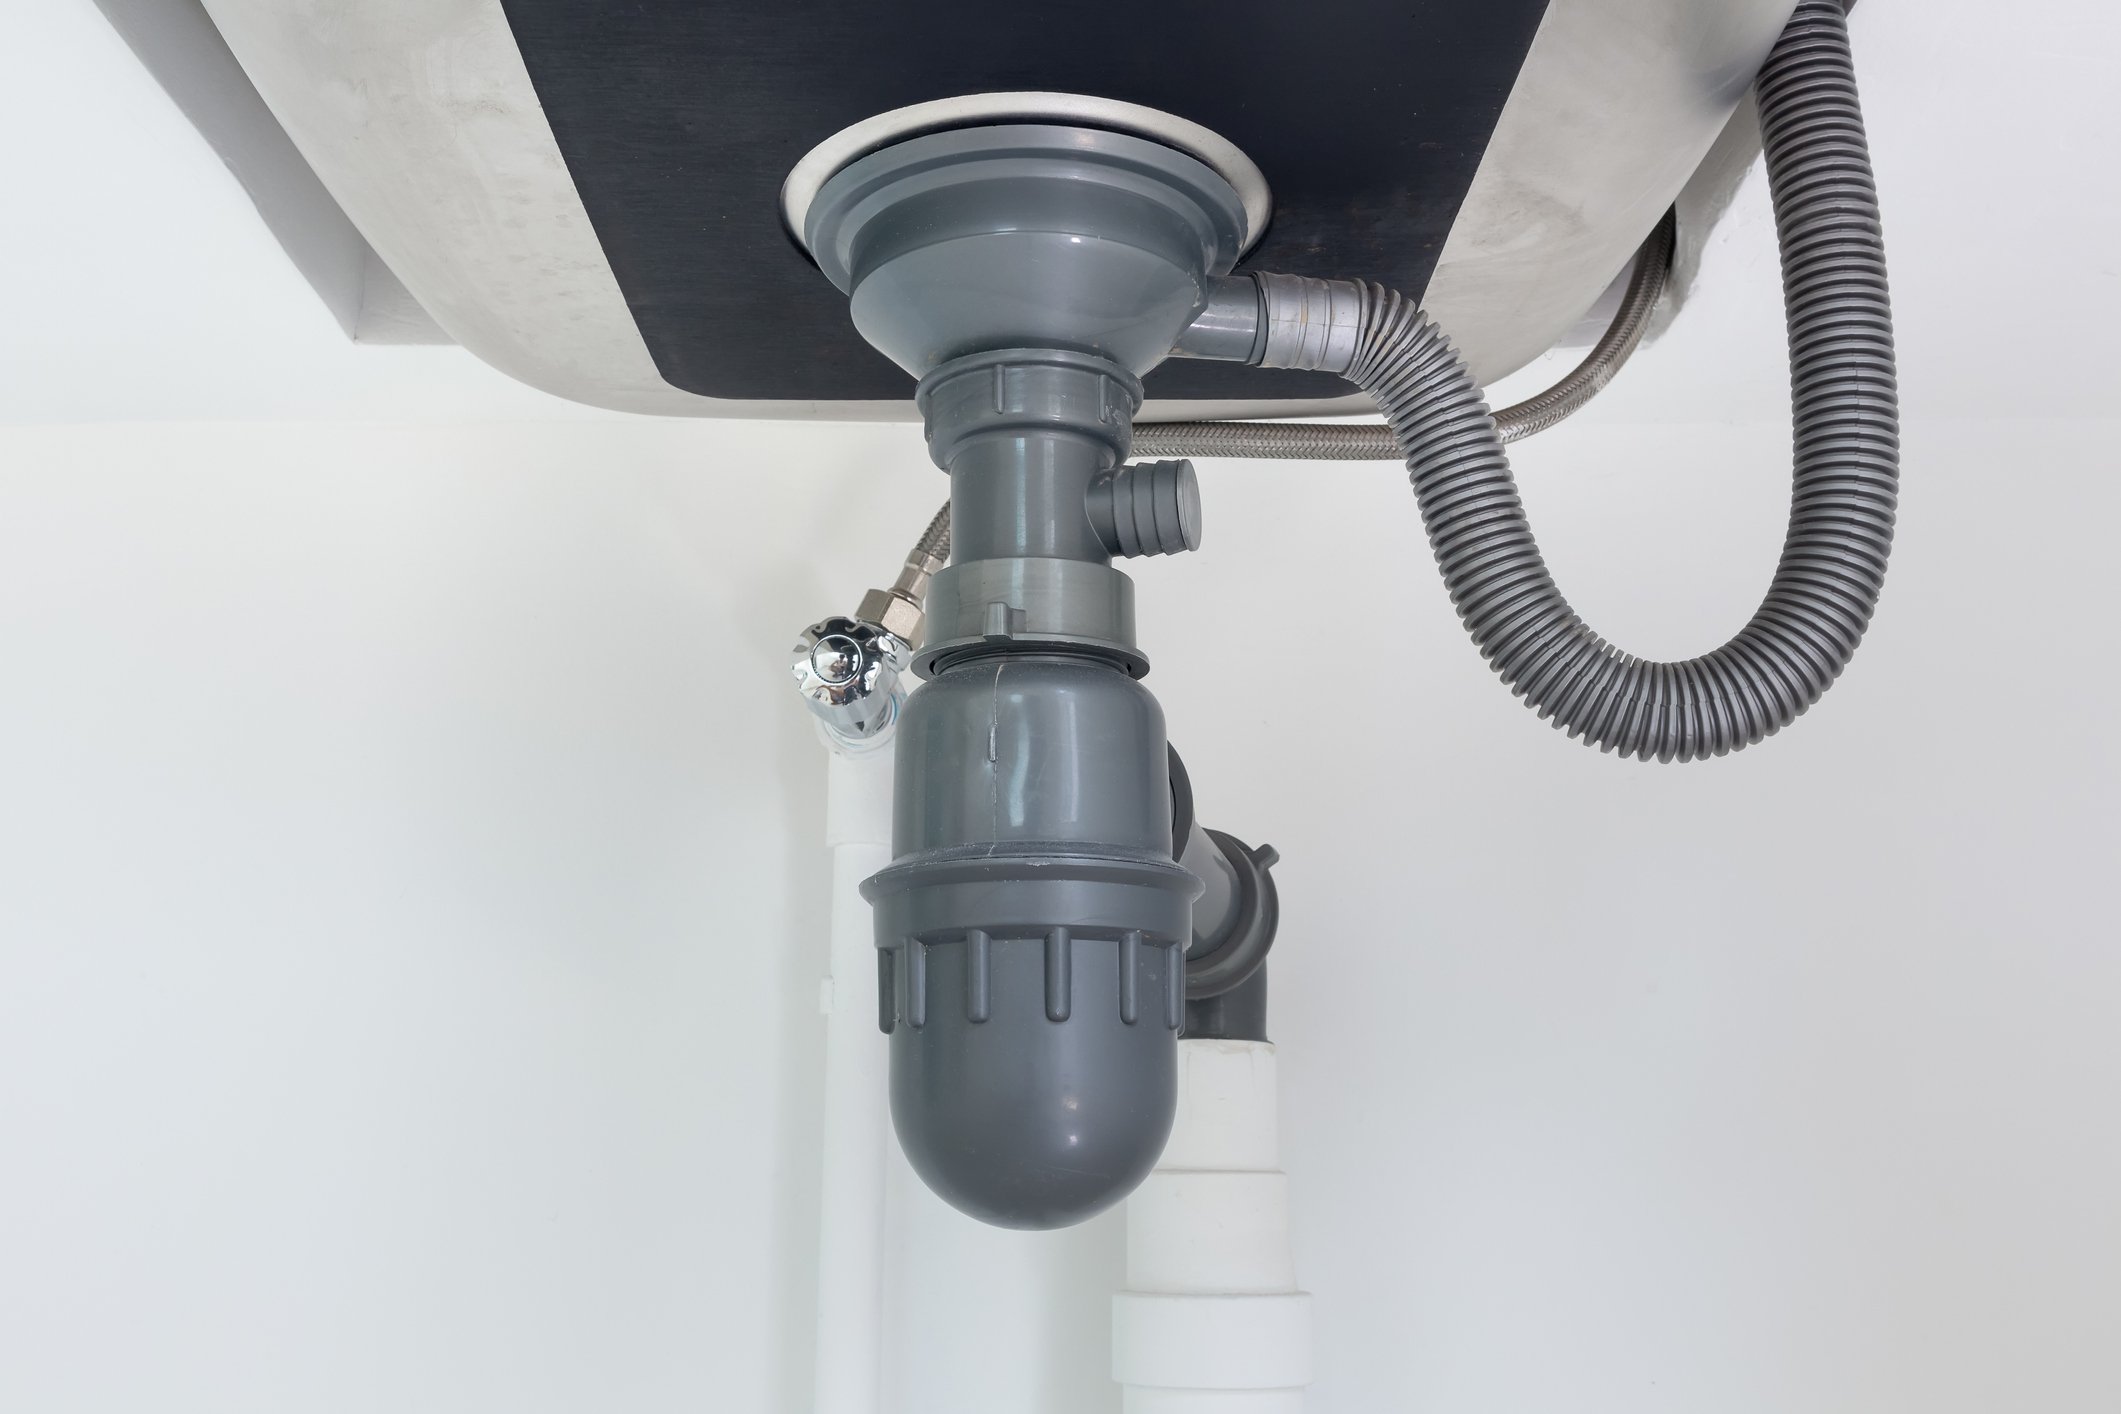
Whether you realize it or not, you’ve seen a flex hose. Look under your sink or behind your toilet. See those metal tubes weaving around the fixture? Those are flex hoses, and they play a vital role in indoor plumbing. Flex hoses (also called flexi hoses) are flexible water pipe connectors that connect the toilet suite and mixer taps to the water supply. 

Flex hoses are rubber hoses covered with a metal or plastic braid. They have screw-on connections that make them easy to install on existing threaded stop valves. Flex hoses play an important role in reducing stress on a plumbing system’s pipes by absorbing hydraulic shock and ground movement. 

Common Flex Hose Problems

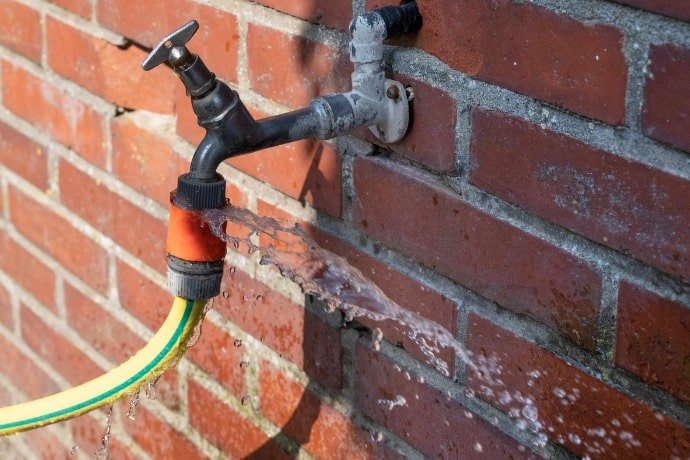
Flex hoses eventually wear out, as all rubber parts do. Flex hoses typically last about five years before needing to be replaced. However, flex hoses don’t start dripping when they’re damaged or need to be replaced; they’re more likely to just burst. 

A burst flex hose can cause extensive water damage and require emergency plumbing service to fix. Here are some of the problems that can cause a flex hose to burst: 

  • Incorrect installation 
  • Stretching the hose to force a connection
  • Corroded hose sleeve
  • Incorrect use, such as kinking or twisting
  • Inadequate maintenance, failure to replace

A failure to replace the flex hoses in your home at regular intervals can lead to burst hoses and water damage. On the other hand, incorrect installation can also result in a flooded home. If you’re not confident in your ability to correctly install a flex hose, it’s best to call a trusted Duncanville plumber

Is your kitchen sink clogged, the toilet stopped up or the water heater leaking? No matter what your plumbing issue is, Dallas One Johnson is here to fix it. Call us at 972-291-0740

to schedule any and every plumbing repair

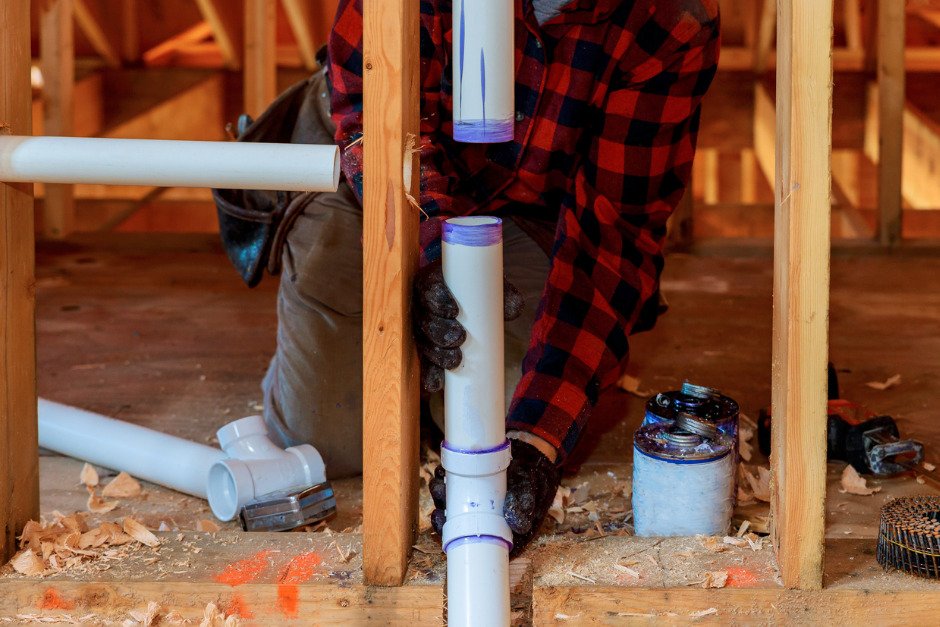
Steps to Install a Flex Hose

Ready to install a new flex hose or hoses on your kitchen sink? Depending on your setup, there could be as many as three. Make sure you have the right size replacement hose for each one you intend on replacing. When you’re ready, follow these steps: 

  1. Remove everything from under the sink. 
  2. Turn off the water. There should be a shut-off valve under your sink that you can turn clockwise to cut off the water supply. 
  3. Drain excess water from the pipes. After you’ve cut off the water supply, turn on the faucets to drain any water that was caught in the pipes. 
  4. Find your plumber’s tape. Wrap the tape around the threaded ends of the faucet supply lines and shut-off valves. 
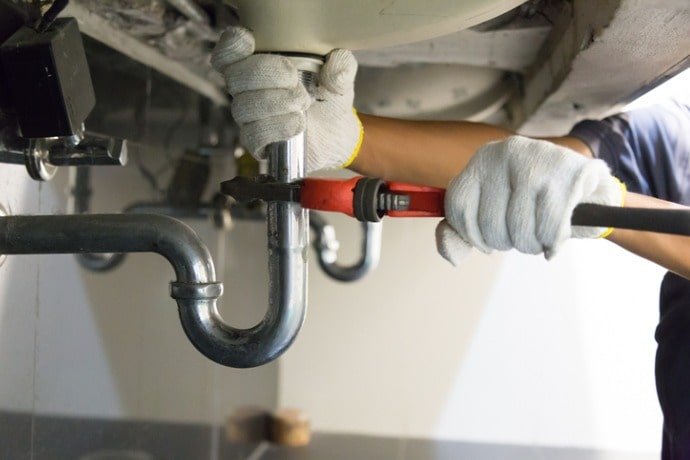
  5. Grab a flex hose. Screw the nut end of the hose onto the threaded end of the faucet supply line. 
  6. Tighten the nut end of the flex hose onto the supply line with a wrench. 
  7. Screw the other nut end of the flex hose onto its corresponding shut-off valve. 
  8. Tighten the nuts with the wrench to ensure a water-tight seal.
  9. Turn on the water supply to the sink. 
  10. Run the faucet and check for leaks. Tighten any leaking connections. 

If you were able to successfully complete these steps, congratulations! You don’t have to worry about that flex hose needing replaced for a while. However, you should make sure to monitor your sink over the next few days to ensure everything is working properly. 

Flex Hose Maintenance 

So you’ve replaced the worn-out flex hoses in your home — now what? Now you want to take every step you can to maintain them. Here are some easy ways to circumvent any flex hoses problems that could arise: 

  • Inspect all the flex hoses in your home for frays or tears.
  • Take note of any flex hoses that are particularly bundled up or kinked. 
  • Track the warranty period on your fixtures and hoses to know when they’re due for replacement. 
  • Start a preventative maintenance plan with your local plumber. 

Preventative maintenance plans may seem like overkill, but they’re not. Even if you’re proactive about home maintenance and plumbing, you probably don’t know the warning signs of a plumbing problem as well as a professional plumber does.

At Dial One Johnson, we want to make getting regular maintenance easy. That’s why we encourage our Duncanville homeowners to sign up for our Advantage Plan and get year-round plumbing and HVAC maintenance. Sign up today and get deep discounts on yearly repairs, maintenance and installation.

Kitchen Plumbers in Duncanville, TX

Is your kitchen sink clogged, garbage disposal broken or faucet running slow? Do your flex hoses need to be replaced? No matter what plumbing issue you have on your hands, the experienced kitchen plumbers at Dial One Johnson are here to help. Ready to schedule service? Contact us online or give us a call at 972-291-0740.

Author Bio:
Sherrie Johnson-Hartsock
Dial One Johnson Plumbing, Cooling & Heating is now owned and operated by Sherrie Johnson-Hartsock, with his grandson, Daniel Johnson, a third-generation plumber who is also the Service Manager.

Posted in

How to Replace a Water Heater Thermocouple or Flame Sensor

When you decide to run a bath or wash the dishes, you don’t have to boil water; you simply turn the faucet lever to the hot position. Your home’s water heater takes care of the rest, making sure you have a consistent supply of heated water. Although reliable, water heaters don’t function perfectly forever. 

Like all other plumbing fixtures and components, water heaters need maintenance and repairs in order to function optimally. When a water heater’s thermocouple or flame sensor breaks, the water heater is unable to heat water until the part is replaced. Keep reading to learn about thermocouples and flame sensors, their differences and how to replace them. 

Need the best water heater repair Midlothian, TX, has to offer? Dial One Johnson Plumbing, Cooling & Heating is your one-stop shop for plumbing maintenance, repair and installation. Call us at 972-291-0740 to schedule service. 

Thermocouple or Flame Sensor?

If you’ve been troubleshooting water heater issues, you’ve probably encountered thermocouples and flame sensors. Despite having different names, both of these parts do basically the same thing: control gas flow in your water heater. 

Both thermocouples and flame sensors are part of the burner assembly and connect to the gas control valve on the outside of the water heater. They convert heat from a burning flame into a small electrical current which acts as a switch to control the gas flow. If the thermocouple or flame sensor doesn’t sense a flame, it does not allow gas to flow to the burner. 

When a thermocouple or flame sensor breaks, it isn’t able to sense a flame. As a result, it won’t allow gas to enter and heat the water. Before you attempt a DIY replacement, you need to figure out what type of ignition system your water heater uses.

Water Heater Ignition Systems

Your water heater’s ignition system will determine whether it uses a thermocouple or flame sensor. There are two types of ignition systems in water heaters: standing pilot and electronic. In both of these systems, the thermocouple or flame sensor is attached to the burner assembly. 

Standing Pilot 

Older water heaters tend to use a standing pilot ignition system, as well as a thermocouple. In this system, a gas line leads to a small burner, which creates a flame. The thermocouple, which is made from composite metal wire, connects the burner to a valve in the gas line. When the pilot light is on, the thermocouple senses heat and sends an electrical current down to open the gas valve. This keeps the pilot light burning. 

Electronic Ignition

Newer water heaters generally use an electric ignition system. An electronic ignition system uses a pilot, flame sensor and an electronic igniter to control gas flow. It utilizes solid-state controls to ignite and prove the flame. An electronic ignition system differs from a standing pilot system in that it only turns on when there is a call for heat. As a result, electronic ignition systems are generally more efficient. 

Not sure you want to install a new flame sensor on your own? That’s not a problem. When you’re ready for the best water heater repair, Midlothian, TX, has to offer, contact the plumbing experts at Dial One Johnson. 

How to Replace a Thermocouple 

If you’ve determined that your water heater uses a standing pilot ignition system, you’re ready to replace the thermocouple. Before you begin any of the steps, it’s critical that you disconnect the gas from the water heater. After you’ve turned the heater’s gas control valve off and closed the shutoff valve on the gas supply line that leads to the heater, follow these steps: 

  • Remove the burner assembly manifold cover. This cover protects the various components inside the combustion chamber, and it’s generally located near the bottom of the water heater. Remove the fasteners that secure the cover and set the cover aside.
  • Remove the burner assembly. Push down slightly on the burner supply tube to free the manifold, pilot tube and thermocouple connections. Gently lift the burner assembly from the combustion chamber and set it aside. 
  • Remove the cover plate gasket. Remove the old gasket from around the manifold cover plate. At this point, you can keep the gasket if it’s in good condition or buy a replacement. Next, clean the metal surfaces between the water heater and cover plate. 
  • Remove the thermocouple. Firmly pull and twist the broken thermocouple from its mounting bracket. Be careful not to bend the connection between the pilot and bracket. Pull the old thermocouple through the rubber grommet seal from inside to out, or through the opening in the manifold cover. If you’re struggling to remove the old thermocouple, you can also cut it out.
  • Install the new thermocouple. Insert the new thermocouple through the grommet or manifold cover opening and then into its mounting bracket. When it’s fully seated, it should click into place. Position the thermocouple so that the pilot flame will cover a little less than a half an inch of its tip. 
  • Reinstall the burner unit. Reinstall the old manifold cover gasket or a new one. Put the burner back in the combustion chamber and seal it. Finally, reinstall the cover and reconnect the gas. 

How to Replace a Flame Sensor 

If your water heater uses an electronic ignition system, you’re going to be replacing the flame sensor. As with the thermocouple installation, it’s critical to turn off the heater’s gas control valve and close the shutoff valve on the gas supply line before you begin. After the gas is off, follow these steps: 

  • Remove the burner assembly. Disconnect the pilot supply tube, burner supply tube and flame sensor from the gas control valve. Lift and remove the burner assembly from the bottom of the water heater. 
  • Remove the flame sensor. Pull and twist the old flame sensor from its bracket. It should come out easily with firm pressure. 
  • Install a new flame sensor. Insert the new flame sensor into the bracket and position it so that a little less than half an inch of its tip will be enveloped by the pilot flame. 
  • Reinstall the burner unit. Reinsert the burner in the combustion chamber and seal the unit. At this point, you can reconnect the gas control valve. 

Midlothian Plumbing Service

Water heaters account for about 18% of a home’s energy usage, according to the U.S. Department of Energy. If your water heater is outdated, it may be using even more energy. In that case, you may want to consider upgrading to a more energy-efficient model. Whether you’re in the market for a new water heater or the best water heater repair Midlothian, TX, has to offer, the plumbing experts at Dial One Johnson are here to help. Contact us online to schedule service or give us a call at 972-291-0740.

Author Bio:
Sherrie Johnson-Hartsock
Dial One Johnson Plumbing, Cooling & Heating is now owned and operated by Sherrie Johnson-Hartsock, with his grandson, Daniel Johnson, a third-generation plumber who is also the Service Manager.

Posted in

Is Your Kitchen Sink Clogged? Do These 6 Things to Unclog It

In many homes, the kitchen is a central hub of family life, but a kitchen sink clogged with debris can set the whole household back. Fortunately, this can be an easy fix for homeowners to tackle themselves. Read on for 6 ways to unclog a kitchen sink drain, along with expert tips to help you avoid getting your kitchen sink clogged in the future.

Looking for an “emergency plumber near me”? The team at Dial One Johnson Plumbing, Cooling and Heating is on call and ready to help. Call 972-992-1495 or visit us online

What Causes a Clogged Kitchen Sink?

There is, perhaps, no other sink in the house that takes on as much debris in the form of food scraps as the kitchen sink. We tend to send crumbs, sauces, cooking oils and bits of leftovers down the drain without thinking twice, but many of these food items don’t belong in our plumbing at all.

While oils and cooking grease can coat our pipes and solidify there, food items like eggshells can easily get caught in plumbing, attracting and trapping more debris until it forms a major clog.

As with many household fixture breakdowns, improper use and a lack of regular maintenance greatly contribute to issues like clogged drains. Our experts advise that homeowners educate themselves on which food items are safe to feed into their kitchen sink drains and specific garbage disposal units, and to keep up with regular household plumbing maintenance.

6 Ways to Unclog a Kitchen Sink Drain

While there are several go-to methods homeowners can attempt to unclog a kitchen sink drain, severe clogs may require multiple tries or a combination of DIY methods. Let’s dive in.

1. Boiling Water

This simple method involves bringing roughly half a gallon of water to a boil and slowly pouring it down the drain, then checking to see if the drain starts moving along. This method should only be attempted if homeowners are certain their plumbing doesn’t connect to PVC piping, as boiling water can melt or otherwise damage these materials.

Clogs caused by soap, grease or cooking oils may dissolve when flushed out with hot water. To prevent these kinds of clogs in the future, avoid adding oil or grease to your sink drain whenever possible. Instead, allow cooking oil to solidify in the pan and dispose of it in the trash.

2. Use Baking Soda and Vinegar

These common household items have many DIY cleaning uses, including breaking up stubborn drain clogs. Try the following:

  • Remove excess water from the sink until you can access the drain directly
  • Pour up to one cup of baking soda into the drain (using a funnel if necessary)
  • Follow up with one cup of white vinegar, and place a stopper over the drain
  • Allow the mixture to sit for 15–30 minutes
  • Remove the stopper and run hot water to flush the drain

Repeat this process as necessary. If you are unable to clear the clog, it’s time to break out the plunger.

3. Plunge the Sink

For plunging to be effective, homeowners will need to plug up the sink’s overflow drain hole (if there is one). In double basin sink units, the second sink’s drain will also need to be plugged. Next, fill the problematic sink with hot water until it forms a seal around the drain. Position a flat-bottomed plunger over the drain and plunge vigorously for 10–20 seconds. Check to see if the water drains, repeating the process if necessary.

4. Snake the Drain

Severe clogs may require the help of a drain snake to break things up or pull the clog out entirely. A drain snake, also known as an auger, is a coiled length of wire or piping with a hook or spiral at the end for breaking up clogs. You can gently feed a drain snake into your drain a few feet at a time, working slowly until you hit resistance.

Ideally, this means you’ve found the blockage. Try hooking it with the tip of the snake, then slowly retract the snake to pull out the debris and try again, if necessary. Run hot water to see if it drains. Homeowners can follow up with baking soda and vinegar to ensure the clog has been cleaned out sufficiently, or try using a combination of these methods to bust a stubborn clog.

5. Clean the P-Trap

The P-Trap is a curved or elbow-shaped section of plumbing underneath your sink. Due to its shape, the P-Trap can collect grease, debris and other forms of gunk, which can be difficult to clean out from above the sink.

In order to clean out the P-Trap, place a bucket and/or towels underneath the P-Trap. Next, unscrew the connectors holding the curved section of piping in place. Remove the P-Trap and clean out any blockages, debris or build-up.

If you cannot find a blockage here, the clog may be further down the line. In this case, you’ll need to remove the horizontal section of piping that connects your sink drain to the wall. Feed your drain snake or a section of wire directly into this access point and see if you can locate and break up — or pull out — the clog.

Reinstall the piping and P-Trap, careful not to overtighten connectors, and run the faucet, checking to ensure no leaks occur underneath the sink.

6. Check Your Garbage Disposal

If your sink has a garbage disposal unit, it could be the source of your clog. Try running the disposal, listening for changes in the way it normally sounds. If you believe you have an issue, always be sure to fully disconnect the power before attempting any repair work.

Using a flashlight, check for any obvious obstructions and use a pair of tongs or pliers to remove any objects or debris you find. It’s important to note you should never stick your hand into a garbage disposal.

Homeowners can also manually turn the disposal’s blades to break up a clog. Locate the manual turn hole on the bottom of your garbage disposal unit and insert an allen wrench to work the blades.

If no obvious clogs are present, lay down towels and a bucket and try disconnecting the pipes that lead to your garbage disposal. Clean out any blockages you find, then reconnect pipes and try running water to see if it drains. Always check to ensure no leaking occurs from reconnected pipes when repair work is done.

Emergency Plumbers in Duncanville, TX

If you’re ready to skip the troubleshooting or require the help of an “emergency plumber near me,” give us a call. Our master plumbers are fully trained and ready to help. Dial 972-362-9801 or visit us online to schedule emergency plumbing services today.

Author Bio:
Sherrie Johnson-Hartsock
Dial One Johnson Plumbing, Cooling & Heating is now owned and operated by Sherrie Johnson-Hartsock, with his grandson, Daniel Johnson, a third-generation plumber who is also the Service Manager.

Posted in

What to Do if Your Tap Has Rusty Water

You might not be a plumbing expert, but you certainly know that water should be crystal clear. In fact, we might instinctively know to avoid muddy, brown or otherwise dirty sources of water. In the modern world, we’ve got it pretty good. Every once in a while, though, you could turn on the faucet and see brownish-red sludge instead of drinkable water. So, what should you do if your tap has rusty water?

Rusty water got you down? Dial One Johnson Plumbing, Cooling and Heating have the plumbers in Waxahachie, TX, you need to turn your taps clear again. Give us a call today at 972-291-0740 to get started solving your water woes today.

What are the Main Causes of Rusty Tap Water?

It can be easy to forget how well off we are in the modern world. Back when we still were scratching paintings on cave walls, finding clean water was a real issue. Nowadays, we enjoy the convenience of municipal water systems and even older tech like wells. But these systems aren’t perfect and you can experience some less than appetizing issues when your water comes out rusty.

In some cases, this is a simple fix. Other times, it’s an issue deeper in your plumbing system that needs addressing. Let’s explore the main reasons why your tap might be turning out rusty liquid instead of clean drinking water.

The Source of the Color

First, let’s talk about where the color comes from in the first place. While a reddish color is the most common one we see when issues arise, that’s not the only shade you’ll see. You may encounter brown or yellowish water, in some cases.

All this color comes from excess sediment and minerals in your water supply or your plumbing system. Of course, the most common culprit is going to be iron and manganese — giving you that distinct reddish hue. These metal and mineral deposits come from either manmade or natural sources. They can be toxic to look at and present an even more unpleasant taste and smell.

Your Pipes Could be the Issue

When we see issues with water color, pipes are usually the main offender. Sometimes, color changes occur when you change out your piping after a pipe burst. All that commotion in changing the pipes could dislodge some sediment somewhere in the system. If recent plumbing work is off the table, you could be dealing with damaged pipes.

Another issue you may run into is old pipes. You should be aware of the signs that your plumbing system is aging — and discolored water is one of them. It could be an issue outside of your home’s plumbing, too. All across the nation, crumbling municipal sewer systems are a big issue.

Water Heater Problems

Sometimes, it’s not all your water that is causing your problems. If you’ve found that only your hot water is coming out discolored, it’s a sign that your water heater is the source. This can be a good sign, as it might mean the problem isn’t somewhere deep in your plumbing system.

Over time, your water heater can build up sediment. This sediment can leak into the supply of hot water — leading to some really disgusting showers if you don’t catch the issue quickly. Now, this could be a problem with the mineral content of your water. In other situations, you could be looking at corrosion issues in your water heater’s tank.

Is Discolored Water Dangerous?

So, how dangerous is discolored water anyway? Besides foul taste and off-color, can drinking or showering in this nasty water cause you and your family health issues? Frankly, sometimes it can be just a color issue, but you can’t know that without testing the water.

In most cases, you’re probably safe. But, and this is a big but, if you don’t know for sure, you could be risking some serious illnesses. Some contaminants, like lead and arsenic, are seriously dangerous. In fact, the EPA has strict regulations regarding contaminants like these.

Iron and manganese, the common culprits when red water is the issue, won’t cause the same problems as things like lead. While they aren’t dangerous, you’ll definitely be making a sour face if you’re brave enough to take a sip. In some cases, it can lead to other issues like stained clothes and even skin rashes in showers and washing machines.

The thing is, you can’t know any of this unless you test your water. You should always consult with professional plumbers in Waxahachie, TX, if off-color water issues arise. Really, the last thing you want is to risk something as serious as lead or arsenic poisoning.

How To Fix Rusty Tape Water Issues

Alright, so when rusty liquid comes from your taps, what should you do? Since the causes of discolored water can vary, the fixes do as well. Let’s explore a few common approaches:

  • Call your water supplier — If you’re seeing both rusty cold and hot water, it could mean the water supply itself is the issue. Chances are, it’s something local like a water main or fire hydrant that’s causing your problems.
  • Flush your water heater — If only your hot water is discolored, the first thing you can do is drain and flush your water heater. Still experiencing issues? Make sure you call your plumber.
  • Run your faucets — Sometimes, it’s only a few sources of water that are the problem. If this is the case, running your faucets at full pressure for several minutes could alleviate your rusty water issues.

Those are a few common fixes for rusty water coming from your pipes. If you’ve tried all the above without any luck, make sure you get a hold of your local Waxahachie plumbers in Waxahachie, TX. Only they will have the knowledge and expertise needed to fix up your plumbing system.

Looking for Waxahachie Plumbers in Waxahachie, TX?

Rusty water is never a fun problem to handle. If you’re hunting for plumbers in Waxahachie TX, that offer the emergency services you need to get your clean water back, Dial One Johnson Plumbing, Cooling and Heating can help.

Our team of plumbing professionals is ready to help you fix your water issues quickly and with quality work. Ready to get started? Make sure to reach out today to schedule an appointment.

Author Bio:
Sherrie Johnson-Hartsock
Dial One Johnson Plumbing, Cooling & Heating is now owned and operated by Sherrie Johnson-Hartsock, with his grandson, Daniel Johnson, a third-generation plumber who is also the Service Manager.

Posted in

Common Plumbing Problems Found in New Construction

It can seem like a waking nightmare. Your new home has plumbing issues, even though the builders put everything in over the last few months. So, what’s the deal? How can your plumbing already be giving you a headache when you’ve barely had time to move in your furniture? The truth is, you can find plenty of plumbing issues in new construction. Read on to learn more about the common issues you might encounter in your new home’s plumbing system.

Are you searching for a great plumber? For the highest quality, reliable service, make sure you give the team at Dial One Johnson Plumbing, Cooling and Heating a call. Whether you need emergency plumbing services or need to replace the old plumber’s handy work, reach out today at 972-291-0740.


New Construction Plumbing Issues

Just because it’s new doesn’t mean it’s high-quality. This unfortunate truth means your plumbing system might be worse off than you think. We’ve all seen the signs of poor craftsmanship in newer homes. Obvious signs like crooked outlets and ill-designed layouts are easy to spot; other issues behind the walls might haunt you when you least expect them.

So, when it comes to plumbing, what are some common issues with new construction?

Constant Leaking

The last thing you want to hear on your first night sleeping in your new dream house is the annoying drip from a leak. That’s if you’re lucky, too. Sometimes, a leak will go unnoticed for quite some time — causing huge amounts of damage in the process.

While you can always employ some tips to protect your home from water damage, sometimes poor plumbing work is the issue. It could be something as simple as the plumber using the wrong size pipe. This causes uneven water pressure distribution that could lead to pipe bursts and costly water damage.

Frequent Clogging

With any new plumbing system, you’d probably expect a clog-free lifestyle for at least a few years. I mean, the plumber just put those pipes in, right? Unfortunately, you can find plenty of reasons why your new home is facing clogging problems. If clogs are a frequent issue, it could indicate some serious problems that will need a professional’s attention.

What could be the root of the clogging? Here are a few common causes:

  • Environmental — Mother Nature can deal some serious blows to any plumbing system. Roots can entangle pipes, causing problems like clogs and leaks.
  • Sewer issues — If the sewer system your home connects to has its own issues, like cheap and aging materials, expect clogs for everyone in the neighborhood.
  • Poor workmanship — Sometimes, people cut corners. When those people are your home builders, it can mean your plumbing system is less than optimal and prone to problems like clogs.

Noises Coming from the Walls

We all love a little peace and quiet. Well, maybe not those of us who are urbanites and thrive off the hustle and bustle of the city. But even those who love living near all the excitement know that weird noises shouldn’t be coming from the walls. So what’s happening when you hear knocking coming from your home?

What often happens with poor plumbing work is workers leave certain important elements out of the system. In this case, the plumber may have left off the correct water chambers that play a role in absorbing the shockwaves when you shut off the tap. That banging comes from hydraulic shock, also known as a water hammer.

Cool name, but with some serious consequences. Without the water baffles stopping the aquatic shockwave, irregular pressure can move through your plumbing system. Often, these pressure changes can lead to more than just noise. In this case, pipe bursts and other serious issues.

Problems with the Water Heater

Water heater issues can be tricky to diagnose. Sometimes it’s an issue that will need the attention of a heating expert, other times, it’s down to a plumber to solve the problem. These issues can gradually get worse without you getting a whiff that something is wrong.

You’ll often only notice when you’re taking your morning shower, and you need to pull all the hot water you can to keep things comfortable. So what’s causing your hot water woes? Well, sometimes it’s the internal components of the water heater. This could be the thermostat or pilot light issues.

In other situations, you could be dealing with sediment in your tank. If you’re noticing issues, make sure you reach out to a Grand Prairie plumbing company. Only the pros will have the knowledge to fix your water heater promptly and safely.

Leaky Faucets and Running Toilets

If you’re seeing your faucets drip and your toilets won’t stop running, it can seem like an innocuous problem. The reality, though, is that even a few constant drips can have you flushing away plenty of water and cash away every year. Leaky faucets and toilet problems are some of the most common bathroom plumbing issues homeowners overlook.

If it’s more than one faucet or toilet in the house causing issues, things add up quickly. Whether it’s installation error, cheap equipment or some other cause, you need to tackle the problem quickly. The more you wait, the more money you’ll be throwing away.


Searching for a Quality Plumbing Company?

Whatever problems you’re having with your new home, you’ll need to find a plumber you can trust to handle the work. After dealing with issues in new construction, it can be difficult to pair up with a plumber that you can trust.

Dial One Johnson Plumbing, Cooling and Heating have the plumbing professionals you need to get the job done right. We’ve seen it all and have been servicing the area for decades. So, if you’re looking to pair up with one of the most trusted names in the area, make sure to reach out today.

Posted in

Is It Time for a Pipe Replacement? 7 Signs to Look Out For

Plumbing problems are a big inconvenience in the home, but they can be repaired quickly with the help of a professional plumber in Desoto TX locals can trust. As with all home maintenance issues, vigilance is key when it comes to preventing major headaches over time. When a quick leak repair just won’t cut it, it might be time for a pipe replacement. Read on to learn 7 signs to look out for, that way you’ll know when it’s time to replace those pipes.


Need help keeping your Desoto plumbing in top shape? The pros at Dial One Johnson Plumbing, Cooling and Heating specialize in residential and commercial plumbing services. Call 972-362-9801 today or visit us online to learn more.  

Pipe Replacement: 7 Signs to Watch Out For

When problems arise with newer pipes, a professional plumbing repair can often do the trick. If you’re dealing with older pipes, major issues or a recurring need for repairs, however, a plumbing replacement might be more cost effective over time. 


Here are 7 signs you need pipe replacement: 

1. Persistent Leaks

Even if your pipes show no obvious signs of damage — like cracks or corrosion — they can still leak in areas like joints. Minor leaks may not seem like a big issue, but with time and exposure to high amounts of pressure, a small leak can quickly turn into a big headache. 

Your first line of defense for a leaking pipe is to call in a plumber for professional leak repair. If leaks are persistent and you find yourself in need of repairs often, however, simply replacing the problematic pipes may be a more cost-effective, long-term solution.

2. Cracked Pipes

While some of the warning signs of pipe damage are elusive, this one typically isn’t shy. Cracked pipes are an obvious sign that big trouble is on the horizon. A cracked pipe will visibly have water coming out of it as it passes through.

With pipes hidden behind walls or running beneath flooring, it won’t take long to cause wet spots. If you notice bulging paint, warped flooring or other signs of wet spots soaking your home, call a professional plumber immediately. 

Neglecting a cracked pipe can lead to major damage to your plumbing and your home, especially if it compromises structural components of your home or leads to mold and mildew growth. 

3. Corroded Pipes

Frequent plumbing clogs may be a sign of poor maintenance habits, such as sending objects, food particles or other substances down your pipes when they don’t belong there. Another cause for persistent clogs is pipe corrosion. When corrosion occurs from the inside, it may not become obvious until it causes major problems. Galvanized steel pipes are prime candidates for corrosion issues. 

Homeowners are encouraged to have their plumbing inspected if frequent clogs become a problem. Corroded pipes require a full replacement, as it affects the water quality in your home and it’s often only a matter of time until corroded pipes crack or burst.

4. Decreased Water Pressure

A decrease in water pressure can indicate a plumbing problem outside of your home, such as an issue with the water main in your immediate area. It could, however, also point to plumbing issues like corroded pipes, or a situation where old plumbing can no longer keep up with the water demands of modern households. 

5. Discolored Water

When we turn on the faucet, we expect clean, clear water to come flowing out. When we’re met with yellow, red or brown water instead, or there appears to be bits of sediment floating in our water, there’s likely trouble afoot. 

Discolored water can sometimes be caused by a temporary issue with your water supply. If the issue persists, however, it could indicate rust or corrosion inside of your pipes. Wait for a day or two to see if the water clears up. If you only get discolored water when the hot water runs, this could also indicate corrosion in the water storage tank of your water heater.  

Avoid drinking or bathing in discolored water. If the issue persists, have a professional plumber Desoto, TX, homeowners trust inspect your plumbing to diagnose the issue. 

6. Lead Pipes

Nearly 10 million homes in the US receive their water through lead service lines or lead plumbing pipes, even though we know lead piping can be dangerous to our health. From causing reproductive issues in adults to learning disabilities and slowed growth in children, lead pipes present a danger to your family. 

We recommend that homeowners find out if their plumbing system contains or comes into contact with lead. If so, contact an expert plumbing to help create a strategy for replacing pipes and removing lead as soon as possible. 

7. Age of Plumbing Pipes

Plumbing is meant to last for decades, but all pipes reach the end of their lifespans eventually. Different materials have different life expectancies, so it’s wise to be familiar with the age of the materials in your plumbing system. This allows for proactive pipe upgrades and replacements before disaster strikes.

Let’s consider the life expectancy of common plumbing materials:


  • Galvanized Steel — 20 to 50 years
  • Brass — 40 to 45 years
  • Copper — 50 years or more
  • Cast Iron — 75 to 100 years


If your plumbing is nearing the end of its expected lifespan, it’s time to start planning for a replacement. Your local Desoto plumbing professional can help assess your needs and create a plan of action.

Work with the Team at Dial One Johnson

Our master plumbers specialize in commercial and residential plumbing repairs, replacements and ongoing maintenance. With flexible financing options and transparent, upfront pricing, we’ll make sure you have access to the plumbing services you need. 


Our clients can enjoy the ongoing benefits of our comprehensive HVAC and plumbing maintenance plan, and we’re proud to offer 24/7 emergency plumbing services for those repairs that just can’t wait until the morning. 


Give us a call at 972-362-9801 or contact us online to schedule an appointment today. 

Author Bio:
Sherrie Johnson-Hartsock
Dial One Johnson Plumbing, Cooling & Heating is now owned and operated by Sherrie Johnson-Hartsock, with his grandson, Daniel Johnson, a third-generation plumber who is also the Service Manager.

Posted in

Dealing with Leaks in Your Outdoor Hose Bibb

Plumbing leaks can be elusive and often remain undetected until they cause damage. While it’s important to check for leaks inside the home, homeowners shouldn’t neglect to check outdoor faucets as well. Read on to learn more about your outdoor hose bib, how to check for leaks and what to do if you find one. 


Seeking a plumber, Midlothian, TX, neighbor? The team at Dial One Johnson specializes in all forms of plumbing services. Call 972-362-9801 or visit us online to schedule an appointment today. 

What is a Hose Bibb?

A hose bib, also commonly referred to as an outdoor faucet, is a fixture on the outside of your home where you can attach a hose pipe. This convenient valve makes doing yard work easy, with quick access enabling you to water plants, hose down the driveway or give your car a good rinse.  


The most common type of valve used inside of a hose bib is a compression type valve. When you turn the handle on your outdoor faucet, it screws the spindle into or out of the valve seat, thus allowing or stopping water flow. While this system does its job effectively, its components can wear down over time, leading to water leaks that can cost homeowners and waste significant amounts of water over time. 


The valve that governs water flow in your hose bib has two washers, a stem washer and a packing washer. The stem washer sits at the bottom of the spindle and closes down into the valve seat, which stems water flow. The packing washer sits higher up on the spindle, right underneath the faucet handle. If you notice water leaking right from the handle, you can tighten the packing nut (under the handle) with a small crescent wrench or similar tool.

Leaking Hose Bibb: When to Call a Plumber

If the whole hose bib leaks, even when it’s closed, it’s a sign that the stem washer is bad. This warrants the help of a professional plumber. Since they’re located outside, hose bibs are constantly exposed to the elements. This can make them difficult to take apart without damaging them. This is a delicate fixture, and taking it apart the wrong way can easily break it, in which case the whole fixture would need to be replaced. 

Signs Your Hose Bibb is Leaking

Homeowners may have an outdoor hose bib leak on their hands without realizing it. Falling into the out-of-sight, out-of-mind mentality, if you don’t visually see your hose bib leaking, it can be difficult to diagnose. Our experts recommend disconnecting your hose pipe after each use, rather than leaving it attached until next time. 


This precaution serves two purposes. The first is that it will allow you to see if your hose bib is leaking or dripping. The second is that it will prevent your hose pipe from fusing to your hose bib through a process called galvanic corrosion. When this happens, it can damage the hose bib to the point where the only option is to replace it.  


To check for leaks in the plumbing that leads to your outdoor faucet, you can check water pressure by hand. Simply put your thumb (or the palm of your hand) over the spigot and turn on the water. If the water pressure seems weak, it could indicate a hidden leak. Neglecting to fix a leaky hose bib will cause water bills to go up, and it can lead to water damage or soil erosion that puts the structural integrity of your home at risk.

How to Winterize Your Hose Bibb

Since hose bibs are located outdoors, they are exposed to the elements. That means extreme heat in the summer and freezing temperatures in the winter. A hose bib filled with water can burst in the winter when water freezes and expands inside. It’s important to winterize outdoor hose bibs to prevent damage and increase their lifespan. 


Each outdoor faucet in your home should ideally have an inside valve that controls water flow. Though this is a standard practice, not all outdoor faucets have inside valves. The location of indoor valves can vary by home, but in most cases they are located underneath household sinks.


Check below your kitchen or bathroom sinks to see if you notice a valve coming out of the cold water supply and into the wall or floor. If you do find one, this is likely a hose bib shutoff valve. To winterize your outdoor faucet, simply close this valve, then open the outdoor hose bib to let any water lingering in the pipes flow out.

Hose Bibb Not Working in Your New Home?

If you have an outdoor hose bib or faucet that doesn’t seem to work because no water flows out of it, its corresponding indoor valve might have been shut off by previous homeowners. Checking beneath sinks may reveal the culprit as a closed valve that simply needs to be opened. 

Professional Midlothian Plumbing: Dial One Johnson Can Help

If you are unable to locate or repair a hose bib leak in your home, don’t hesitate to call in a pro plumber Midlothian, TX, homeowners trust. The team at Dial One Johnson is fully trained to assess, diagnose and repair plumbing issues with transparent advice and upfront pricing. 


Homeowners can enjoy a 100% satisfaction guarantee on our workmanship, and with flexible financing options available, we’ll make sure you get the plumbing repairs you need. Our comprehensive HVAC  and plumbing maintenance plans help ensure your home is taken care of year-round with cleanings, inspections and repairs. 


Dial One Johnson Plumbing, Cooling and Heating provides 5-star plumbing and HVAC services to Midlothian, Cedar Hill, Desoto and the surrounding Dallas metro areas. Our team is proud to offer 24/7 emergency services to help keep your family safe and comfortable right when it matters the most. Give us a call at 972-362-9801 or visit us online to speak to a team member today. 

Author Bio:
Sherrie Johnson-Hartsock
Dial One Johnson Plumbing, Cooling & Heating is now owned and operated by Sherrie Johnson-Hartsock, with his grandson, Daniel Johnson, a third-generation plumber who is also the Service Manager.

Posted in

How to Remove an Air Lock in Water Pipes

Dealing with sputtering faucets or water that won’t flow at all? You might have an air lock in your plumbing. An air lock occurs when air pockets get trapped in your water pipes, blocking normal water flow and causing frustrating pressure problems throughout your home.

The good news? Most air locks can be fixed without calling a plumber. In this guide, we’ll walk you through six proven methods to clear air locks from your plumbing system, explain what causes them, and help you know when it’s time to call for professional help.

What Is an Air Lock in Plumbing?

An air lock happens when air becomes trapped in your plumbing pipes, creating a blockage that prevents water from flowing properly. Think of it like a bubble stuck in a straw—the liquid can’t get past the air pocket.

Air locks most commonly occur in:

  • Hot water lines (especially after water heater maintenance)
  • Newly installed plumbing systems
  • Heating systems with radiators or boilers
  • Pipes after repairs or winterization
  • Homes in areas with frequent water main work

How Air Gets Into Your Pipes

Air can enter your plumbing system through several ways:

During repairs or maintenance: When pipes are drained for repairs, air naturally fills the empty space. If the system isn’t properly bled when refilling, air pockets remain trapped.

From your water heater: Sediment buildup in water heaters can create air bubbles. When the heater cycles on, these bubbles get pushed into your hot water lines.

After water main work: Municipal water main repairs often introduce air into the system. This air travels through service lines into homes.

Low water pressure: When water pressure drops significantly (like during a water main break), air can be drawn into your plumbing through faucets or appliances.

Pump problems: Homes with well water can develop air locks when well pumps draw in air instead of water, usually indicating a problem with the pump or water level.

Looking for the best plumbers in Dallas, TX? The team at Dial One Johnson is on call and ready to help. Give us a ring at 972-388-3310 or visit us online to schedule services today.  

Signs You Have an Air Lock

Recognizing air lock symptoms helps you address the problem quickly before it causes more issues.

Common Symptoms Include:

Sputtering or spitting water: Faucets release bursts of water mixed with air, creating a sputtering sound and irregular flow.

No water flow from certain faucets: Some fixtures may produce no water at all, while others work normally. This happens because the air lock is blocking flow to specific pipes.

Hot water issues only: Air locks affect hot water lines more frequently than cold because hot water systems are more complex and involve more components where air can become trapped.

Inconsistent water pressure: Water pressure fluctuates dramatically, sometimes strong and sometimes barely a trickle.

Gurgling or bubbling sounds: You might hear unusual sounds from pipes, faucets, or your water heater as trapped air moves through the system.

Banging pipes (water hammer): When air locks break free suddenly, they can cause loud banging noises in your pipes as water rushes to fill the space.

5 Ways to Break Apart an Air Lock in Plumbing  

Fortunately, air lock issues can often be solved at home with a DIY fix. Of course, if you don’t feel comfortable attempting your own repairs, or you’d rather not deal with the headache of troubleshooting, your local Red Oak, TX, plumbers are just a phone call away. If you’re up to tackling the issue at home, here are 5 ways to break up an air lock in your plumbing system.

1. Open All Faucets

This all-hands-on-deck approach involves opening every faucet in the home, including shower heads, and letting the water run for several minutes. The simultaneous increase in water pressure throughout your plumbing system can help break up air pockets. This method is simple, requires no tools and can help break up an air lock in a hard-to-reach area. 

2. Connect a hosepipe. 

Perhaps one of the most effective ways to break apart an air lock, the hosepipe method requires minimal elbow grease. Simply use a length of hosepipe to connect the problematic faucet to one that is working. Ensure a tight seal on both ends and open the problem faucet, then run the working faucet. As the hose fills with water, it will increase pressure in the air-locked faucet. As this pressure works its way down your piping, it should break apart the air lock.

Depending on the location and severity of the problem, it may take a few minutes for this method to work. Once a few minutes have passed, remove the hose and test the problem faucet. Repeat this process if necessary. If you are unable to clear the airlock, it’s time to try something else. 

3. Make Do With Your Washing Machine

Harness the power of your mighty washing machine with this variation on the hosepipe method. Now, this one only works if you have an automatic washing machine that utilizes both hot and cold water connections. To try this method, turn off the valves of both water inputs and disconnect their hoses. Next, connect these two water outlets with your length of hosepipe. Turn on the hot water valve first, then the cold water valve, leaving them open for roughly 30 seconds. 


This method creates an increase in pressure that should hopefully break up the air locks in your pipes. When you’re done, turn off the cold valve, then the hot one, and reconnect your washing machine. 

4. The Showerhead Method

This method is slightly more involved than those previously discussed, but if you’re not having any luck thus far, it just might do the trick. Start by removing the showerhead from its pipe. Next, wrap 2–3 plastic bags around the connecting pipe to seal it off and replace the showerhead. Locate your water heater and turn off the hot water outlet. 


Return to the shower and turn on both hot and cold water faucets. The plastic bag seal will create an increase in pressure, which should ideally travel back down the pipe and help bust that air lock. When done, turn off both faucets, remove the plastic bags, and reinstall the showerhead. Then, turn the hot water outlet back on at the source and check to see if the problem was solved.

5. Bleed Your Radiators

Air locks can also occur in radiators, which can create uneven heating patterns throughout the home. If you notice individual cold radiators, bleeding the system may solve the issue. To “bleed” your radiators, start by turning the heater/boiler off and waiting for all radiators to cool. Begin with the first radiator in the line and locate the radiator bleed valve (typically a small valve at the top of one side of your radiator). Place down towels or a cloth underneath it, as it might expel water. Using a radiator key, pliers, or a screwdriver, slowly open the valve by half a turn. This releases air pressure, and you’ll likely hear a hissing sound as trapped air escapes. 
When the valve expels a steady stream of water instead of air or steam, the radiator is free of excess air. Tighten the valve again by half a turn and repeat this process down the line for each radiator in the home. 

Best Plumbers in Dallas, TX: Dial One Johnson   

If you’re unable to clear out an air lock, or if you’re ready to skip the troubleshooting and hire a professional plumber, the team at Dial One Johnson is ready to help. Our master plumbers will diagnose and repair plumbing problems right away with honest, transparent service, upfront pricing, and expert advice. Call 972-388-3310 or contact us online to get started.     

Author Bio:
Sherrie Johnson-Hartsock
Dial One Johnson Plumbing, Cooling & Heating is now owned and operated by Sherrie Johnson-Hartsock, with his grandson, Daniel Johnson, a third-generation plumber who is also the Service Manager.

Posted in

Kitchen sink not draining? Here are 6 ways to unclog it

We’ve all experienced it: pulling the drain stopper out of a kitchen sink filled with dirty water, only to realize the water isn’t draining. Even when the water does eventually drain, the sink clogs as soon as you run more water. In these situations, you may start to wonder about the scope of the issue and whether or not you’re equipped to fix it. Before you reach for the chemical drain cleaner, there are a few things you should know. 


A clogged kitchen sink is a common issue, and most of the time, it’s a problem you can resolve on your own. Although a chemical drain cleaner seems like an easy solution, it can actually make the situation worse, causing pipe corrosion and polluting nearby water supplies. Before you call the plumber, keep reading to learn about six safe and easy ways to unclog the kitchen sink. 


Can’t get the kitchen sink to drain? Some clogs require professional plumbing assistance. For the best kitchen plumber Cedar Hill, Texas, has to offer, call Dial One Johnson Plumbing, Cooling & Heating at 972-362-9801. 

1. Pour Boiling Water Down the Drain

Most people don’t realize how much gets washed down the kitchen sink. It’s not just water and food debris; the sink ends up draining soap, grease, hair and bits of trash, too. If you’re dealing with a relatively small build-up of these things, hot boiling water may be enough to clear it. Try these easy steps: 


  • Bring a half-gallon of water to boil.
  • Carefully pour the boiling water directly into the drain opening.
  • After a few minutes, turn the faucet on to see if the water drains.
  • If it doesn’t drain, repeat the process once or twice more. 


If repetition doesn’t work, move on to the next drain-clearing method. It’s important to note that if your drain is attached to PVC pipes, you should not try this method; boiling water could melt the pipes. 

2. Plunge the Clog Away

Plungers don’t just work for toilet clogs; they can sometimes help release sink clogs as well. You can use a regular bathroom plunger for a sink, but a flat-bottom plunger is more effective. When you’re ready, fill the sink about halfway with hot water. Then start plunging over the drain, stopping periodically to see if the water drains. If the water still doesn’t drain after multiple plunges, move on to the next approach. 

3. Check the Garbage Disposal

If your sink clog is located in your garbage disposal, you should be able to break up the blockage simply by turning on the disposal. However, this obviously doesn’t work when your garbage disposal has malfunctioned, overheated or broken. Before attempting to fix anything, try flipping the reset switch on the bottom or side of your garbage disposal unit to reboot it. Sometimes this is all the garbage disposal needs to start working again. 


If resetting the garbage disposal doesn’t work, it could be jammed. To dislodge a clog manually, follow these instructions: 


  • BEFORE doing anything else, disconnect the garbage disposal from the power supply. Even after it’s disconnected, never stick your hand directly in the disposal.
  • Insert an Allen wrench into the disposal from its bottom opening (under the sink). Try twisting the disposal with the wrench until the clog starts to break and you feel less resistance. 
  • Plug your disposal back in, run water and turn it on. If water drains, you’ve successfully cleared the clog. 


If the clog is still present, you may want to call a Cedar Hill kitchen plumber. In the event that the disposal is broken, the plumbers at Dial One Johnson can repair or replace it.

4. Try a Baking Soda and Vinegar Solution

The water you flush or pour down the drain — as well as anything in it — ends up at a wastewater treatment facility where it’s treated and then released into local waterways. Treatment facilities are not designed to treat hazardous substances like chemical drain cleaners, so those chemicals end up in local waterways before re-entering the drinking supply. This is one of the reasons why natural drain cleaners are a much better option. 


To try a baking soda and vinegar solution, follow these steps: 


  • Remove standing water from the sink (you may have to use a bowl or cup). 
  • Pour one cup of baking soda down the drain, pushing it down with a spatula or spoon if necessary.
  • Pour one cup of white vinegar down the drain.
  • Seal the drain with a stopper or cover and wait 15 minutes. 
  • Remove the cover, then run hot tap water or pour boiling water down the drain. 


If this method seems to be working, repeat until the drain is cleared. If it has no effect, move on to the next method. 

5. Use a Plumber’s Snake

Plumber’s snakes can dislodge or break up many of the toughest clogs. However, this method will only work if you have access to a plumber’s snake and know how to use it. If you’ve never used a snake before, it’s a good idea to call a Cedar Hill plumber to inspect the drain and operate the snake. Moving forward when you don’t know what you’re doing could result in a damaged pipe or pushing the clog further down the drain. 

6. Check the P-Trap

The P-trap is the elbow-shaped pipe under your sink. If the clog is in the P-trap, you might be able to disassemble the pipe and clean out the blockage. This task can get messy, so you’ll want to prepare with goggles, gloves and plenty of towels. When you’re ready, follow these instructions: 


  • Place a bucket under the pipe to catch water or debris. 
  • Unfasten the connectors that hold the P-trap in place and remove it. 
  • Clean all of the junk and debris out of the pipe. 
  • Reattach the pipe and run water down the drain. 


If this method doesn’t work, you can honestly say you’ve tried. It’s time to call the best plumber Cedar Hill Texas, has to offer: a plumbing expert from Dial One Johnson Plumbing, Cooling & Heating. 

Call Cedar Hill Plumbers at Dial One Johnson 

Clearing clogs can be difficult, especially if you’re not sure where the blockage is located. Fortunately, an experienced plumber can assess the situation and take the appropriate steps to clear the clog. When you need a fast, experienced plumber Cedar Hill Texas company Dial One Johnson is here to help. Whether you need emergency plumbing services, maintenance, repairs or installations, we’re here for you. Contact Dial One Johson online, or give us a call at 972-362-9801

Author Bio:
Sherrie Johnson-Hartsock
Dial One Johnson Plumbing, Cooling & Heating is now owned and operated by Sherrie Johnson-Hartsock, with his grandson, Daniel Johnson, a third-generation plumber who is also the Service Manager.

Posted in

5 Bathroom Plumbing Issues You’re Overlooking

If a pipe bursts and floods your bathroom, that’s a pretty good indicator that something is very, very wrong with your plumbing. However, a burst pipe is an obvious, dramatic effect of an issue. The real question is, could you diagnose a bathroom plumbing issue that only displayed subtle warning signs? In reality, most pipes don’t burst without more than a few warning signs of their own. Recognizing those signs is the key to averting potential plumbing disasters.

Most plumbing mishaps are the result of a problem that’s been allowed to continue and grow over time. At Dial One Johnson Plumbing, Cooling & Heating, we know from experience that certain critical bathroom plumbing issues go unaddressed because homeowners don’t recognize them as problems. When this happens, small obstacles with manageable solutions can grow into plumbing disasters that end up costing a small fortune to repair. Don’t let this happen to you! Keep reading to learn about five bathroom plumbing issues you may be overlooking.

Need emergency plumbing services? Not a problem. Dial One Johnson Plumbing, Cooling & Heating has your back. Contact us online to schedule service or call us at 469-557-2703 to speak directly with a team member about emergency repairs. 


1. Frequent Toilet Clogs

How often do you plunge your toilet? If you only have to plunge it once in a while when it refuses to flush, that’s no big deal; the cause is likely something minor, like flushing too much toilet paper. However, if you find yourself frequently plunging the toilet in order for the water to drain, you may be dealing with one of the following issues:

  • A clog in the toilet trap (a curving channel inside the toilet’s base)
  • A blockage in the plumbing vent (a pipe that regulates airflow to help waste and water flow through the right pipes and out of the house)
  • A clog in the sewer line (the line that connects your home’s drains to your community’s main sewer line)

With each of these issues, you’ll need a plumber to assess the situation and perform the appropriate clogged drain repair. The experienced plumbers at Dial One Johnson are happy to conduct inspections, clear clogs, clean pipelines, make repairs and necessary installations.


2. Leaky Faucets

Leaky faucets may seem like just an annoyance, but they’re another commonly overlooked warning sign of larger plumbing issues. Left unaddressed, a leaky faucet that drips one time per second can waste 3,000 gallons of water per year. Not only is that kind of water waste irresponsible — it’s extremely expensive. Even minor leaks like dripping faucets can drive up your utility bill.

More often than not, leaky faucets are caused by a damaged washer or valve seat. However, if the problem doesn’t appear to be mechanical, you could be dealing with deteriorating pipes, high water pressure or other damage. The best thing you can do for your bathroom plumbing and your wallet is call an experienced plumber to assess the situation. They can help you pinpoint the culprit and avoid any potential plumbing catastrophes.


3. Water Heater Issues

Nothing feels better than a hot shower to wake you up in the morning. If you’re expecting to step into a refreshing, steamy shower, it’s downright unpleasant to step into a cold one. Although most people see hot water issues as merely an inconvenience or frustration, these temperature fluctuations can actually indicate larger issues. Water heater issues can be caused by water leaks or mineral deposits, which reduce the heater’s ability to provide hot water to your entire home.

If you’ve noticed that your hot water doesn’t get as hot as it should or turns cold abruptly, you may be dealing with water heater issues. Don’t let those issues fall by the wayside — call Dial One Johnson for water heater repair. If your water heater isn’t able to be repaired, our experienced plumbers can install a new water heater.


4. Low Water Pressure

Out of all the overlooked bathroom plumbing issues, low water pressure is potentially the most dangerous to ignore. It’s an insidious issue because it doesn’t seem like a big deal to most people, yet it’s often the symptom of a serious, looming problem. These are some of the common causes of low water pressure:

  • The pipes are clogged.
  • The pipes are corroded.
  • You share pipelines with a neighbor.
  • Your pipes are leaking.
  • You’ve got faulty plumbing fixtures.

If you’re experiencing consistently low water pressure or your home’s water pressure recently changed, consider calling a plumber from Dial One Johnson to come take a look. They can assess the situation and suggest the appropriate repairs, replacements or installations.


5. Slow Draining Fixtures

After you wash your hands in the sink, does the water refuse to drain from the basin or drain extremely slowly? If so, you already know how gross it can be. What you may not realize is that the slow drain may be caused by a major blockage. Similar to a frequently clogged toilet, slow draining fixtures may result from a superficial clog or a clog that’s deeper in the drain line. When this is the case, a professional draining cleaning service can help.

However, sometimes a slow drain — especially when present in fixtures throughout the house — can indicate an even bigger problem, like tree roots in the sewer line. Luckily, the experienced plumbers at Dial One Johnson are up to the task. Whether you need sewer line installations, clogged drain repair, maintenance or something else, we’re here to help. For the best plumbers, call Dial One Johnson or visit us online.