Experiencing an emergency? Call 972-914-0833

Ready to Experience the Dial One Johnson Difference?

Your go-to resource for HVAC and plumbing solutions, DIY guides, and home maintenance tips.

Got an emergency? Call 972-914-0833 or …

Explore by topic:
Posted in

Installing a New Toilet – Things to Consider

All toilets eventually need replacing. Although installing a new toilet may seem relatively straightforward, it can be challenging if you lack experience and expertise. As trusted plumbers in Irving, TX, our experts at Dial One Johnson Plumbing, Cooling & Heating explain what you should know before tackling this project.

Is It Time To Install a New Toilet at Your Irving Property?

Before replacing your commode, you should know whether the project is necessary. Consider these common reasons for toilet replacements in Irving homes to determine if your residence needs this plumbing project:

  • Outdated Fixture Design. Even if a toilet isn’t broken, it might not match your bathroom’s aesthetics or layout. 
  • Constant Clogs. If you must use a plunger to unclog your toilet multiple times a month, it might be time to invest in a new fixture. 
  • Cracks and Leaks. Damage to the tank or bowl could lead to water damage and costly repairs. The best solution is to replace the toilet. 

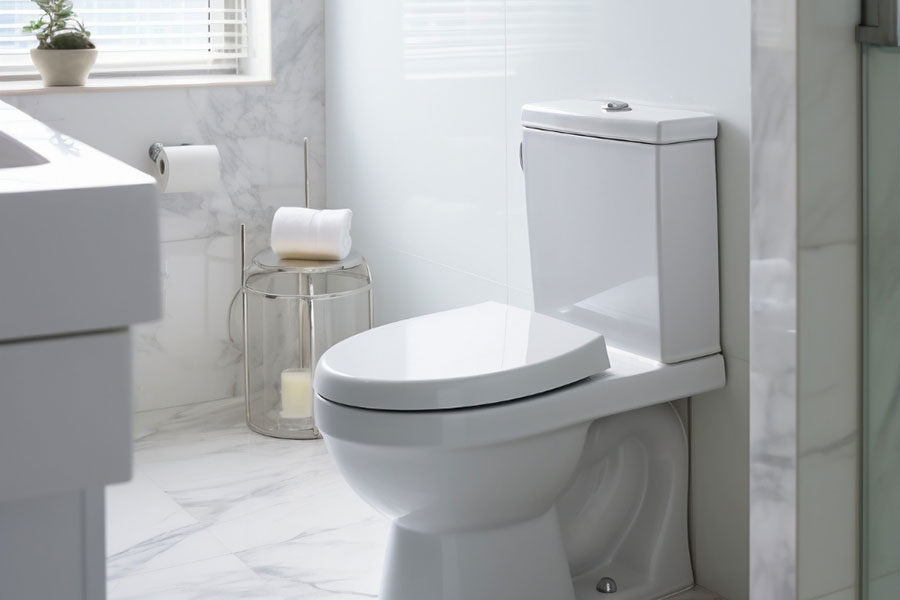
How To Pick a New Toilet

If installing a new toilet is necessary for your home, what kind of fixture should you purchase? Understanding these factors will help you make an informed decision regarding your new bathroom feature:

  • Flush Options. For familiarity, you might consider single-flush toilets. However, water-saving toilets may have dual flushes for solid and liquid waste. 
  • Water Efficiency. If you want to conserve water, look for the WaterSense label on toilets. Those models accommodate the EPA’s water efficiency regulations. 
  • Size and Height. Whatever unit you pick should fit inside your bathroom while meeting the minimum spacing requirements. Most commodes have heights between 14 and 16 inches.
  • Bowl Shape. You could choose from rounded or elongated bowls depending on your aesthetic and personal preferences.

Tips for Installing Toilets

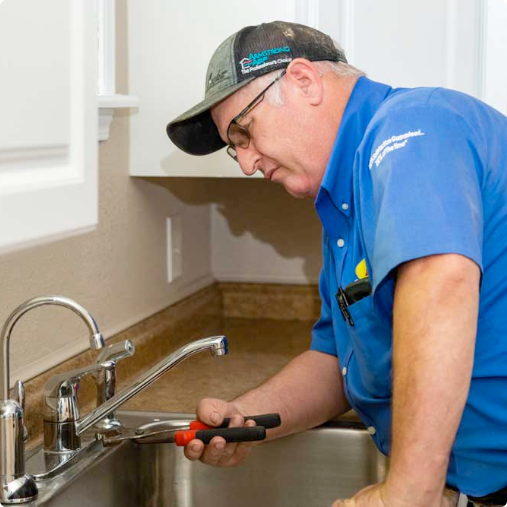
Installing a new toilet takes experience and plumbing knowledge, so it may be best to contact a qualified Irving plumber for help. Still, you can learn the process by reviewing these must-know tips. 

Ensure Proper Bowl Positioning

According to plumbing codes, toilets must fit inside bathrooms and be sufficiently far apart from other structures, such as walls, showers, and vanities. The minimum spacing recommendation for the sides of toilets is 18 inches and 30 inches of floor space from the front of the bowl. 

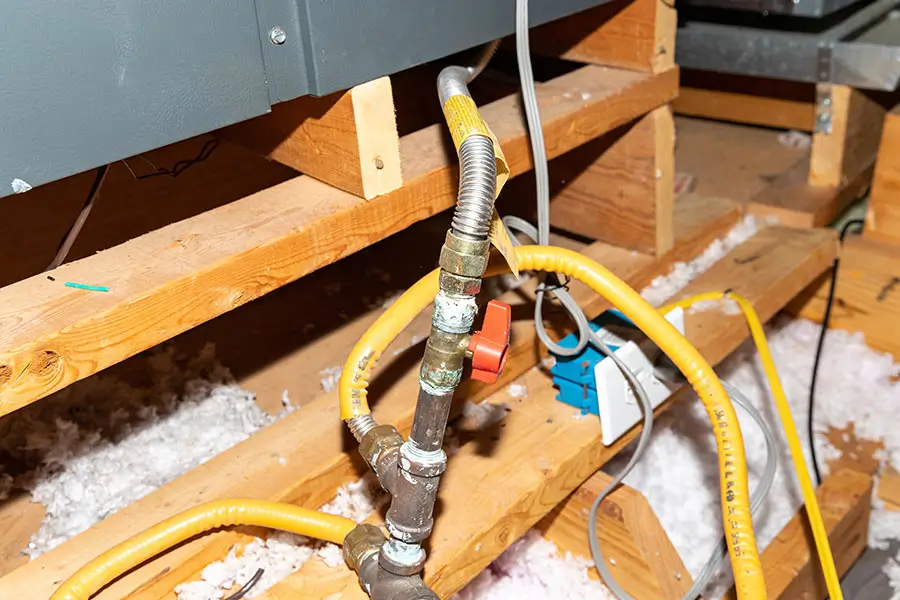
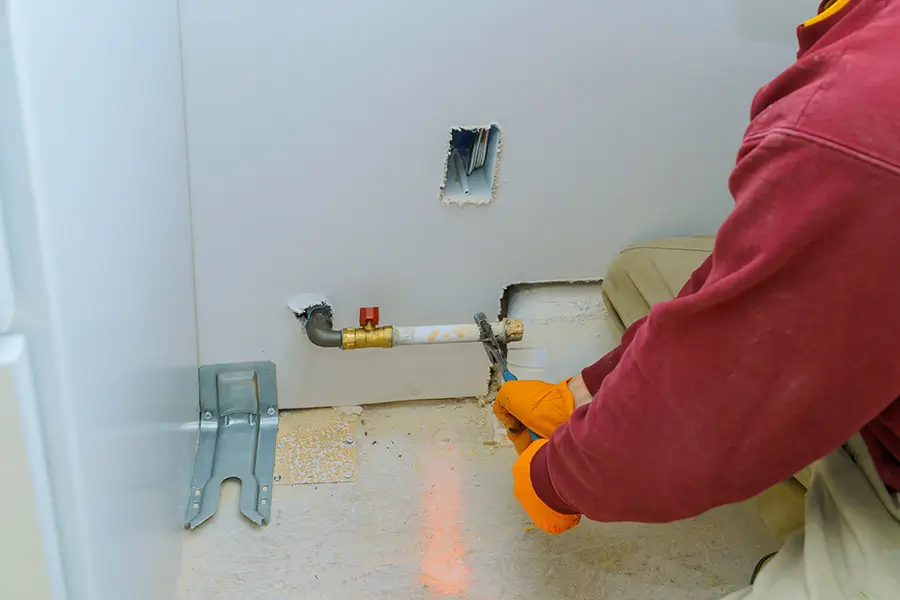
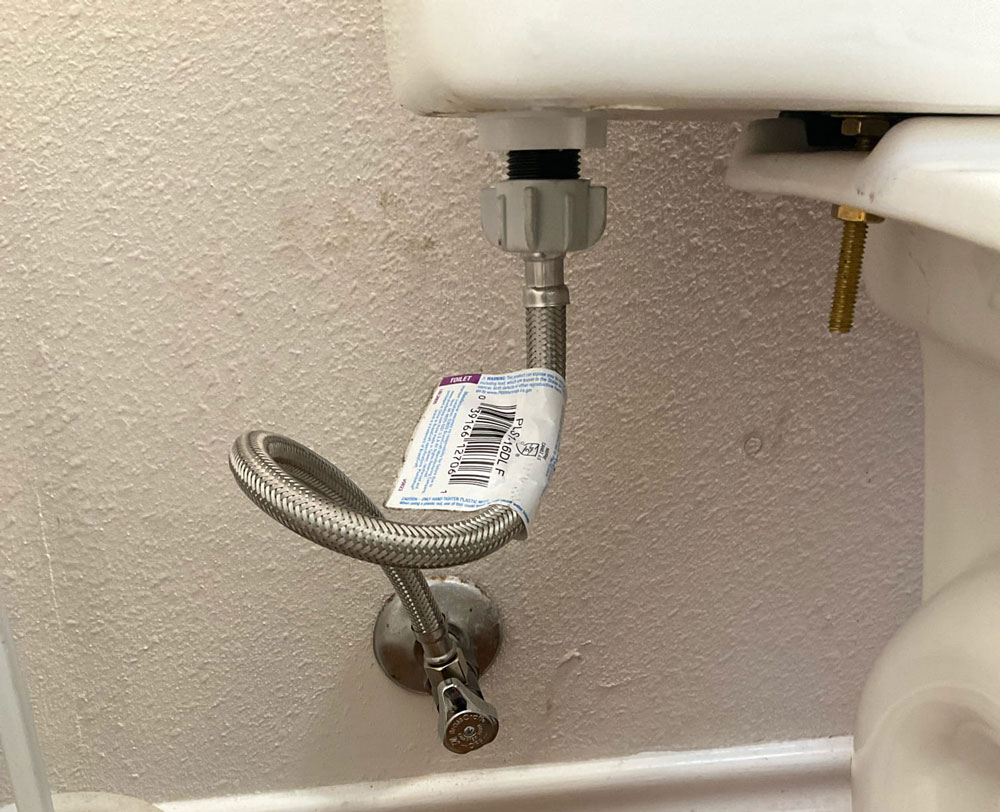
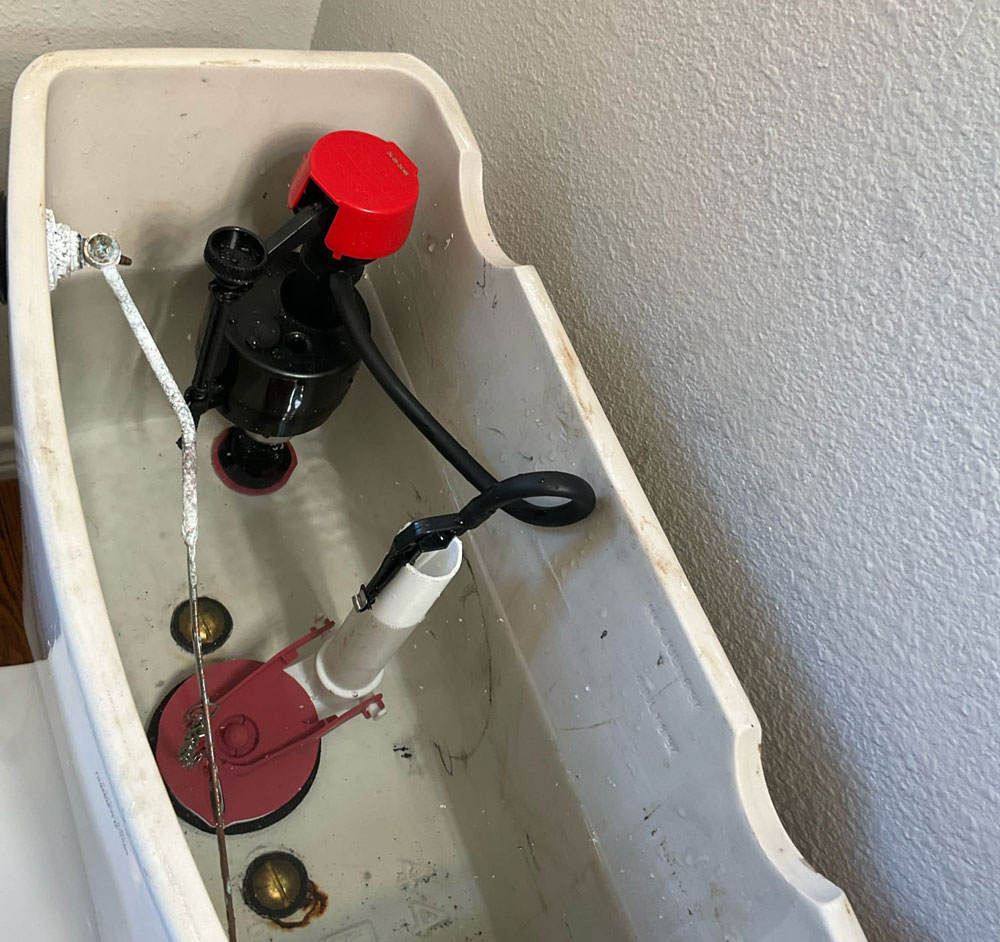
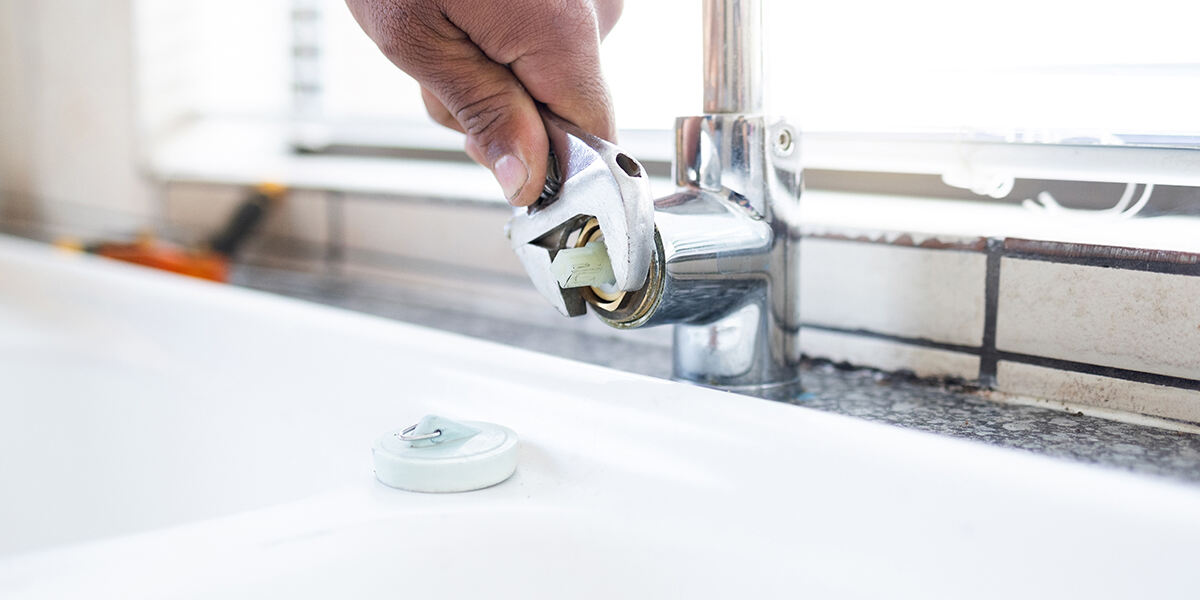
Shut Off the Water Supply and Replace the Line

The water supply valve is under the commode near the wall. Turn it clockwise to shut off the water supply, then flush the commode to empty its bowl. 

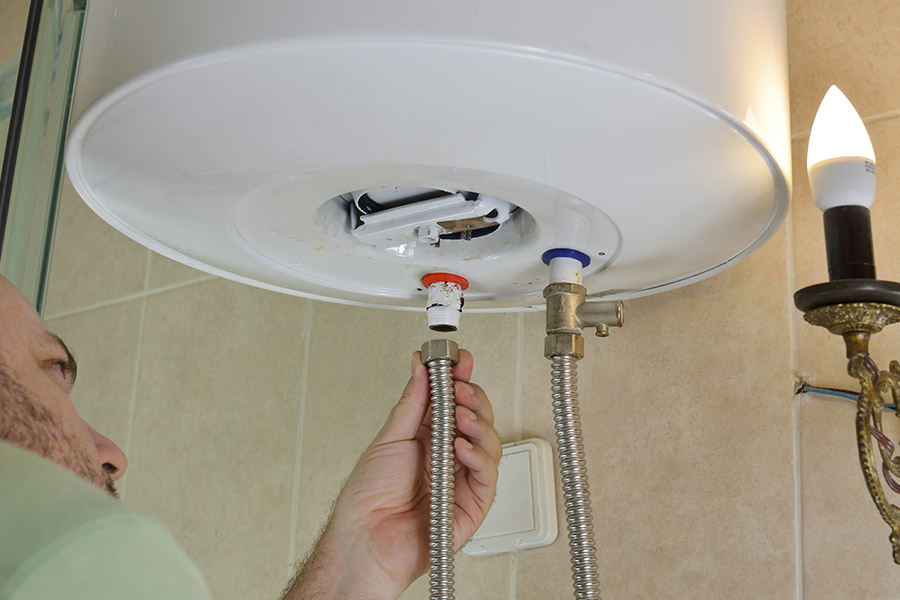
Upgrading your toilet is the perfect time to replace the water supply line that connects the fixture to the plumbing in the wall. Typically, this component lasts six to eight years, so if your toilet is older, it might be time for a new line. 

Remove the Old Toilet

After disconnecting the water supply line, move to the fixture’s base and remove the caps covering the bolts that attach it to the flooring. Unscrew them to carefully lift the toilet from its old flange. 

Replace the Flange

The flange is the plastic or wax ring that secures the toilet to the floor. Remove the old component and install a new one. Wax has better seal integrity than plastic, so that’s the top recommendation for Irving properties. 

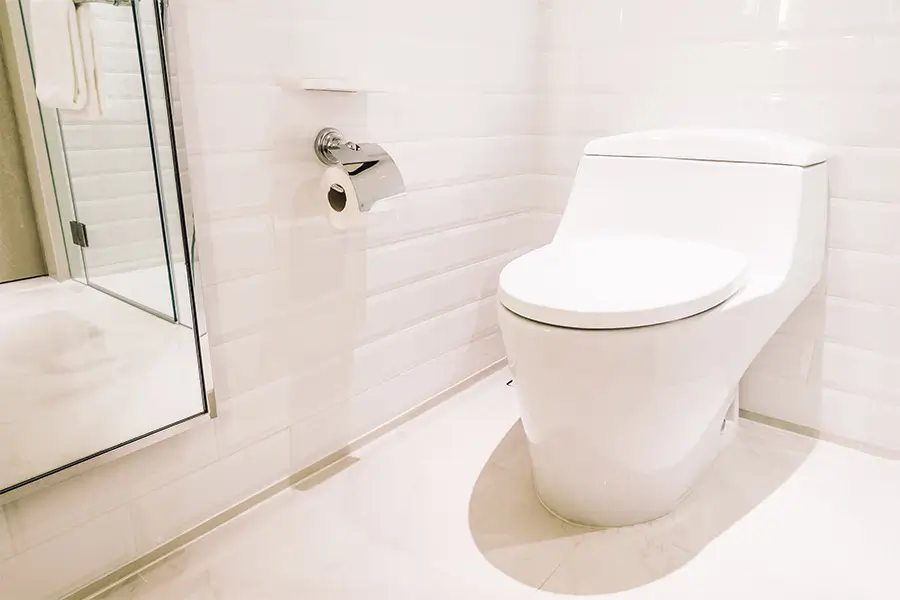
Install the New Fixture

Once the new flange is in place, lower the new commode over the wax ring and press down on the bowl to secure it to the wax. Conduct a flange inspection to ensure the wax creates an airtight seal around the toilet’s base.

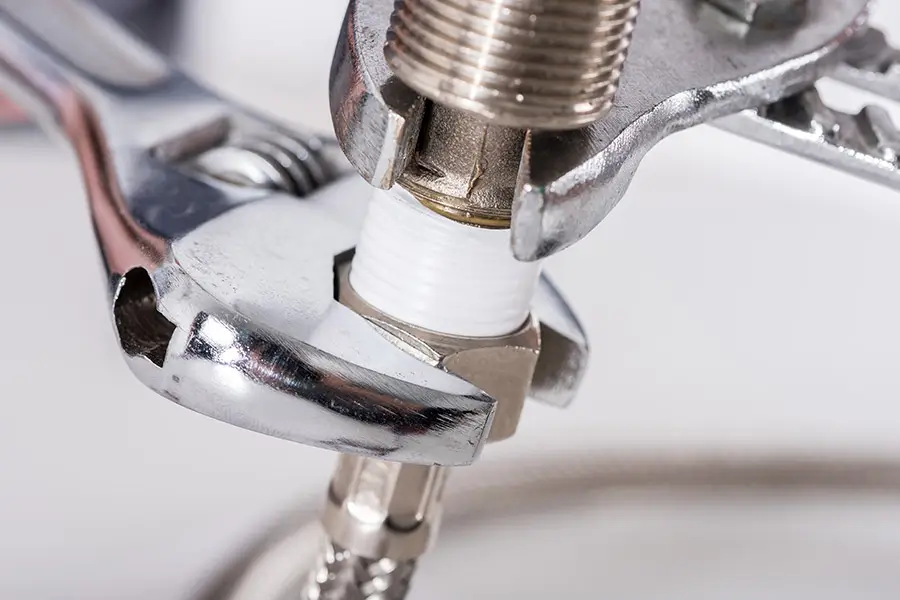
Ensure the toilet is directly over the flange with its bolt holes perfectly aligning with the holes in the ground. Attach all washers and nuts, and use a wrench to ensure a snug fit. With the new fixture in position, you can attach the new water supply line. 

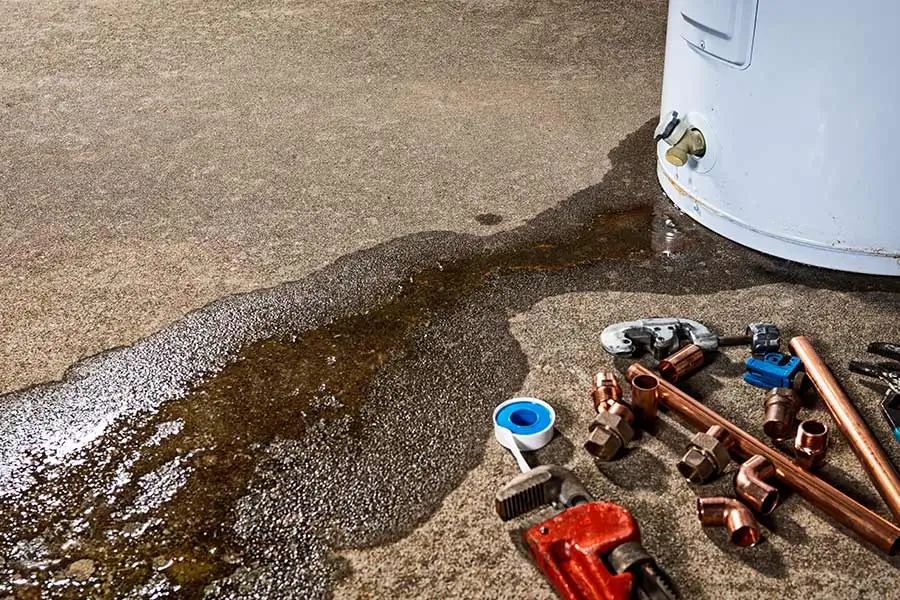
Caulk the Base and Check for Leaks

Caulking the commode base will seal it firmly to the ground. After applying an even line of caulk and smoothing it with a moistened finger, turn the water supply back on. Leak testing is essential, so inspect the water supply line, base, and tank for leakage after flushing your upgraded toilet.

Installing a New Toilet - Things to Consider

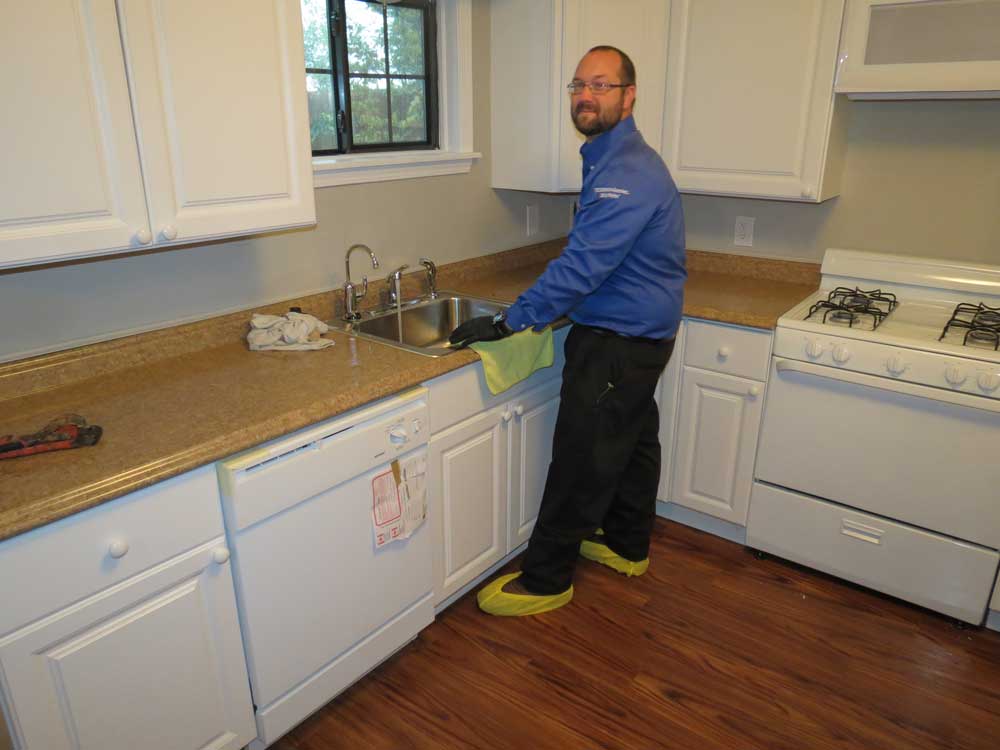
Contact Irving’s Top Plumbing Company for Your New Toilet Installation

If you need help installing a new toilet in your Irving, Texas, home, turn to Dial One Johnson Plumbing, Cooling & Heating. As a family-owned and operated company with decades of experience, we know the best approaches for replacing a toilet, handling tank mounting, and making appropriate water level adjustments.  

We guarantee customer satisfaction, so contact our experts today for an appointment.

Posted in

How Long Does It Take To Fix a Gas Leak?

If you have a leaky gas line, you know what a nightmare this debacle can be. How long does it take to fix a gas leak? 

When can you return to your normal routine? Dial One Johnson Plumbing, Cooling & Heating has the answer. Our trusted plumbers in Arlington, TX, discuss where leaks come from and what you should expect below. 

Do You Know What Caused Your Gas Leak?

Gas leaks are rare, especially when professional plumbers install and maintain the lines, but they can still occur. So, why do they develop?

  • Appliance disconnections: A gas-powered water heater, stove, or furnace might incur damage or just have a loosened attachment. 
  • Loose or corroded parts: Gas valves and caps seal the fuel safely inside the lines. These sealants can corrode over time or become too loose to contain the gas. 
  • Soil and temperature shifts: The ground moves ever so slightly, and those shifts put pressure on the lines. Add changing temperatures to the mix, and this combination may gradually loosen the pipe fittings. 
  • Aging line materials: Most modern gas lines consist of durable metal. Still, these materials degrade over the years and allow fuel to leak. 

In other words, it’s gas leak repair time if your lines are 20 to 50 years old and haven’t undergone maintenance in a while. 

What Can You Expect From the Gas Leak Repair Process?

Now, how long does it take to fix a gas leak? Let’s explore the process first. 

  1. Gas leak detection: Your plumber needs to see where the leak occurred. They may follow their nose and use advanced equipment to pinpoint the leak location. 
  2. Supply shutdown: Next, your plumber will cut the gas supply. After all, you don’t want this combustible substance flowing into the air. 
  3. Material and equipment sourcing: The plumber will find durable materials from a reputable manufacturer to replace the damaged ones. Sometimes, it takes a while for the materials to ship if your service provider doesn’t have them on hand. 
  4. Repair service: Once the plumber has the tools and equipment needed, they can begin fixing a gas leak.  
  5. Safety evaluations: How long does it take to fix a gas leak? That depends on how the safety evaluation goes. This step ensures that everything fits well with no potential for future leaks. 
  6. Repair approval and fuel return: Your gas company may check the repair to ensure everything works properly before giving the plumber the go-ahead to return the fuel supply. 

What does that mean for you? Can your plumber give you a specific timeframe for the service?

How Long Does It Take To Fix a Gas Leak?

The repair duration for gas leaks depends on myriad factors. For example, your plumber might have materials available and can administer the emergency gas leak repair within an hour. 

On the other hand, they might have to order new materials, which may take one or two days for delivery. Many line repair services take between four and 24 hours to finish.

  1.  

How To Protect Yourself and Other Building Occupants

Has the time to fix a gas leak arrived at your property? Treat the situation with caution and urgency. You’re looking at an incredibly dangerous issue that could damage your property or even cause injuries until your plumber completes the gas leak-fixing process.

If you suspect your gas line sprung a leak, remember to:

  1. Turn off your gas supply. Stop the fuel flow to minimize potential hazards.
  2. Evacuate everyone from the building. Direct everyone to a safe meeting place at least 330 feet from the building. 
  3. Call Dial One Johnson Plumbing, Cooling & Heating. Tell our team about your concerns, and we’ll promptly head your way. 
  4. Wait until the plumber gives you the all-clear. Our plumber will check that the gas is disconnected and inspect for additional threats. 
  5. Discuss repair solutions and payment plans as needed. You will learn what to expect from the service timeline, pricing, and other repair factors.  
  6. Follow your plumber’s directions until they fix the leak. Avoid using gas appliances unless your plumber has completed the service. 
Fixing Gas Leak

Resolve Your Gas Line Emergencies

How long does it take to fix a gas leak? Our plumbers typically take less than a day under most circumstances. Ask Dial One Johnson Plumbing, Cooling & Heating for emergency assistance, especially if you notice these signs of a gas leak in your home or business.

Posted in

Why Is Your Water Heater Exhaust Pipe Making Noise?

If you want to know whether a noisy water heater could be a sign of trouble, it is. Thankfully, this problem is fairly common, something experienced plumbers deal with daily. However, prompt action is essential to avoid unnecessary risks of property damage, safety hazards, and wasted energy. 

Dial One Johnson Plumbing, Cooling & Heating is your team of trusted plumbers in Waxahachie, TX, and we want to share key information about understanding why your water heater exhaust pipe is making noise.

Common Noises From Your Water Heater Exhaust Pipe

We encounter various noises that come from water heater exhaust pipes, and each of them can point to one or more underlying issues.  

Banging or Popping Noises

These result from metal expansion and contraction when the exhaust pipe heats up and cools down. Mild noises due to cooling are normal. Backdrafting due to improper venting or negative air pressure inside your home can aggravate these loud noises.

Rattling or Vibrating Sounds

Excessive rattling and vibrating come with loose connections. Hardware then shakes when under pressure or moved by external wind entering the vent. 

Hissing or Whistling Noises

Restricted airflow caused by blockages in the vent system — like soot buildup, bird nests, or other debris — causes pressurized airflow to make distinct noises inside the system.

Roaring or Rumbling Sounds

Malfunctioning burners or trouble with gas flow can create whooshing and roaring noises. A miscalibrated burner can also cause distinctive sounds associated with incomplete combustion. 

What Causes Water Heater Exhaust Noise?

Several factors contribute to water heater exhaust noise, some of which are easily fixable while others require more involved professional attention.

Thermal Expansion

Since the exhaust pipe is metal, it expands when heated and contracts when cooled. An overly tightened pipe can also make loud noises as it tries to shift.

Vent Blockages

A blocked vent can cause gases to struggle to exit, creating pressure changes that result in strange noises. In Waxahachie, TX, where wildlife is common, birds or small animals often nest inside vent openings.

Wind and External Environmental Factors

If your home is in an area exposed to strong winds, gusts cause a noisy exhaust vent.

Negative Air Pressure

Negative pressure inside the home often results from the misadjusted exhaust fans or tightly sealed spaces. That traps gases trying to move outdoors, producing various airflow noises. 

How Plumbers Address Water Heater Venting Issues

When a water heater exhaust pipe is making loud and disruptive noises, it could be time to call in a professional for an assessment. Leading signs you need to call for help include:

  • Continuous loud noises, even after securing the vent 
  • Signs of gas leaks or back drafting 
  • Visible damage to the exhaust pipe, making banging noises
  • Persistent rattling despite checking fittings 

Dial One Johnson Plumbing, Cooling & Heating typically recommends and performs these types of expert repairs in Waxahachie, TX:  

  • Secure loose pipes. We use metal brackets or straps to hold the vent pipe in place.
  • Check for obstructions. We clear out debris, soot, or foreign objects from the vent pipe as part of a thorough inspection. 
  • Adjust vent installation. We ensure the vent system sits at the correct angle and that there is adequate ventilation in your home.
  • Address thermal expansion. Often, we install modern, flexible vent pipe connectors to accommodate expansion and contraction without friction and noise. 
  • Prevent wind-related noise. Missing or improperly installed vent caps allow wind to enter the vent system. That causes a water heater vent to make unexpected sounds. We replace or install proper vent caps as necessary. 
Leaking water heater with plumbing tools on the floor

Choose Dial One Johnson Plumbing, Cooling & Heating in Waxahachie, TX 

For nearly 60 years, Dial One Johnson Plumbing has led the plumbing industry in Waxahachie, TX, for water heater repairs and maintenance. Attempting DIY water heater repairs can be dangerous and often leads to unnecessary additional damage. Count on us for: 

  • Expert water heater repairs. Whether it’s a water heater vent rattling or a full system malfunction, we have the tools and expertise to fix it.
  • Reliable service. Our decades of experience mean we do the job right the first time.
  • Commitment to customer satisfaction. As a family-owned business, we treat our customers like family.

A water heater exhaust pipe making noise can be more than a nuisance — it can indicate underlying issues with your ventilation system. Count on our team of expert plumbers for regular maintenance, proper installations, and timely repairs to keep your water heater functioning safely and efficiently.

Contact Dial One Johnson Plumbing, Cooling & Heating to discuss your needs and schedule service today.

Posted in

How Long Does It Take to Install a Kitchen Faucet in Richardson, TX?

Your kitchen sink leaks constantly, and you’ve had it up to here with paying for repairs. Or perhaps your faucet is outdated, and you’d like to bring your kitchen into the 21st century. How much time should you expect to spend on the project? On average, how long does it take to install a kitchen faucet? 

Learn the answer below, then call us to schedule plumbing services in Richardson, TX.

How Long Does It Take to Install a Kitchen Faucet?

How long will it take to replace your kitchen faucet? The short answer is that it depends. If you’re hiring a contractor in Richardson, they can usually finish the job in 30 minutes to an hour. If you’re doing it yourself and are new to faucet replacement, the task could take you a few hours to finish. However, you could save $200 to $400 on labor costs by going the DIY route. It all depends on what you value more: money or time.

The time it takes to replace a faucet depends on installation complexity and how difficult it is to remove your existing one. If your faucet needs a different base plate, called an escutcheon plate, this adds to the installation time. You’ll need an escutcheon plate to cover up any unused holes.

If you’d like a wall-mounted faucet, expect a longer installation process. That’s because you’ll need to open the wall behind the sink for pipe adjustments and to install a new water supply line.

When to Replace Your Kitchen Faucet in Richardson, TX

How long does it take to install a kitchen faucet, and when should you replace the faucet in your Richardson, TX, home? It’s tough to answer this question because faucets can last a long time and are usually easy to fix. Consider replacement if:

  • The faucet leaks constantly: Fixing leaks is typically simple, but if your faucet keeps leaking even after repairs, you might want to replace it.
  • The faucet is rusting: Rust doesn’t necessarily impact the faucet’s performance, but it certainly looks unsightly. Rust can also end up in your tap water. Yuck!
  • You have poor water pressure: Often, low water pressure is a systemic issue impacting the entire house. But if you have bad pressure only in your kitchen sink faucet, replacing the faucet may fix the issue.
  • You want an upgrade: Maybe your faucet doesn’t match the aesthetics of the rest of your kitchen. That’s a perfectly valid reason to replace it. Modern faucets come with handy features, too, such as touchless sensors that tell the faucet to turn the water on when they detect motion.
Modern kitchen sink with a high-arc spring faucet and stainless steel basin

DIY Kitchen Faucet Installation Tips

If you’re set on replacing the faucet yourself, follow these steps. How long does it take to install a kitchen faucet? If you’re handy and experienced, the job could take about an hour. Expect a longer timeline if you’re new to faucet replacement.

  1. Prepare for removal. Clean all items out from under the sink and gather your supplies. Tools required include a wrench, screwdriver, pliers, and tube cutters. You may also want a pillow for comfort since you’ll be on your back for most of the process.
  2. Turn off the water supply. Most sinks have a water supply underneath them. If yours doesn’t, you’ll have to shut off the water for the whole house.
  3. Remove the faucet supply line. If your faucet has a single handle, its supply lines will likely be built-in. The mounting hardware is typically directly over the supply lines. If your faucet has two handles, you’ll find separate lines going to each handle. Remove both.
  4. Remove the old faucet. You’ll usually find mounting hardware keeping the faucet in place. Once you’ve taken out the faucet, remove any caulk and clean the area well.
  5. Install the new faucet according to the included instructions. Be sure to mount the faucet securely; it can become wobbly and may fall off if you skip this step.
  6. Reconnect the water supply lines and turn the supply back on. Test the faucet and ensure it works properly.

Stop Wondering, “How Long Does It Take to Install a Kitchen Faucet?” and Call Our Pros in Richardson, TX

How long does it take to install a kitchen faucet? If you’re inexperienced, it could take an entire day to finish the job. Don’t want to spend your weekend under the sink? Call the experts at Dial One Johnson Plumbing, Cooling & Heating to schedule service or get help with understanding flex hoses.

Posted in

Case Study: Rapid Response and Expert Service Saves Family from Plumbing Repair in Desoto, TX

The Problem

One chilly January morning, Greg woke up to an unpleasant plumbing repair: his toilet was “running”.  His toilet continued to leak water into the toilet bowl, causing the tank to constantly drain and refill with water over and over. This causes massive water usage.  Depending on the severity of the leak, a running toilet can waste anywhere from 1 to 6 gallons of water per minute, which equates to 60 to 360 gallons per hour. Over time, this can lead to thousands of gallons wasted each day if not addressed promptly.  Greg tried to quickly turn off the water supply but the water stop was 30 years old and no longer working to turn the water off.  He was worried about the cost of high water usage, and possible damage to his home if the stop wouldn’t work during an emergency, not to mention the unknow cost of a plumbing repair. That’s when he called us for help. 

Toilet water supply line with a kinked flexible hose

The Solution

1. Immediate Response to Plumbing Repair

  • Our team arrived at Greg’s home within 90 minutes of his call.
  • We provided a thorough inspection to assess the source of the toilet leak and identify potential options for repair or replacement for both the toilet and the emergency water stop.

2. Expert Service

  • We repaired the toilet by replacing the damaged components in the tank.
  • We replaced the emergency water stops to ensure that in the event of future leaking or flooding, the stops will effectively stop the incoming flow of water.
  • Checked the rest of the plumbing system to ensure no other leaks or damage.

3. Restoration Assistance

  • We advised the family on next steps for water damage mitigation, recommending a trusted local restoration company.

4. Preventive Education

  • Before leaving, we shared tips on how an annual plumbing inspection can often catch emerging problems like these before they become serious enough to turn into plumbing repairs.

The Outcome

  • Timely Repair: With replaced toilet components and new emergency water stop, Greg’s plumbing repair was fully resolved within 2 hours of our arrival.
  • Peace of Mind: Greg was relieved to know their plumbing system was secure and prepared for future use.
  • Minimal Cost for Water Waste: Thanks to the quick response, the cost for high water usage was minimal, and repairs were less extensive than they feared. 
Open toilet tank showing the fill valve, flush valve, and flapper

Customer Testimonial

“I called Dial 1 at 9:30 this morning. I had a “running” toilet and a 30-year old shut-off valve that would not turn off. Everything was fixed by noon today. Great company. Great service. Fair price!!♥️♥️♥️ “

Greg L. 1/13/24

Key Takeaways

  • Speed Matters: Our 24/7 emergency services ensure homeowners aren’t left dealing with plumbing repairs alone.
  • Preventive Care: Educating homeowners on simple preventive measures and the benefit of a yearly plumbing inspection can save them from costly repairs.
  • Community Trust: Families like Greg’s can rely on us for both immediate solutions and long-term peace of mind. 

If you’re facing a plumbing repair, plumbing emergency, or want to winterize your home, call Dial One Johnson Plumbing, Cooling, and Heating today at 972-291-0740. Let us help you protect your home and family.

Posted in

Winter Plumbing Maintenance Tips for Garland, TX, Homeowners

Plumbing problems can occur at any time of year, but they often get worse during the winter. Colder temperatures and additional stress from holiday celebrations can cause clogs, worsen leaks, and put additional strain on appliances.

With these winter plumbing tips from the most reliable plumbers in Garland, TX, you can rest easy knowing that you won’t have to deal with any inconvenient and damaging issues. 

How To Protect Your Garland Plumbing During Winter 

Keeping your plumbing working smoothly throughout the winter starts with being aware of the most common issues that can crop up. Garland winters might not bring extremely harsh temperatures, but that doesn’t mean homeowners are immune to cold weather-related issues. Knowing the risks and implementing winter plumbing tips can help you get through the season incident and damage-free. 

Protect the Water Heater 

When the outdoor temperature drops, the water heater has to work harder to maintain a steady supply of hot water. Avoid sudden breakdowns by scheduling a maintenance visit from a professional plumber before the start of the season. This ensures that all the critical components are in good condition and reduces the risk of anything going wrong. 

Taking care of your water heater also means planning water usage to avoid putting excessive wear and tear on it. Spacing out chores like washing dishes and laundry and showers gives the tank time to refill, so you don’t run out of hot water. 

Avoid Frozen Pipes 

Although the temperatures in Garland don’t typically fall so low that the pipes are in danger of freezing, there’s always a chance of a sudden cold snap. When potentially pipe-freezing conditions hit, it’s crucial that you take steps to protect the plumbing. Otherwise, you could be left to deal with a massive disaster due to a burst pipe and associated water damage. 

The first winter plumbing tip to prevent frozen and burst pipes is to keep the temperature inside your home above 55 degrees at all times. Turning off the heat while you’re away for a few days might seem like an energy-saving option, but if foul weather hits, your home can get very cold very quickly, increasing the risk of a pipe rupture.

If it gets extremely cold outside, you can protect them from the cold by turning on the faucets to a slow drip. Leaving the faucet dripping keeps water moving through the pipes so it doesn’t have a chance to freeze.

Take Care of Outdoor Plumbing 

Preparing your Gartland home for winter should include preparing the outdoor spigots and pipes. Turning off the water supply to the spigots and storing hoses indoors can help stop frozen pipes. 

Pipe insulation is another way to protect your plumbing during cold weather. Adding a layer of foam insulation to the pipes that run from the main water line to your home, as well as any located in unheated areas like the garage or attic, will help prevent frozen pipes. 

Keep Drains Clear

Winter brings celebrations that can do a number on your Garland home’s plumbing system. Whether you’re hosting a big holiday meal or the neighborhood Super Bowl party, you need to give your plumbing a little TLC to avoid issues. 

Investing in professional drain cleaning before the holiday season will help you start with a clean slate, but don’t forget other winter plumbing tips, like the following:

  • Never rinse oils or grease down the drain.
  • Be cautious about what goes into the garbage disposal; avoid bones, eggshells, and other items that can cause clogs. 
  • Turn the garbage disposal on first before adding food, and remember to run water while it’s on.

Watch Your Water Bills 

A hidden plumbing leak can cause a long list of problems, but a higher-than-normal water bill is often one of the earliest indications of trouble. If you notice a sudden spike in usage, call a plumber about leak detection. Even a tiny hole in a pipe hidden behind a wall can cause substantial damage and waste hundreds of gallons of water, so stay alert to the signs that something isn’t right. 

Trust Our Garland Plumbers To Solve Your Cold Weather Woes 

Don’t let plumbing problems dampen your spirit. Follow our winter plumbing tips and tips to prevent frozen pipes to avoid the most common issues and the stress and expense they can cause. 

If something does go wrong, there’s no need to fret. Call the experienced team of Dial One Johnson Heating, Cooling, & Plumbing, and we’ll be there to solve the problem quickly.

Posted in

What To Do When Your Toilet Handle Stays Down in Highland Park, TX

You encounter all sorts of annoyances when you use a public restroom. Poor water flow, dirty toilet seats, and empty toilet paper dispensers  you don’t expect these maintenance issues to crop up in your home. 

Unfortunately, that doesn’t mean problems can’t happen. You know how your toilet handle stays down sometimes? Dial One Johnson Plumbing, Cooling & Heating’s team deals with this problem during residential plumbing services in Highland Park, TX. Find out what to do about it below. 

Why Do Toilet Handles Get Stuck?

Toilet handles get stuck in one position for numerous reasons, including:

  • Blockages down the drainage line preventing water flow
  • Broken parts within the water tank
  • Too little water in the tank
  • Excessive water pressure damaging components

Sometimes, a stuck toilet handle needs a simple fix that you can tackle yourself. Other times, you need a plumber to perform a toilet troubleshooting service. 

What Can You Do When the Toilet Handle Stays Down?

First, see if you can get your toilet handle unstuck by yourself. Use our guide below to navigate the repair process:

  1. Turn off the fixture’s water supply. While it is possible to work elbow-deep in water, you will much prefer working with an empty tank. Find the supply valve near the floor behind the toilet and turn it to the off position. 
  2. Empty the water tank. Just flush the toilet like you normally would. This will release the tank water into the drainage system, leaving you with a manageable workspace. 
  3. Examine the chain. Most toilet chains are made of stainless steel, which resists rust and corrosion. Still, sometimes the chain assembly can become detached or a link will break, and the toilet handle stays down. 
  4. Check the handle arm and other flushing components. A flush mechanism can also incur damage or become loose and disable exterior flushing. If you notice any broken pieces, collect them for replacement. Reconnect the parts that have come loose.   
  5. Replace or reconnect any damaged or loose pieces. You can typically go to any home improvement store and find a new set of flush mechanisms to replace the old ones. If you discover damaged components, purchase and install the package that closely matches your set.
  6. Return the water supply back into the tank. After assembling the new pieces or reconnecting loose parts, turn the water supply back on and refill the toilet tank. 
  7. Test your repair work. Flush the toilet once or twice to see if the handle, chain, and seals hold. Keep the tank open so you can watch the mechanisms work. 

This quick handle adjustment often returns toilets to their normal functions. However, you sometimes need a plumber in Highland Park, Texas, to intervene. 

A Highland Park Plumber Can Solve the Problem If You Can’t

You need professional toilet repair services in Highland Park, Texas, when replacing a component or wiggling the handle doesn’t cut it. They can check and correct the following common issues that make a toilet handle stay down:

  • Replacing broken parts: If you aren’t sure how to install new toilet hardware, leave it to a professional. Sometimes, this task is a little more technical than you might expect. 
  • Checking water supply and retention: The toilet tank might leak water, leading to low water levels and loose flush handles. It can also have too little water draining into it at too slow a rate. Both issues need a professional to address since they deal with internal supply. 
  • Correcting the water pressure level: If your problem is with high water pressure, you probably need a plumber to adjust the flow rate to a safer, less damaging level. 

Other Toilet Concerns

A toilet handle that stays down might be the least of your concerns. You might face some common but concerning commode calamities, such as:

  • Cracked bowls: Your toilet might not crumble into dust before your eyes, but its service life is coming to an end.  
  • Damp floors surrounding the toilet: A damp floor surrounding your toilet might indicate a broken or corroded seal beneath the toilet. 
  • Constant running water: Water that constantly seeps from the tank to the bowl means you have a broken seal somewhere.

When Highland Park homeowners encounter these issues, they often replace their old, leaky commodes with WaterSense toilets that conserve water and save money. 

Got a Plumbing Problem in Highland Park, Texas? Dial One Johnson Plumbing, Cooling & Heating Can Fix It

Call Dial One Johnson Plumbing, Cooling & Heating when the toilet handle stays down and you can’t fix it. Our routine or emergency plumber can quickly solve your toilet troubles.

Posted in

What To Do With Water Not Coming Out of Faucets in Irving, TX

It can happen on an average workday or just before major events like Thanksgiving dinner, but you don’t want to stand there finding water not coming out of faucets when you need it. A lack of accessible water can immediately shut down your normal activities – as well as your ability to host guests comfortably.

You’re okay if you hit this snag in Irving. Dial One Johnson Plumbing, Cooling & Heating, the most trusted plumbers in Irving, TX, can handle things quickly. Still, if you’d like to know more about what to do and how to prevent this inconvenient plumbing issue, keep reading.

1. Confirm Water Supply Issues

The first thing to do when you discover water not coming out of faucets you’re trying to use is to determine the scope. Is the problem affecting your entire house? If other faucets are dry, it’s likely to be an external water supply issue, so do the following:

  • Check with nearby neighbors to see if they are having the same trouble.
  • Call your local water provider for information on possible service interruptions. 

The city of Irving provides reliable and high-quality water services. However, regular maintenance projects could disrupt the supply temporarily.

2. Check the Main Valve and Individual Valves

Valve malfunctions can easily stop water flow. If you know how to do it and where it is, check the main water valve in your home. Is it fully open? 

Then, inspect the shut-off valves under the sink having the problem. Has the valve accidentally shifted, become stuck, or turned to the “Close” position? Partially closed or faulty valves can restrict water flow suddenly and give the impression of a more significant problem. 

Valves are a relatively minor repair job for a professional plumber.

3. Inspect for Faucet Aerator Blockage

Is water not coming out of faucets in a single location? A local faucet blockage might be mineral residue and sediment buildup in a faucet’s aerator — the small screen attached to the faucet spout. If so, aerator cleaning is a simple yet effective way to restore water flow.

Just unscrew the aerator, soak it in vinegar to dissolve mineral buildup, and scrub it clean before reattaching it. This quick fix resolves blockages of natural limescale and scum.

4. Investigate Other Possible Plumbing Obstructions  

Has the aerator cleaning not done anything? There may be a deeper plumbing obstruction in the pipes serving that faucet, including sediment or rust buildup. Internal blockages are a job for a professional plumber with the technology and skill to inspect the pipes and pinpoint the repair issues.

The mineral-rich water in Irving and the rest of the Dallas-Fort Worth region often accelerates sediment buildup. Regular professional pipe inspections are helpful for properties in the area.

5. Check for Pressure Loss

Unexpected pressure loss is another common cause of water not coming out of faucets, especially if water flows weakly or gradually slows until it stops. There could be a leak somewhere deeper in your property’s plumbing system or a malfunctioning pressure regulator.

Locating and repairing leaks is a job for an expert plumber. A qualified professional can also assess your plumbing system’s pressure regulator for repair or replacement. 

6. Look Out for Internal Faucet Valve Malfunction  

Individual faucets can develop internal issues over time. Is the faucet’s internal cartridge or washer worn through? That could stop the water flow. 

This problem requires disassembling the faucet to inspect the internal components and replacing worn-out parts to fix the problem. It’s a routine repair for an experienced plumber like Dial One Johnson Plumbing, Cooling & Heating.

7. Be Aware of Pipe Freeze Risk

Irving enjoys the seasonal weather typical of our part of Texas. When seriously cold weather strikes, we are usually attentive to the hazards that extended or freezing temperatures bring. If you notice water not coming out of faucets and the affected pipes around the fixture feel unusually cold, don’t rule out frozen pipes.

Plumbers will usually try to thaw the spot with a space heater. Don’t use open flames. Also, if you notice any leaking or signs of burst pipes, call your plumber immediately!

When To Call the Professionals at Dial One Johnson Plumbing in Irving, TX

When plumbing trouble hits in Irving, Dial One Johnson Plumbing, Cooling & Heating is here to help. Our family-owned business’s legacy of unmatched customer service and precision repairs dates back to 1965. Whether it’s water not coming out of faucets or comprehensive AC services, give us a call.

Get things flowing again – contact Dial One Johnson Plumbing, Cooling & Heating to schedule service!

Posted in

A leaky sink faucet that just won’t quit is nothing short of torture for your ears. Drip, drip, drip, it goes, all day and all night, no matter how much you adjust (or smack) your faucet.

If your leaking faucet is about to get on your last nerve, our experts are here to help. In this guide, a professional plumber in Seagoville, TX, explains what causes a leaking faucet and how to fix it.

What Causes a Leaky Sink Faucet in Seagoville Homes?

Why exactly do faucets leak? Here’s a breakdown of some of the most common causes.

  • Faulty O-ring: The O-ring is a little rubber or plastic disc with a circular shape (hence the name). Its job is to form a watertight seal between the spout and the faucet handle. Over time, O-rings can become brittle and crack, resulting in leaks. A faulty O-ring is the likely cause if your faucet is leaking at the base.
  • Damaged or poor-fitting washer: The washer is a small part that sits against the valve seat of your faucet. Friction causes the washer to break down over time, and boom, you have a leak that’ll require washer replacement. Your faucet could also leak if you installed the wrong-sized washer.
  • Damaged cartridge valve: The cartridge valve controls how much water flows through your faucet. When you turn the handle one way, water gushes out. Turn it the opposite direction, and the flow stops. Or at least, that’s how it should be. If your cartridge valve is busted, you’ll probably notice a steady stream of water flowing from the faucet at all times.
  • Loose fittings: Your faucet has plenty of parts, many of which you can’t see unless you take the whole thing apart. These nuts, bolts, and other bits can come loose, causing a leaky sink faucet.
  • Valve seat corrosion: The valve seat’s job is to connect your sink’s spout to the faucet. Sediment can build up here, causing the valve seat to corrode and let water flow through. This is probably the issue if your faucet is leaking around the nozzle or spout.
  • Too-high water pressure: Leaks commonly crop up when the water pressure is too high. You might have to install a water pressure regulator to fix your leaky sink faucet.
  • Pipe leaks: The worst-case scenario is that you’ve got a pipe leak you haven’t found yet. Leaking pipes can cause water to gush out of your faucet at an alarming rate. Look carefully for signs of a leak, such as puddles under the sink and water stains on your walls.

How To Fix a Leaky Sink Faucet

Can you fix a leaky sink faucet yourself? In many cases, yes. Here’s how to bring peace and quiet back to your Seagoville home:

  1. Shut off the water supply before you start working (it’s usually located under the sink).
  2. Using an Allen wrench or screwdriver, remove the handle from the faucet so you can see the components inside.
  3. Inspect all of the parts, including the washer, O-ring, faucet aerator, and stem assembly, for damage. Replace any that look broken or worn-out.
  4. Clean the components with a soft brush or damp cloth.
  5. Reassemble the faucet (be sure you put all the parts back where they belong before closing everything up).
  6. Turn the water supply on and test the faucet to see whether or not you’ve fixed the leak. If it’s still leaking and you don’t want to dive back in there, it’s best to call a pro for help.

Why Hire an Expert for Leaking Sink Repair?

If you don’t have the know-how to fix your leaking sink faucet, you’re better off calling a plumber for repairs. Doing so comes with perks like these:

  • Saves time: Do you truly want to spend your weekend messing around with a busted sink? We didn’t think so! Skip the hassle and hire us instead.
  • Top-shelf tools: Some leaky faucets need more than a basic wrench and screwdriver to fix. When you call a plumber, they’ll bring professional-grade tools, sparing you the expense of buying them yourself.
  • Avoid water damage: Your faucet may be dripping now, but it could start gushing if you damage something during your DIY fix. Plumbers know what they’re doing and won’t damage your pipes.

Leaky Sink Faucet Driving You Nuts? Call Our Seagoville Plumbing Pros

Skip the stress and headache of do-it-yourself faucet repair and call our plumbing experts at Dial One Johnson Plumbing, Cooling & Heating. We’re Seagoville’s top choice for plumbing and AC services.

To schedule repairs for your leaky sink faucet, call today.

Posted in

Do you have a plumbing project coming up in your Lancaster, TX, home? Everyone will advise getting multiple plumbing quotes to ensure you’re not getting fleeced. But receiving dozens of quotes from different plumbers is pointless if you’re not sure they’ve covered all the bases.

In this post, the top-ranking plumbers in Lancaster, TX, cover the key details you should watch for in any plumbing quote you receive.

The Full Scope of Work

Professional plumbers will always provide a quote that clearly outlines the work they will do on a project. Without a clear and comprehensive scope of work, you can’t hold the contractor accountable for not completing one part of the project or the other.

It doesn’t matter if you’re thinking about hiring a plumber for a simple installation job or a wider-scale repair. Always ensure there’s no ambiguity with the scope of work. Ignoring this tip will expose you to the risk of conflicts. And when it’s your word against the plumber’s, it’s hard to seek redress when problems arise.

Labor and Service Charges

The best plumbing quotes will include an itemized breakdown of the costs of each phase of the project. It will clearly show the cost of materials and labor, as well as any additional fees. Pay close attention to the cost of materials, as quality will vary. Ensure the quote is for materials that are within your budget and are sure to last.

You should also ask questions about the costs of any external work. For example, the plumber might charge fees for relocating pipes, moving landscaping elements, and much more. The goal is to ensure you have a clear picture of what the project will cost before you commit to the contract.

A quick note of warning here, though. Cheapest isn’t always the best.

It’s true that requesting and evaluating multiple plumbing quotes can help you get the best deal. However, you shouldn’t go for the cheapest quote you can find. If it’s too good to be true, there’s always a catch somewhere! Are the plumbers licensed and insured? Will they adhere to plumbing codes? Will they use quality materials?

Plumbers charging uncommonly low fees are always overcompensating for something. Don’t pay cheap fees and end up spending ten times more on dealing with the fallout.

Warranty and Guarantees

Professional plumbing companies always detail warranties and guarantees in their plumbing quotes. This helps show their belief in the quality of their work and provides clients with peace of mind. So, when you’re looking at plumbing quotes from plumbers in Lancaster, TX, always ensure the quotes cover these details.

You should check for separate labor and material warranties. The labor warranty assures you that the plumber will fix any issues that may arise within a certain period of time — if the problem was due to their actions or inactions. The material warranty often comes from the manufacturers. So, the plumber can replace materials that show manufacturer defects within the warranty window.

Project Completion Timeline

Plumbing projects vary in complexity. So, professional plumbing quotes often contain how long the project will take. The plumbers will detail a start date and completion date. This will allow you to plan your schedule around the job.

If the project timeline will affect other construction work or severely affect your convenience, you can consider moving around dates or taking approaches that will shorten the timeline. However, completing a complex project on a shorter schedule can cost you more.

On the flip side, a project that overshoots the expected completion date can also become expensive. That’s why you should only take completion date estimates from plumbers who have shown a proper understanding of the scope of work.

Payment Terms

The best plumbing quotes should clearly detail how you’ll make payment for the project. Professional plumbers will require a deposit on most projects. This could be 10-30% of the total cost of the project. The final payment will come after the completion and inspection of the work.

For large projects, you may get payment schedules that are related to certain project milestones to protect both you and the plumber.

Get Comprehensive Plumbing Quotes for Your Plumbing Projects in Lancaster, TX

Do you have a plumbing project coming up? Dial One Johnson Plumbing, Cooling & Heating provides clear, detailed, and cost-effective plumbing quotes after carefully evaluating the scope of your project.

It’s how we have become the premier choice for plumbing and AC services in the area.

Are you ready to schedule a consultation? Call Dial One Johnson Plumbing, Cooling & Heating today to schedule an appointment.