Experiencing an emergency? Call 972-914-0833

Ready to Experience the Dial One Johnson Difference?

Your go-to resource for HVAC and plumbing solutions, DIY guides, and home maintenance tips.

Got an emergency? Call 972-914-0833 or …

Explore by topic:
Posted in

Indoor Air Quality

We spend most of our time indoors—at home, at work, and in various indoor spaces. It makes sense that the air quality in these environments should be excellent. However, many homeowners are surprised to learn that indoor air is often more polluted than outdoor air, even in large industrial cities.

At Dial One Johnson Plumbing, Cooling & Heating, we’ve been helping Texas homeowners improve their indoor air quality for over 50 years. This comprehensive guide will help you understand what affects your indoor air quality, why it matters, and what you can do to breathe cleaner, healthier air at home.

Why Indoor Air Quality Matters

Indoor air quality plays a significant role in your home’s comfort, but more importantly, it directly impacts your health and well-being. Poor indoor air quality affects everyone, but especially those with respiratory problems, asthma, and allergies.

The Surprising Truth About Indoor vs. Outdoor Air

With modern air filters, dehumidifiers, and purification systems, it’s easy to assume indoor air is much cleaner than outdoor air. However, the Environmental Protection Agency reports that indoor air pollutants can be two to five times higher than outdoor levels.

Why? Contaminants build up over time, and in buildings with poor ventilation and limited fresh air circulation, they have nowhere to go. While some pollutants enter from outdoors, many originate inside the building itself—cooking gases, pet dander, mold spores, dust, and chemical fumes from household products.

Health Effects of Poor Indoor Air Quality

Indoor air pollution poses serious health risks because of the amount of time we spend indoors.

Respiratory Issues

  • Aggravated asthma symptoms
  • Increased allergy symptoms
  • Sinus problems and congestion
  • Greater vulnerability to respiratory infections

Physical Discomfort

  • Dry skin and hair (from overly dry air)
  • Irritated eyes, nose, and throat
  • Headaches and fatigue
  • Difficulty sleeping

Long-term Concerns

  • Chronic respiratory conditions
  • Weakened immune system response
  • Reduced cognitive function and productivity

The Productivity Connection

Indoor air quality doesn’t just affect health—it impacts how well you function. Studies show that optimal temperature (around 70 degrees) and clean air improve cognitive functioning, allowing your brain to focus on tasks rather than dealing with discomfort or poor air quality.

Poor air quality forces your body to work harder filtering pollutants and maintaining comfort, leaving less energy for work, school, or daily activities. Clean air helps you think more clearly, sleep better, and feel more energized.

What Causes Poor Indoor Air Quality

Understanding what affects indoor air quality is the first step toward improvement. Several factors contribute to contaminated indoor air.

Common Indoor Contaminants

  • Dust and debris: Accumulates on surfaces and becomes airborne
  • Pet hair and dander: Constant source of allergens for pet owners
  • Cooking gases: Released during food preparation
  • Mold and mildew: Thrives in humid conditions
  • Bacteria and viruses: Can circulate through HVAC systems
  • Carbon monoxide: Potentially deadly gas from fuel-burning appliances
  • Chemical fumes: From cleaners, pesticides, building materials, and household products
  • Pollen: Enters through doors, windows, and on clothing

Poor Ventilation

Inadequate ventilation is a primary cause of poor indoor air quality. Tightly sealed homes keep outdoor temperatures out, which saves energy but limits fresh air circulation. Without proper ventilation, polluted air has nowhere to escape and contaminants continue accumulating.

High Humidity Levels

Texas humidity is legendary, and when it infiltrates your home, it creates problems. The DFW area averages 66% humidity annually, making moisture control essential. Relative humidity above 50% causes condensation on surfaces, fostering mold growth that triggers asthma attacks and allergic reactions. Water damage also rots wood, weakens structural beams, damages furniture, and attracts pests.

Low Humidity Levels

While high humidity causes problems, overly dry air also compromises health. When HVAC systems remove too much humidity, dry air causes dry skin, hair, and sinuses. Dried-out nasal passages lose their ability to filter air effectively, making you more vulnerable to respiratory infections. Some viruses also thrive in low-humidity conditions.

Seasonal Allergies in North Texas

Each year, the Asthma and Allergy Foundation of America ranks the Dallas area as one of the most challenging places for allergy sufferers. Located in the “pollen belt”—the worst region in the country for seasonal allergies—North Texas offers a seasonal allergen for every season:

Tree Pollen (February-June): Ash, elm, pine, oak, pecan, hickory, poplar, and walnut trees

Grass Pollen (March-September): Wild, uncut grass exacerbated by lawnmowers, peaking in summer

Mold (Year-round, peaks July-August): Fungi flourishing in warm, damp conditions

Ragweed (August-November): Can travel hundreds of miles, lasting much longer in Texas than other regions

Mountain Cedar Pollen (December-February): Also called “Cedar Fever” or “The Christmas Allergy”

Unfortunately, experts predict seasonal allergies will intensify as North Texas becomes warmer and wetter due to climate change, making efficient HVAC systems and indoor air quality management increasingly important.

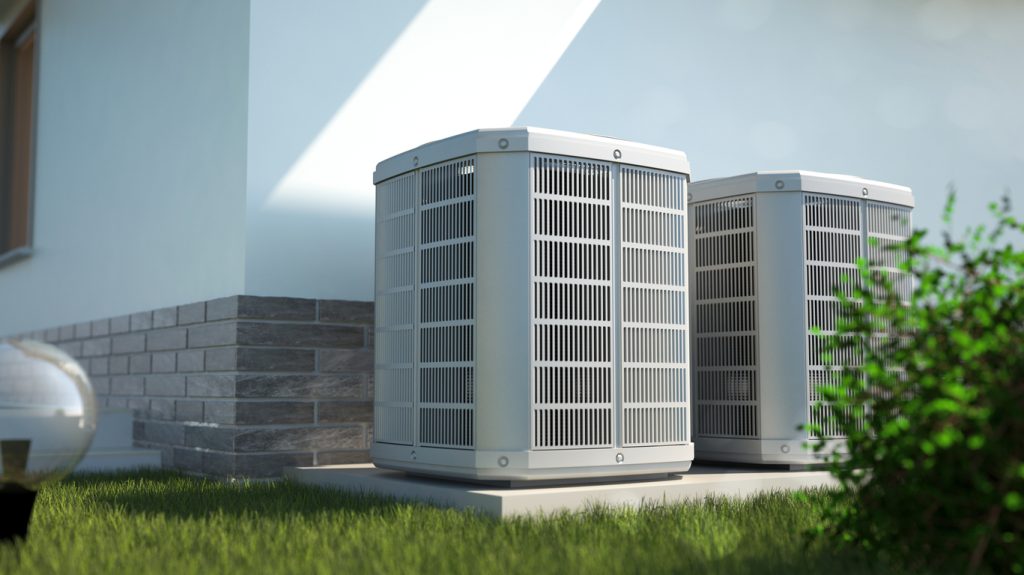
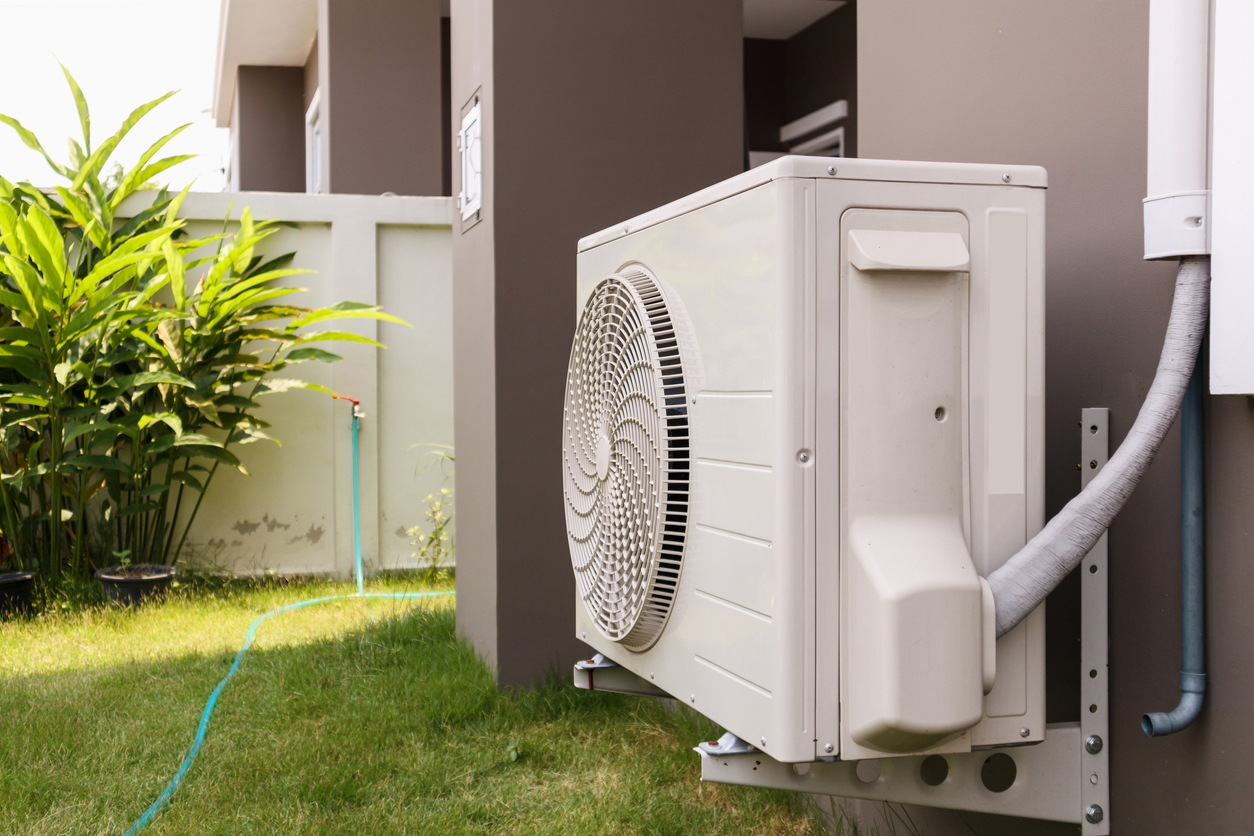
How Your HVAC System Improves Indoor Air Quality

Your heating and cooling system does more than regulate temperature—it’s your first line of defense against indoor air pollution.

Air Filtration

Your HVAC system’s air filter traps contaminants as air circulates through your home. Basic filters capture dust and large debris, while high-quality filters can trap bacteria, mold spores, allergens, viruses, and microscopic particles.

The filter quality matters significantly. Standard filters provide basic protection, while advanced filters offer superior allergen and pollutant removal—especially important for those with severe allergies or respiratory challenges.
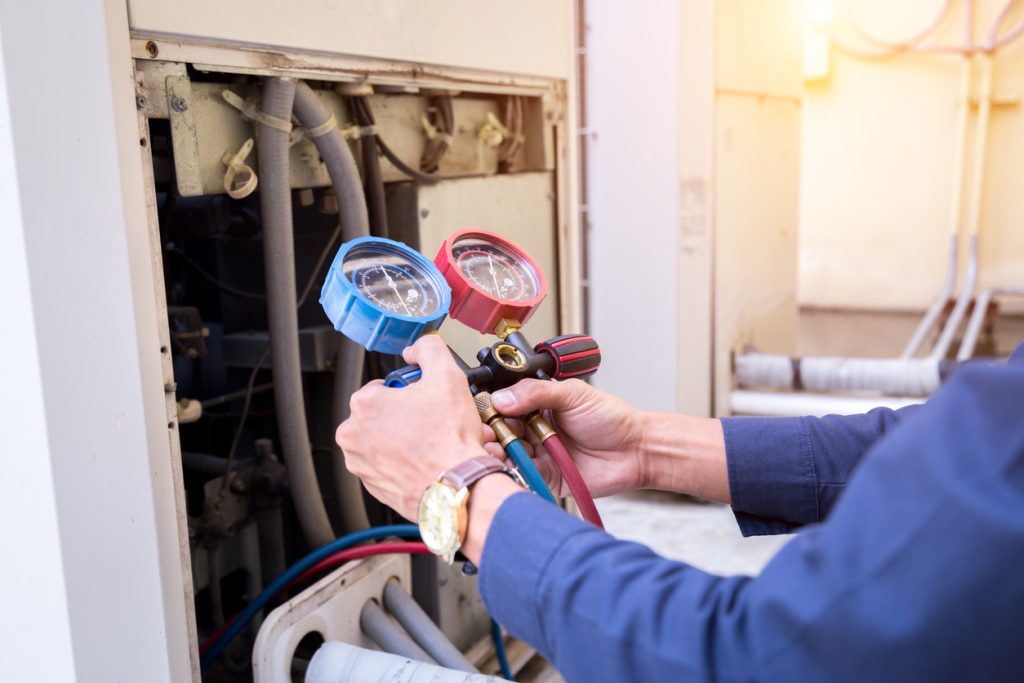
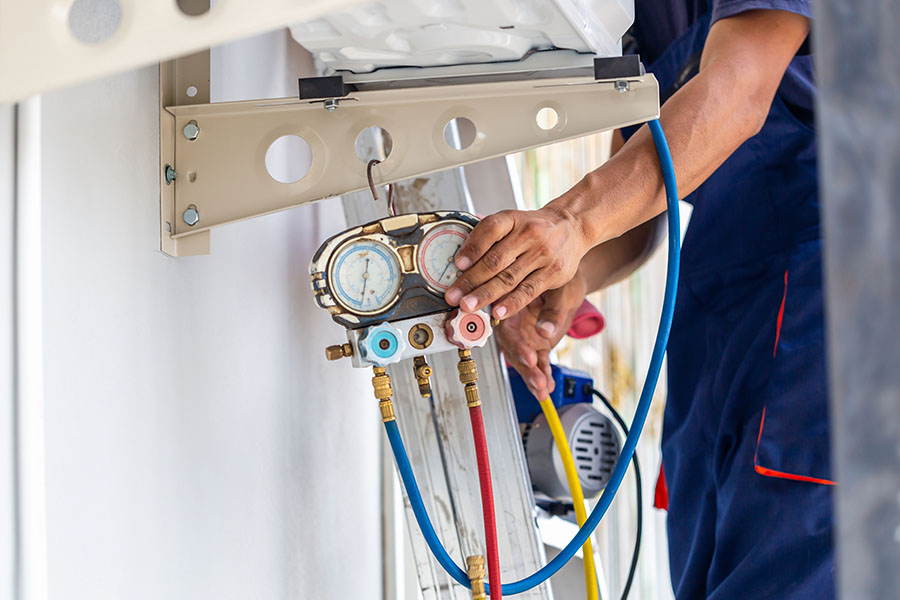
Humidity Management

Air conditioners naturally manage indoor humidity by cooling air. As warm, moist air passes over cold evaporator coils, the refrigerant absorbs heat and moisture. This process—condensation—turns water vapor into liquid that drains from your system, maintaining humidity between 30-50% in summer.

Proper humidity control prevents mold and mildew growth, eliminates musty odors, protects structural elements from water damage, and keeps you comfortable during humid Texas summers.
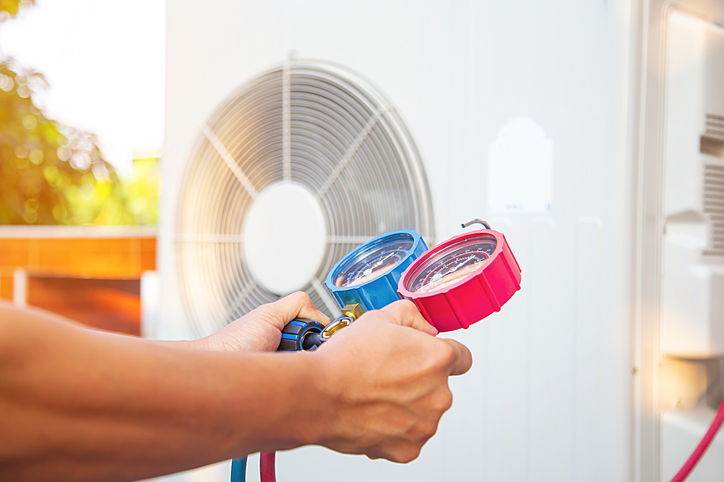
Ventilation

Your HVAC system draws fresh air from outdoors, filters it for particles, and circulates it throughout your home. This ventilation is crucial for diluting indoor pollutants and preventing contaminant buildup. Without adequate ventilation, polluted air remains trapped inside, continuously recirculating harmful particles.

Heat and Comfort

Adequate heating isn’t just about comfort—it protects health. Studies show that just 45 minutes in a cold room decreases muscle strength in elderly people. Proper heating helps everyone move safely and maintains overall physical function during winter months.

Practical Ways to Improve Indoor Air Quality

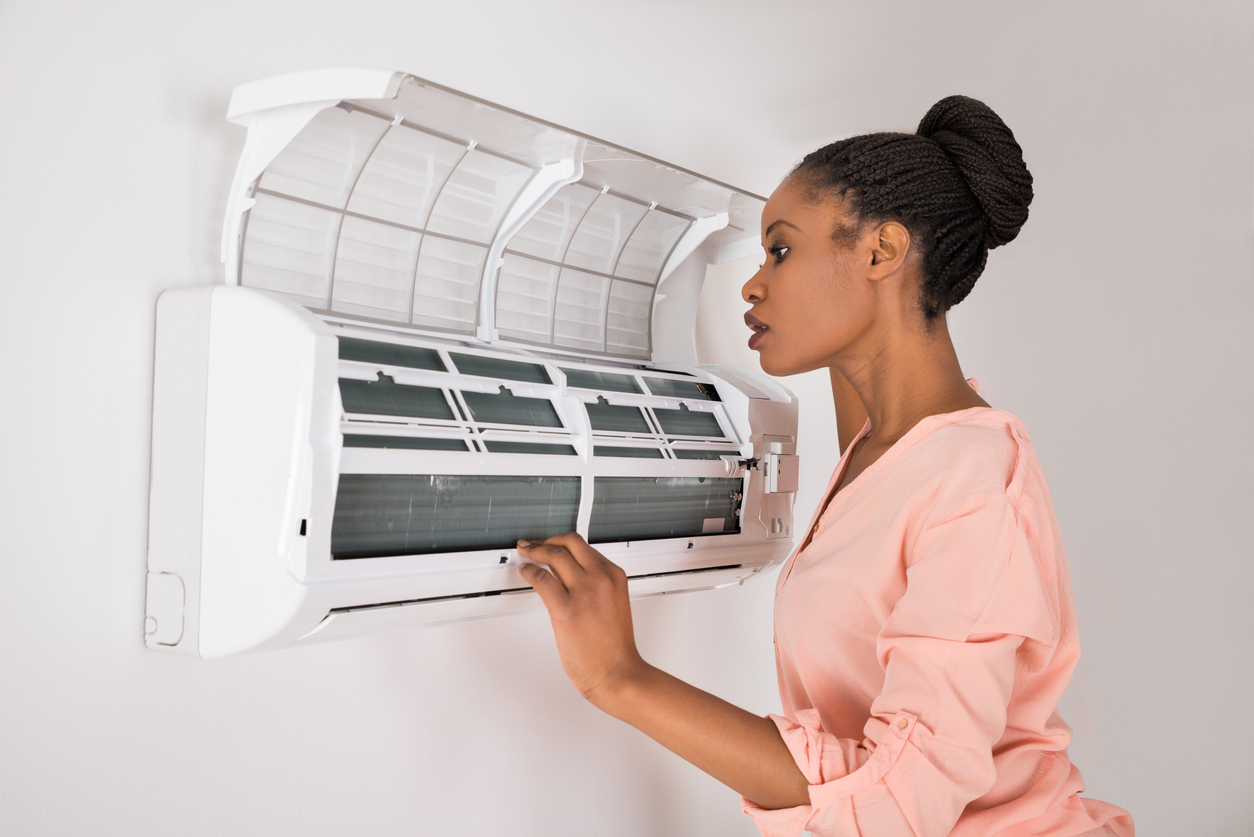
1. Replace HVAC Air Filters Regularly

This is the single most important action you can take. As your HVAC cycles air throughout your home, filters trap pollutants. Over time, contaminants accumulate, preventing filters from doing their job and potentially allowing pollutants to recirculate.

Best practices:

  • Inspect filters monthly
  • Replace every 1-3 months (more frequently with pets)
  • Consider HVAC service plans that include filter replacements
  • Perform visual inspections—hold filters up to light; if little light passes through, it’s time to replace them

2. Control Humidity Levels

Install a dehumidifier to reduce moisture during humid months, preventing mold growth and keeping you comfortable. In winter, when heating systems create overly dry conditions, a humidifier adds necessary moisture back into the air.

Balancing humidity throughout the year—dehumidifying in summer, humidifying in winter—helps alleviate seasonal allergies and maintains optimal indoor air quality year-round.

3. Improve Ventilation

One of the fastest ways to improve air quality is increasing ventilation:

  • Open doors and windows when outdoor temperatures are comfortable to create cross-breezes
  • Run exhaust fans while cooking to carry gases outdoors
  • Ensure adequate ventilation when using cleaners or chemicals
  • Consult HVAC professionals about improving existing ventilation systems

4. Install Advanced Air Cleaning Systems

Advanced air purifiers work like HVAC filters but with significantly higher efficiency. Made from high-quality materials, these systems trap even minuscule contaminants like dust and dander.

Air purifiers can even capture airborne viruses, reducing transmission of airborne infections—especially useful when weather doesn’t permit opening windows. They provide exceptional protection from allergens, bacteria, and pollutants.

5. Add UV Lighting

UV lights reduce or eliminate biological contaminants including mold spores, viruses, and bacteria. Installing UV lights in your HVAC system provides an additional layer of protection against harmful microorganisms.

6. Practice Source Control

Keep contaminants out or eliminate them quickly:

  • Groom pets regularly and vacuum frequently to control pet hair and dander
  • Run stove exhaust fans while cooking
  • Provide proper ventilation when working with cleaners or chemicals
  • Remove mold and mildew immediately when discovered
  • Choose low-VOC paints and building materials
  • Store chemicals and pesticides properly

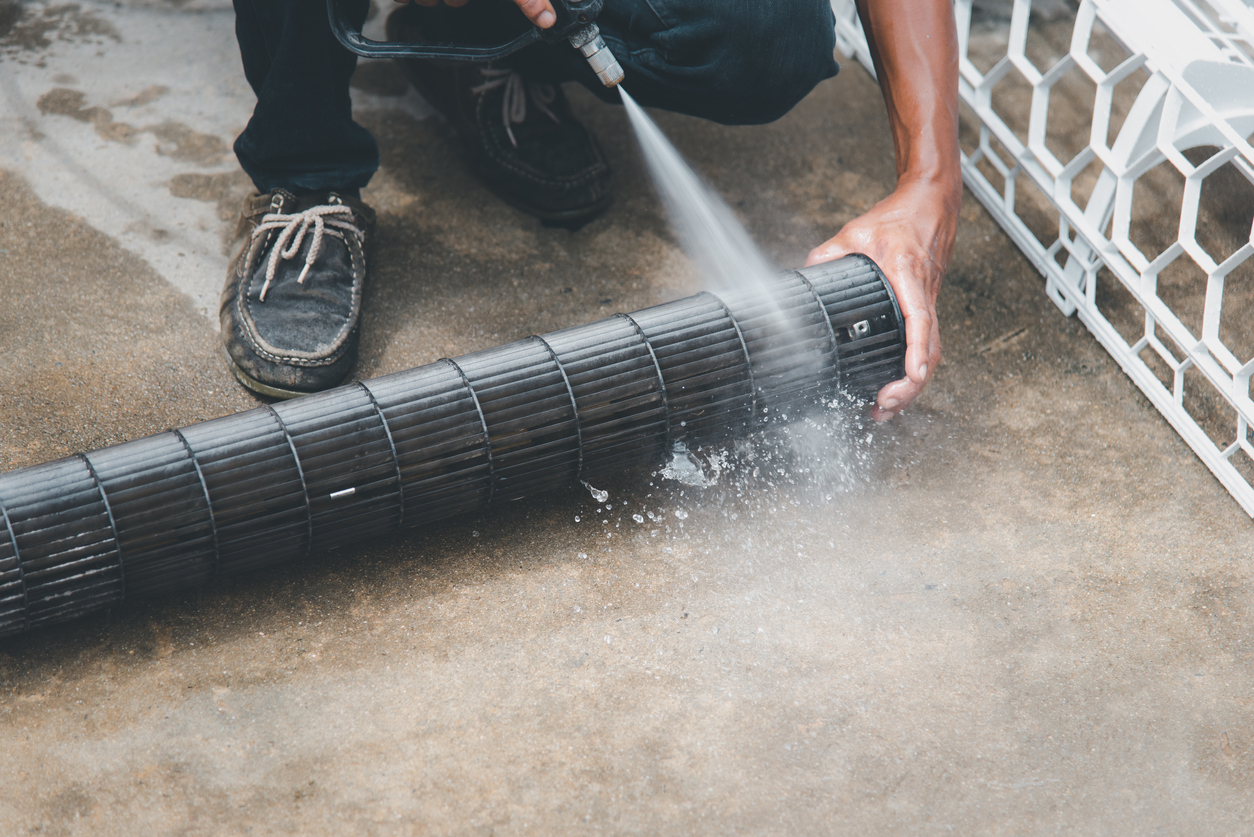
7. Schedule Professional Air Duct Cleaning

As air travels through ductwork, it carries pollutants that build up over time, leading to unpleasant odors, decreased air quality, and mold growth. Annual professional duct cleaning ensures clean air travels through clean ducts before reaching your lungs.

8. Add Indoor Plants

House plants aren’t just decorative—they’re nature’s air filters. Ferns, aloe vera, pothos, and spider plants naturally filter air and help you breathe easier. While they won’t replace mechanical filtration, they complement your air quality improvement efforts.

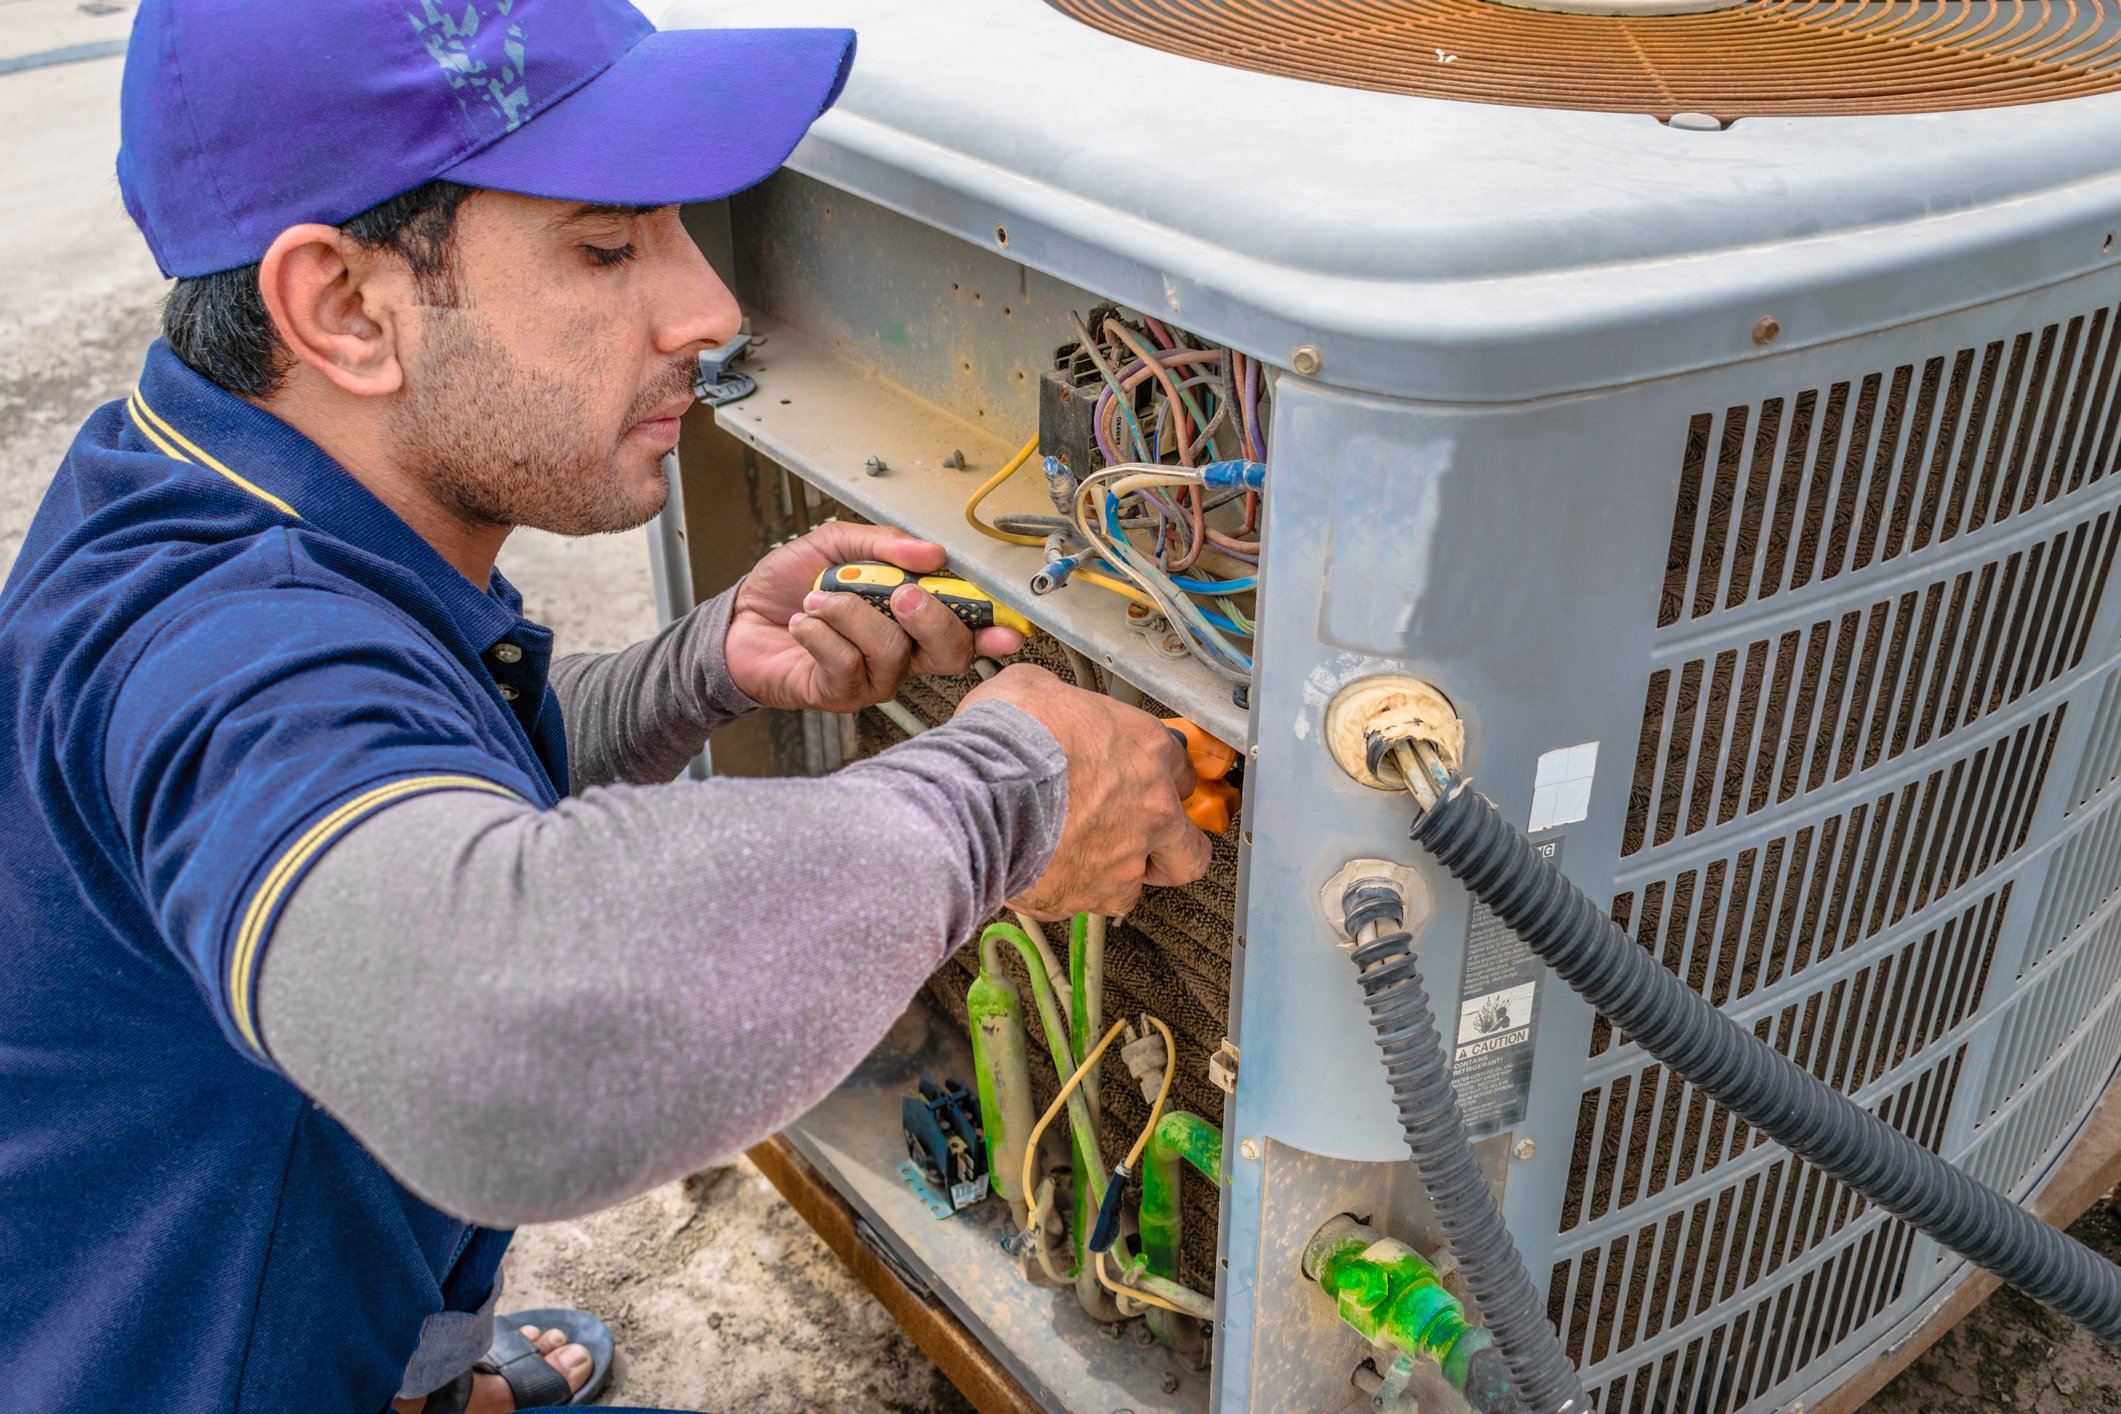
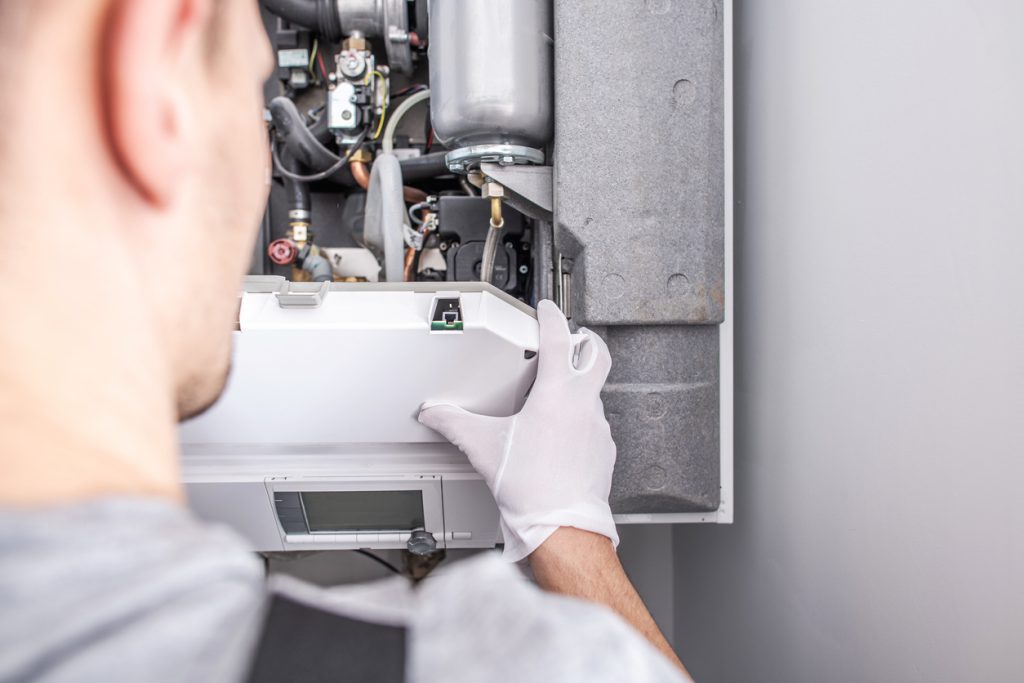
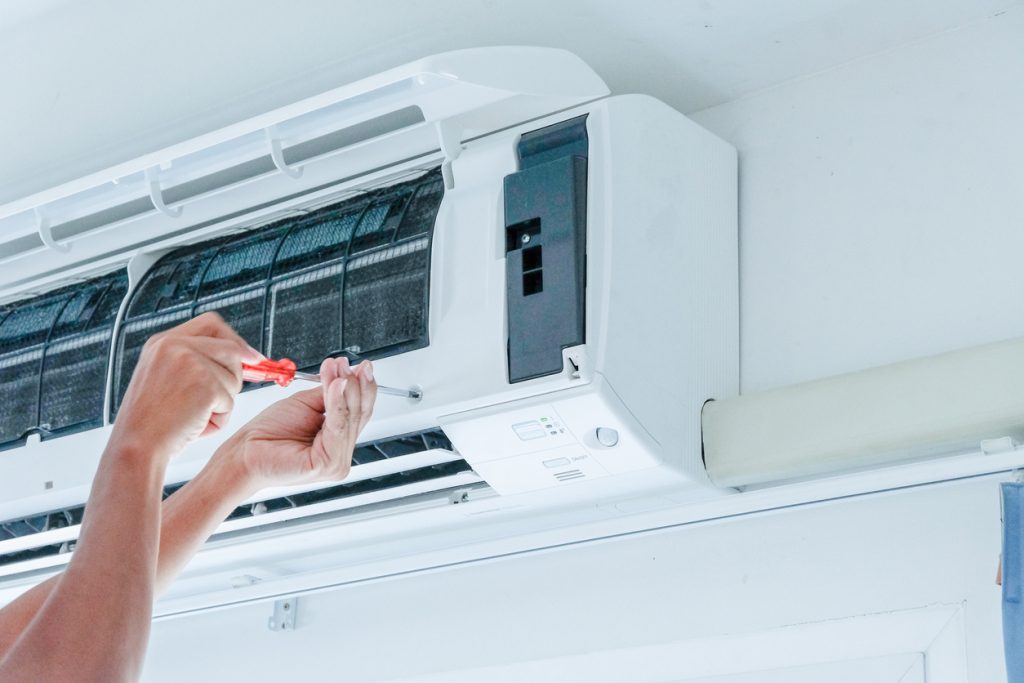
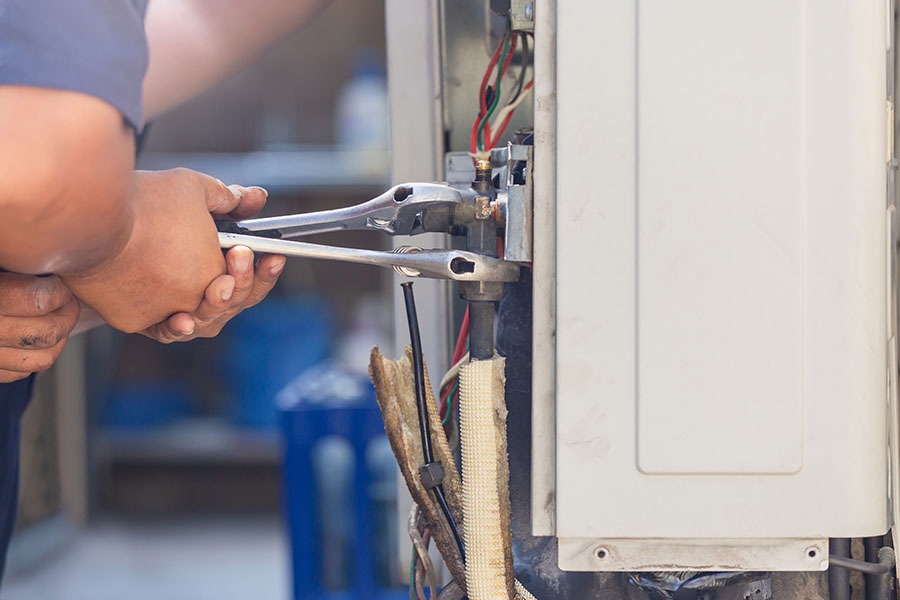
9. Keep Up With Regular HVAC Maintenance

Professional HVAC maintenance is essential for maintaining optimal indoor air quality. Schedule service twice yearly—spring for summer preparation and fall for winter readiness.

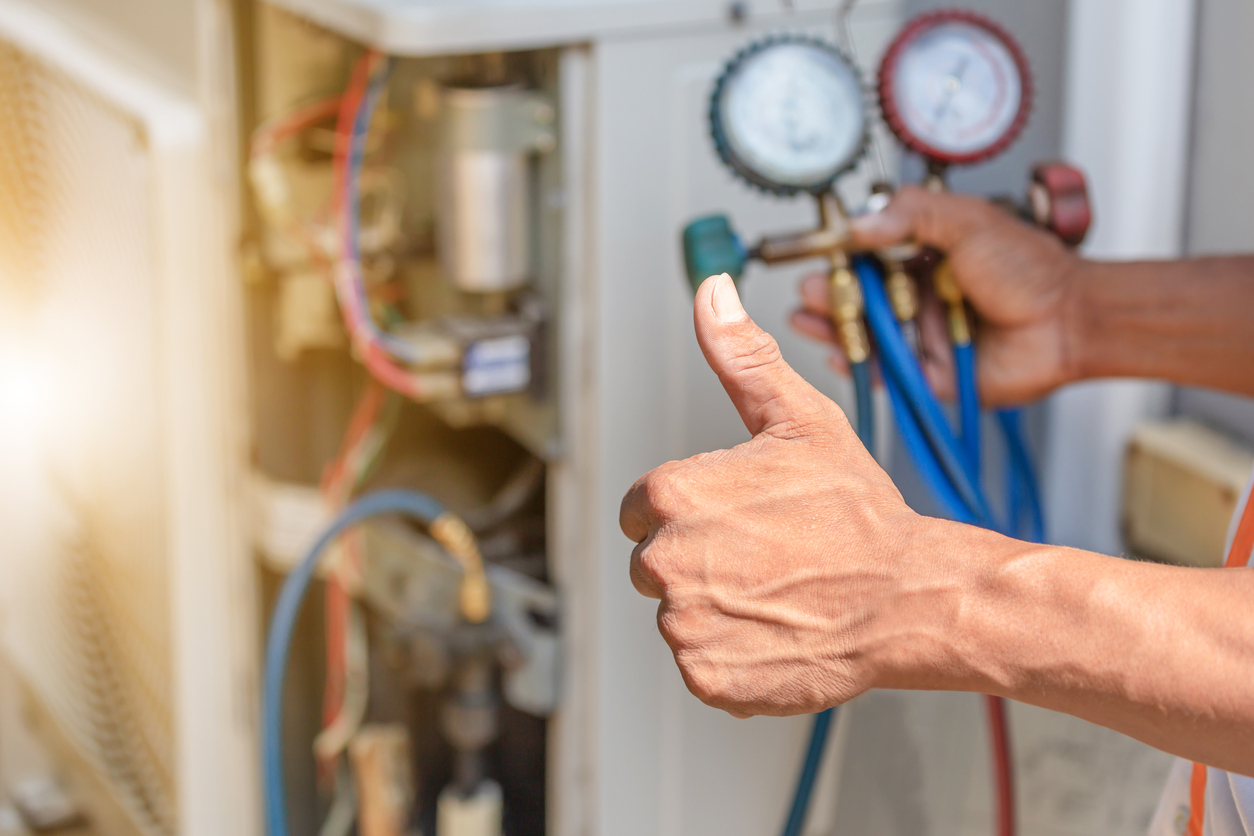
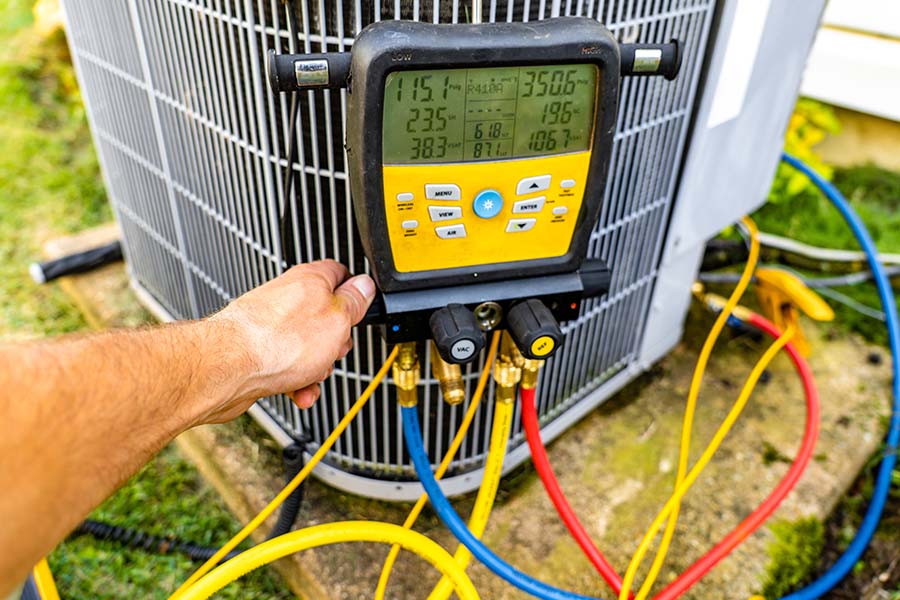
Professional tune-ups include:

  • Top-to-bottom cleaning and inspection
  • Filter replacement
  • Component testing and adjustment
  • Identification of worn parts before they fail
  • Indoor air quality evaluation
  • Expert recommendations based on your home and lifestyle

Regular maintenance ensures your HVAC system operates at peak efficiency, maximizing its air quality benefits while preventing breakdowns.

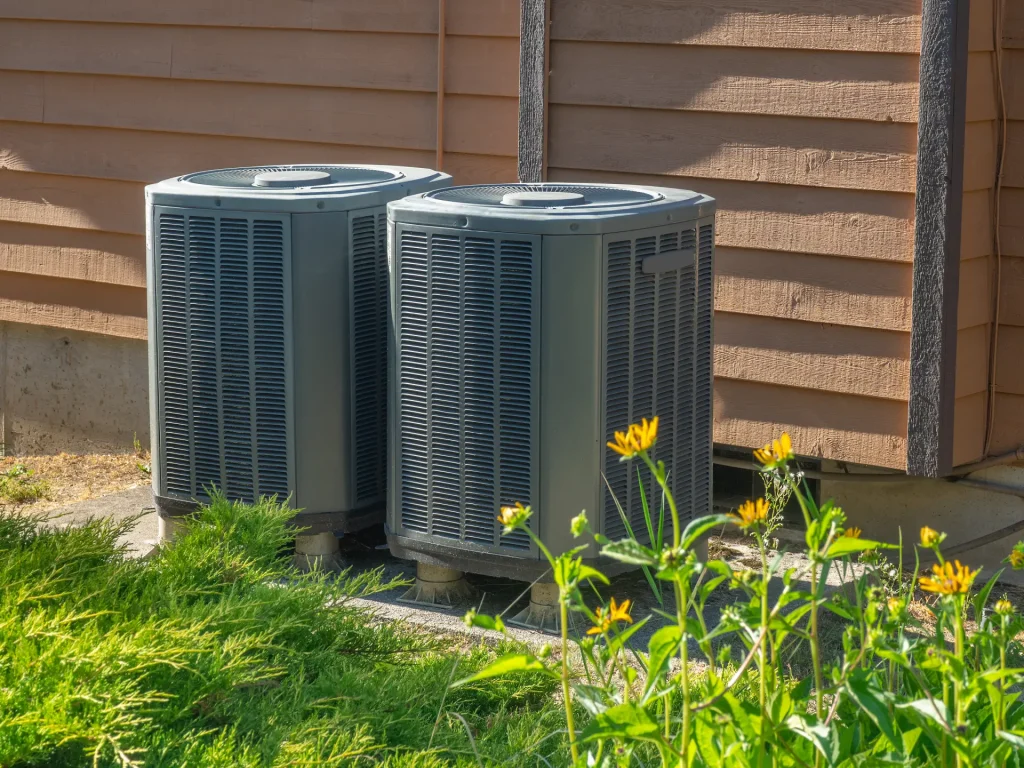
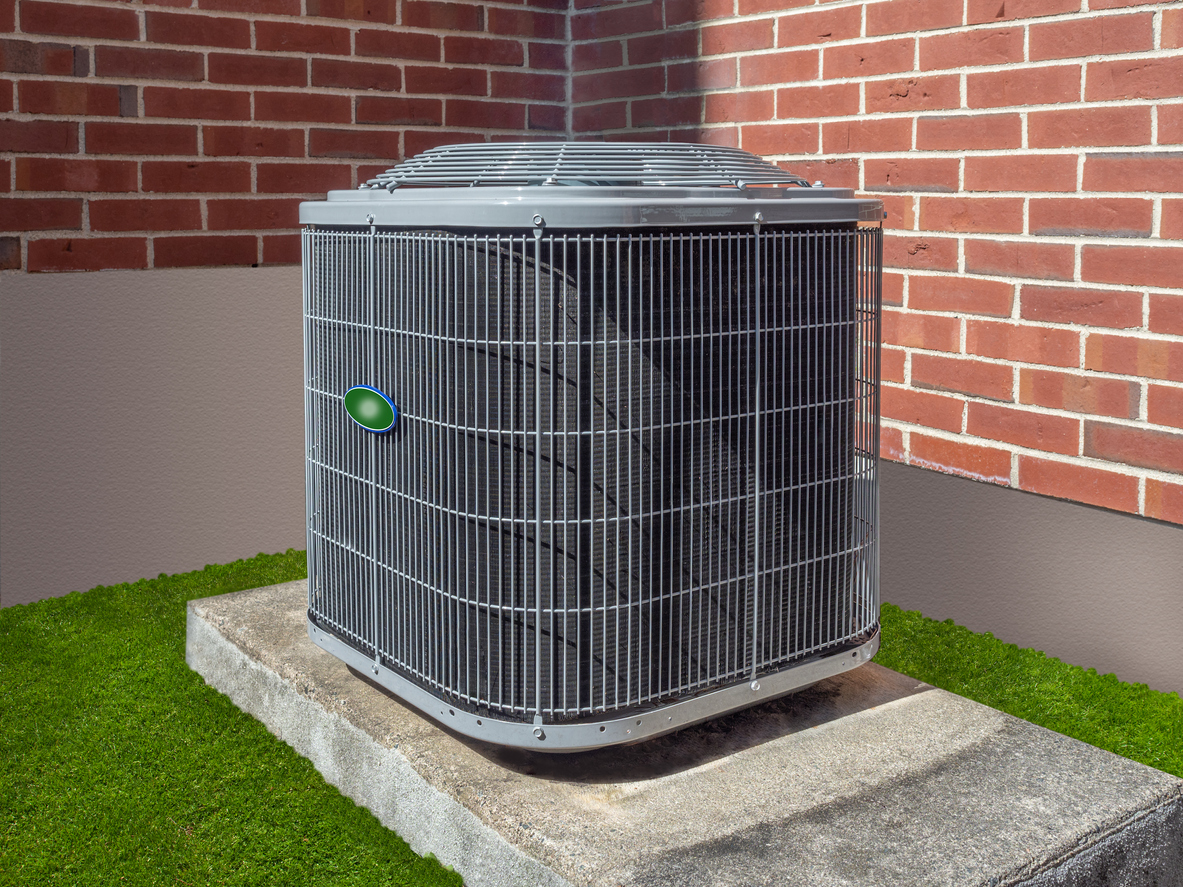
When to Consider HVAC Replacement

Sometimes improving indoor air quality requires updating your HVAC system. Consider replacement if:

Your system is 10+ years old: Older units lack modern filtration and efficiency features

You’re experiencing frequent repairs: Constant fixes indicate systemic problems

Energy bills keep rising: Inefficient systems work harder, consuming more energy

Your system can’t control humidity: Inadequate dehumidification or improper sizing creates persistent moisture problems

You notice loud noises or inconsistent performance: Failing components compromise air quality and comfort

Modern HVAC systems offer significantly better air filtration, humidity control, and energy efficiency than older models. Upgrading your system can dramatically improve indoor air quality while reducing operating costs.

Trust Dial One Johnson for Indoor Air Quality Solutions

At Dial One Johnson Plumbing, Cooling & Heating, we’re committed to helping you breathe easier. Our family-owned business has served the Dallas area for over 50 years, providing expert HVAC services, indoor air quality evaluations, and personalized solutions.

We offer:

  • Advanced air cleaning systems for superior filtration
  • UV light installation for biological contaminant control
  • Dehumidifier and humidifier solutions for humidity management
  • Professional duct cleaning services
  • Comprehensive HVAC maintenance plans
  • Expert guidance on improving your home’s air quality
  • New HVAC installation when upgrades make sense

Our certified technicians understand Texas’s unique climate challenges and can recommend solutions tailored to your specific needs, home, and lifestyle.

Breathe Cleaner Air Today

Indoor air quality significantly impacts your health, comfort, and productivity. Don’t wait for symptoms to worsen or air quality to deteriorate further. Take action now to improve the air you and your family breathe every day.

Whether you need a simple filter replacement, professional duct cleaning, advanced air purification systems, or a complete HVAC upgrade, Dial One Johnson Plumbing, Cooling & Heating is here to help.

Contact us today at 972-291-0740 or reach out online to schedule an indoor air quality evaluation and start breathing cleaner, healthier air.

Posted in

Air Conditioning Repair vs Replacement

When your air conditioner stops working during a sweltering Texas summer, it creates immediate stress. You’re faced with urgent questions: What’s wrong? Can it be fixed? If it needs replacing, can I afford it? The good news is that air conditioners break all the time, and in most cases, they’re fixable. Even when replacement is necessary, the right HVAC company will help you with financing options to ease the burden.

This article will help you understand common AC problems, determine when repair makes sense versus replacement, and make an informed decision that’s right for your home and budget.

Diagnosing the Problem: What's Wrong With Your AC?

Before jumping to conclusions about repair or replacement, investigate the problem. Air conditioners communicate issues through specific symptoms, much like a car pulls to one side when it needs alignment. Ask yourself these diagnostic questions:

  • Will the air conditioner turn on at all?
  • Is the AC blowing air? If so, is it cool or warm?
  • Is the unit leaking water?
  • Does the AC fan appear to be working?
  • Is the AC making strange noises?
  • Is your circuit breaker tripping repeatedly?

Answering these questions gets you started down the right path toward a solution.

Common AC Issues and What They Mean

Understanding typical AC problems helps you communicate effectively with technicians and make informed decisions.

Poor Airflow

Restricted airflow can result from a dirty or clogged air filter, malfunctioning fan, or blocked ductwork. When airflow is limited, your unit can’t cool your home effectively, leading to increased energy bills and decreased comfort.

Refrigerant Leaks

Refrigerant is the substance that cools air in your system. Leaks result in decreased cooling capacity, higher energy bills, and potential environmental harm. Signs include low air output, hissing or bubbling sounds, frozen coils, and ice formation on the unit.

Dirty or Clogged Filters

Over time, air filters accumulate dust, dirt, and debris, restricting airflow and reducing efficiency. This causes higher energy bills, decreased comfort, poor indoor air quality, and can exacerbate allergies or respiratory issues.

Compressor Failure

The compressor circulates and compresses refrigerant to provide cool air. When it fails, you get decreased cooling capacity or no cooling at all. Warning signs include strange noises, warm air from vents, and unexpectedly high energy bills.

Electrical Issues

Power surges, short circuits, or component damage can cause abrupt failures. Problems with capacitors, relays, or wiring prevent your system from starting or operating properly.

Thermostat Problems

A malfunctioning thermostat can’t properly communicate with your AC unit, causing inefficient operation or preventing the system from running at all.

AC Repair or Replace

Low-Cost AC Repairs Worth Considering

Many AC problems have straightforward, affordable solutions. Before assuming you need expensive repairs or replacement, consider these cost-effective fixes.

Cleaning or Replacing the Air Filter

This is the simplest and most impactful repair. Dirty filters restrict airflow and force your unit to work harder, decreasing efficiency and increasing energy bills. Regular filter changes (every 1-3 months) can prevent many larger problems.

Thermostat Replacement

A faulty thermostat causes inefficient operation or complete system failure. Replacing it is relatively inexpensive and can dramatically improve temperature control.

Cleaning the Evaporator Coil

Dirty or clogged evaporator coils restrict airflow and force your unit to work harder. Professional coil cleaning is a low-cost repair that improves system efficiency.

Refrigerant Leak Repair

If your AC is low on refrigerant due to a leak, repairing the leak and recharging the system can restore proper function and avoid more serious damage from the unit running low on refrigerant.

Fan Motor Replacement

When the fan motor fails, your unit works harder and loses efficiency. Replacing a fan motor is more affordable than replacing the entire system.

Capacitor Replacement

The capacitor starts your AC and keeps it running. If your AC won’t turn on, a dead capacitor could be the culprit. Capacitors can be recharged or replaced relatively inexpensively.

Unclogging the Condensate Line

When the condensate drain becomes clogged, your AC shuts off to prevent short circuits. Once unclogged, normal function typically resumes.

Replacing Blown Fuses

A blown thermostat fuse prevents communication between your thermostat and AC unit. Simple fuse replacement solves this problem.

While these repairs can be effective and affordable, they’re not always the best long-term solution. Some issues indicate larger systemic problems where replacement makes more financial sense.

When AC Replacement Makes More Sense

Certain indicators suggest that replacement, rather than continued repairs, is the smarter investment.

Age of the Unit

Air conditioners typically last 10-15 years with proper maintenance. If your unit is approaching or past this lifespan, replacement is often more cost-effective than continued repairs. Older units are significantly less energy-efficient than modern models, meaning higher operating costs even when functioning properly.

Uses R-22 Refrigerant

As of January 1, 2020, the EPA banned the production and import of R-22 (hydrochlorofluorocarbon-22) in the United States to protect the ozone layer. While existing R-22 systems can still be used and serviced with recycled or stockpiled supplies, no new R-22 is being produced. Costs for R-22 are significantly higher, encouraging a transition to ozone-friendly alternatives. If your system uses R-22, replacement with a modern system using environmentally friendly refrigerant makes long-term financial and environmental sense.

Frequency of Repairs

If you’re calling for repairs every few months, you’re wasting money that could go toward a new, reliable system. Frequent repairs also indicate larger, systemic issues that won’t be resolved with patchwork fixes.

High Repair Costs

Lorem ipsum dolor sit amet, consectetur adipiscing elit. Ut elit tellus, luctus nec ullamcorper mattis, pulvinar dapibus leo.

Rising Energy Bills

Older, failing systems work harder to achieve the same cooling, driving up energy costs. If your bills have increased significantly without explanation, your AC may be operating inefficiently.

Inability to Cool Adequately

If your AC can’t maintain comfortable temperatures throughout your home despite repairs, it may be undersized, failing, or past its useful life.

Making the Decision: Repair or Replace?

AC repair makes sense when:

  • The unit is relatively new (under 10 years old)
  • The repair is minor and low-cost
  • The unit has been well-maintained and has significant life remaining
  • You plan to move soon and need a temporary solution

AC replacement makes sense when:

  • The unit is old and approaching or past its expected lifespan
  • Repair costs are high (approaching 50% of replacement cost)
  • The unit requires frequent repairs
  • Energy bills have increased significantly
  • The unit uses R-22 refrigerant
  • You’re planning to stay in your home long-term

There’s no one-size-fits-all answer. The right choice depends on your unit’s age and condition, cost-effectiveness of repairs versus replacement, your long-term plans, and your budget.

What to Do When Your AC Unit Stops Working

Important Questions to Ask Your HVAC Technician

Before making any decisions, have an honest conversation with a trusted HVAC professional. Here are essential questions to ask:

Should I Repair or Replace?

Get a professional assessment of your specific situation. A qualified technician will provide an honest evaluation based on the unit’s condition, repair costs, and your best interests.

What Are the Benefits of a New System?

Modern air conditioners offer significant advantages:

  • Improved energy efficiency reduces monthly utility bills
  • Better indoor air quality with advanced filtration
  • Enhanced humidity control improves comfort
  • Quieter operation with updated technology
  • Smart thermostat compatibility for better control
  • Fewer repairs with new, reliable equipment
  • Increased home value with updated systems

What's Involved in Installation?

Understanding the installation process helps you plan appropriately. Professional installation includes:

  • Removing the old unit
  • Calculating your home’s cooling load to determine proper sizing
  • Presenting appropriate, affordable options
  • Installing refrigerant coils, lines, condenser, and components
  • Updating or installing necessary ductwork
  • Filling refrigerant coils
  • Testing the complete system

Quality installation takes time but ensures your system operates efficiently for years.

What Financing Options Are Available?

Air conditioning services can be expensive, and paying upfront isn’t feasible for most homeowners. Ask about financing options—reputable HVAC companies offer payment plans to make necessary repairs or replacements accessible without financial strain.

At Dial One Johnson, we partner with financing providers so cost isn’t a barrier to comfort. We believe you shouldn’t have to choose between living uncomfortably and overextending yourself financially.

Extending Your AC's Lifespan

Replace Air Filters Regularly

Change filters every 1-3 months. This simple task prevents numerous problems and extends system life significantly.

Schedule Professional Maintenance

Have your system serviced at least twice yearly—ideally before cooling season and again before winter. Regular maintenance catches small issues before they become major failures.

Use a Programmable Thermostat

Smart thermostats reduce unnecessary runtime, decreasing wear and improve efficiency.

Reduce Heat Inside Your Home

Help your AC by:

  • Using high heat-producing appliances during cooler morning and evening hours
  • Blocking sun with quality blinds or thermal curtains during peak heat
  • Improving home insulation to retain cool air longer
  • Ensuring your outdoor unit has shade from direct sunlight

Maintain Proper Clearance

Keep at least two feet of clearance around your outdoor unit. Trim vegetation, remove debris, and ensure unrestricted airflow.

Trust Dial One Johnson for Expert Guidance

At Dial One Johnson Plumbing, Cooling & Heating, we understand how stressful AC problems can be. Our family-owned business has served the Dallas area for decades, and we’re committed to providing honest assessments, quality service, and fair prices.

We’ll never pressure you into unnecessary replacements, but we’ll also be straightforward when replacement makes better financial sense than continued repairs. Our certified technicians have the expertise to accurately diagnose problems, perform reliable repairs, and install new systems that keep your home comfortable for years to come.

Whether you need emergency repairs, routine maintenance, or a complete system replacement, we’re here to help. We offer multiple financing options to ensure cost isn’t a barrier to the comfort and safety you deserve.

Don’t let AC problems leave you uncomfortable. Contact Dial One Johnson Plumbing, Cooling & Heating at 972-291-0740 or reach out online to schedule service today.

Posted in

The Ultimate Guide to Furnace Maintenance

Texas winters may be unpredictable, but one thing remains certain: when temperatures drop, you want a heating system that works reliably. Whether you’re bouncing between air conditioning and heat as northern fronts roll through the Dallas area or settling in for a stretch of cold weather, proper furnace maintenance ensures your family stays comfortable without worry.

At Dial One Johnson Plumbing, Cooling & Heating, we’ve been helping homeowners maintain their heating systems for over 50 years. This comprehensive guide covers everything you need to know about furnace maintenance—from why it matters to what you can do yourself and when to call the professionals.

Why Furnace Maintenance Matters

Regular furnace maintenance isn’t just recommended—it’s essential for safety, efficiency, and long-term value. Here’s why scheduling professional maintenance and completing basic upkeep should be priorities.

1. Safety First

Your family’s safety is the number one priority. With natural gas furnaces increasing in popularity due to high efficiency ratings, the risk of carbon monoxide leaks shouldn’t be taken lightly.

Properly functioning furnaces release carbon monoxide through an exhaust pipe that vents safely outside your home. Over time, parts may fail or connections may loosen, creating leaks that trap carbon monoxide inside. Regular maintenance allows HVAC technicians to identify faulty parts before they create health hazards, including carbon monoxide poisoning.

Additionally, furnaces generate significant heat and use combustible fuel, creating fire risks if not properly monitored. Professional maintenance catches potential safety issues before they become emergencies.

2. Significant Cost Savings

Lower monthly utility bills: When operating properly, your furnace heats your home efficiently. You can expect slight increases during heavy usage months, but well-maintained systems avoid large energy bill spikes caused by inefficiencies.

Reduced repair costs: The overwhelming majority of emergency furnace repairs can be prevented with regularly scheduled maintenance. While maintenance doesn’t eliminate all repair needs, it dramatically reduces their frequency.

Avoid premature replacement: Most manufacturers state furnaces should last 15-20 years. Since HVAC systems require significant investment, maximizing this lifespan through maintenance protects your investment and avoids premature replacement costs.

3. Improved Efficiency

Your furnace is a complex system with multiple parts working together to efficiently heat your home. Something as small as a dirty air filter can impact operation and lead to larger issues.

Well-maintained furnaces heat homes more efficiently, which is critical during periods of heavy use. Aging furnaces require more attention, but those with a history of proper maintenance are less likely to develop efficiency problems.

4. Extended System Lifespan

Just as changing your car’s oil increases its longevity, regular furnace maintenance helps your system last as long as possible. Proper care can mean the difference between a furnace lasting 20 years with few repairs versus 15 years with frequent problems.

5. Warranty Protection

For newer HVAC systems, most repairs are covered by manufacturer warranties. However, the fine print often requires regular maintenance by licensed professionals to maintain coverage.

Maximizing warranty coverage protects you from unexpected expenses. From the manufacturer’s perspective, mandatory maintenance reduces the risk of major repairs caused by neglect or improper care.

6. Peace of Mind

Perhaps most importantly, regular maintenance provides peace of mind. You won’t wake up on a freezing morning to discover your heating has failed. You’ll know your system is ready to handle whatever Texas weather brings.

How Often Should You Service Your Furnace?

Most furnace and boiler manufacturers recommend professional maintenance at least once annually, ideally in early fall before heating season begins. This timing ensures you have adequate time for any necessary repairs before winter arrives.

However, several factors may require more frequent service:

  • High humidity areas: More frequent filter changes and inspections
  • Homes with pets: Increased dust and dander requires more attention
  • Older systems: Aging furnaces benefit from twice-yearly professional service
  • Heavy usage: Systems that run frequently need more regular care

Always consult with your heating contractor for personalized recommendations based on your specific system, usage patterns, and local conditions.

What to Look for When Choosing Heating Repair Services

DIY Furnace Maintenance Tasks

While professional service is essential, there are several maintenance tasks you can handle yourself between professional visits. Always follow proper safety precautions: turn off power before completing any maintenance and wear protective clothing.

Replace Air Filters Regularly

This is the single most important DIY task. Most homeowners know filters should be replaced monthly, but how many actually do it?

Your filter removes dust, dander, and debris from the air while keeping your furnace running efficiently. When filters become clogged, airflow becomes blocked, forcing your furnace to work harder. Eventually, the system sustains damage or shuts down completely.

Best practices:

  • Check filters monthly during heating season
  • Replace every 1-3 months, or more frequently with pets
  • Keep spare filters on hand
  • Choose higher-quality filters designed for homes with pets if applicable

The cost of a filter is minimal compared to repair or replacement costs. Filters are available at any home improvement store and many grocery stores.

Clean the Unit and Surrounding Area

Your furnace needs clean surfaces to operate efficiently:

  1. Turn off power to the furnace
  2. Wipe down the unit’s surface
  3. Open grilles and covers to gently blow out dust and dirt with low vacuum settings
  4. Ensure at least two feet of clearance around the unit
  5. Keep the area free of flammable objects (three feet minimum)

Better airflow improves efficiency. Your HVAC technician provides in-depth cleaning during professional service, so don’t worry about reaching every component.

Inspect Critical Components

Perform regular visual inspections to catch problems early:

Heat Exchanger: Look for cracks or damage. A cracked heat exchanger can leak carbon monoxide into your home—extremely dangerous and requiring immediate professional attention.

Burners: Check burner flame color. They should be blue. Orange or yellow flames indicate burners need cleaning by a professional.

Intake Vents: Ensure indoor intake vents aren’t blocked by furniture, debris, or pet hair. Most intake vents are located near your HVAC’s indoor unit.

Open Vents Throughout Your Home

This simple task makes a significant difference. Open vents in rooms you use regularly, but you can close vents in rarely used spaces like guest bedrooms.

Open vents maintain proper airflow throughout your home, reducing strain on your system and ensuring comfort. Consider updating older vents for improved efficiency.

Listen for Unusual Sounds

Your furnace’s normal operation becomes background noise. Periodically listen for subtle changes:

  • Knocking or squeaking may indicate developing issues
  • Severe screeching or clanking requires immediate attention
  • Popping or rumbling suggests burner ignition problems

When in doubt, call a professional for diagnosis rather than waiting for complete failure.

The Value of Professional Furnace Service

While DIY maintenance helps, professional service provides benefits you simply can’t achieve on your own.

Comprehensive Inspections and Cleaning

Professional technicians perform thorough inspections that include:

  • Cleaning burner assemblies and blower components
  • Inspecting heat exchangers for cracks or corrosion
  • Checking all electrical connections
  • Testing safety features and controls
  • Verifying proper combustion and venting
  • Measuring system efficiency
  • Identifying potential problems before they cause failures

Expertise and Training

HVAC technicians undergo years of training to master furnace systems. They can identify issues you might miss and know when situations are unsafe. They also have specialized tools and personal protective equipment to work safely.

Time and Cost Efficiency

While DIY enthusiasts claim you can save thousands doing your own repairs, DIY projects often cost as much or more when you factor in:

  • Tools and equipment purchases
  • Parts and materials
  • Time investment (entire weekends or longer)
  • Risk of mistakes requiring professional correction anyway

Professional technicians solve problems quickly and correctly the first time, ultimately saving you time and money.

Emergency Service Availability

Partnering with a local HVAC company means help is available when you need it most. Once you’ve established a relationship, your information is on file, making emergency calls faster and easier.

At Dial One Johnson, we provide 24-hour emergency service for heating, cooling, and plumbing issues. Don’t waste time searching for different companies—find one that handles all your home service needs.

Warranty Compliance

Professional maintenance keeps manufacturer warranties valid, protecting you from unexpected expenses on newer systems.

hvac repair grand prairie tx

Essential Safety Precautions

Fire Safety

Furnaces generate significant heat, creating fire risks without proper care:

  • Keep objects at least two feet from furnaces
  • Keep flammable objects at least three feet away
  • Test smoke alarms monthly
  • Replace smoke detectors every 10 years (preferably hardwired units)
  • For homes with fireplaces: annual chimney inspections and cleanings, glass screens, proper ash disposal
  • Turn off portable heaters and extinguish candles before bed
  • Never plug heating appliances into extension cords—use grounded outlets only
  • Inspect electrical heating appliances for damage before use
  • Water live holiday trees daily and keep away from fireplaces

Carbon Monoxide Safety

Most gas furnaces have heat exchangers that can crack from constant expansion and contraction. Cracked heat exchangers may leak carbon monoxide—a tasteless, odorless gas causing headaches, nausea, and death.

Protection measures:

  • Install carbon monoxide detectors on every level of your home
  • Place a detector above or next to your furnace
  • Test detectors monthly
  • Replace detector batteries as needed
  • Never ignore detector alerts—evacuate and call emergency services

Hot Water and Leak Safety

Hydronic furnaces can develop water leaks in piping, especially after long periods of non-use. Water leaks cause structural damage and create burn risks.

Call an HVAC technician immediately if you notice puddles around your furnace. For radiators, install insulation on bodies and valves to prevent burns.

Electrical Safety

For electric heating systems, leave all repairs to professionals. The only electrical component you should touch is the breaker switch. Turn power completely off before attempting any maintenance work.

Gas Leak Safety

Natural gas companies add sulfur smell to gas for leak detection. If you smell this:

  1. Call 911 immediately
  2. Evacuate your home
  3. Open doors and windows if safely possible
  4. Don’t operate light switches—they can ignite gas
  5. Wait for fire department clearance before returning
  6. Schedule heating repair once safe

Understanding Your Heating System

Heating systems fall into two broad categories: furnaces (using air as the heat-carrying medium) and boilers (using water). However, many variations exist, making it important to work with professionals who understand your specific system.

Common Heating System Types

Furnaces: The most common type, furnaces blow heated air through ducts. They’re available in gas-fired, oil-fired, and electric models. Gas furnaces are most popular due to cost-effectiveness and efficiency.

Boilers: Typically used where natural gas pipelines aren’t available, boilers heat water that circulates through pipes and radiators. Steam boilers use gas or oil-fired burners.

Heat Pumps: Use electricity to distribute heat, making them more efficient than traditional furnaces and boilers. They transfer heat from outside sources (air, ground, or water) through your home’s ductwork.

Radiant Floor Systems: Hot-water systems using tubing installed under floors, circulating heated water to provide warmth.

Because system types vary significantly, work with professionals who can recommend appropriate maintenance schedules and procedures for your specific equipment.

Why Choose Dial One Johnson for Your Furnace Maintenance

At Dial One Johnson Plumbing, Cooling & Heating, we’ve been serving the Dallas area as a family-owned and operated business for over 50 years. We understand the ins and outs of the HVAC industry and prioritize helping our neighbors, not just completing transactions.

Our Comprehensive Services

  • Professional maintenance plans: Choose the plan that fits your needs and save money on necessary appointments
  • Emergency services: 24-hour availability for heating, cooling, and plumbing emergencies
  • Expert repairs: Highly trained, certified technicians committed to quality workmanship
  • System replacements: When repair isn’t cost-effective, we guide you through replacement options
  • Honest assessments: We’ll never pressure you into unnecessary services

Our Commitment to You

Heating service isn’t just about fixing problems—it’s about ensuring your family’s comfort and safety. We’re here to answer questions, walk you through our services, and provide the expertise you need when you need it.

We offer coupons, rebates, and financing options to make professional service accessible. Don’t let cost concerns prevent you from getting the maintenance and repairs your system needs.

Schedule Your Furnace Maintenance Today

Don’t wait for your furnace to fail on the coldest night of the year. Proactive maintenance keeps your system running efficiently, safely, and reliably throughout the heating season.

Whether you need annual maintenance, emergency repairs, or guidance on extending your furnace’s lifespan, Dial One Johnson Plumbing, Cooling & Heating is here to help. Our team of licensed, professional HVAC experts serves Dallas County and the greater Dallas-Fort Worth Metroplex with offices in Midlothian and Cedar Hill.

Contact us today at 972-291-0740 or reach out online to schedule your furnace maintenance appointment. Let us help you stay warm and comfortable all winter long.

Posted in

AC Condenser Guide: Function, Pads, and Common Problems

Your air conditioner’s outdoor unit houses critical components that keep your home cool, with the condenser playing a central role in the cooling process. Understanding how your condenser works, the importance of proper installation, and common problems helps you maintain system efficiency and avoid costly repairs.

What Your AC Condenser Does

When you turn down your thermostat on a hot Texas afternoon, a complex process begins. While the vents and thermostat are the visible parts of your air conditioning system, your condenser unit outside does essential work behind the scenes.

Your HVAC system pulls warm air from your home, and cold refrigerant chills this incoming air before pushing it back through your vents. After absorbing heat from your home, the refrigerant needs to cool back down—this happens at your condenser unit through the process of condensation.

Here’s how it works: The refrigerant arrives at your outdoor condenser as a hot, high-pressure gas. The condenser coils release this heat into the outside air, cooling the refrigerant and converting it back to liquid form. This cooled liquid refrigerant then returns inside to absorb more heat from your home, and the cycle continues.

Without a properly functioning condenser, this essential heat exchange can’t happen, leaving you with warm air and an uncomfortable home.

The Role of AC Condenser Pads

Of all the components in your HVAC system, the condenser pad probably ranks last on your list of concerns. You might not even know what one is. However, this lesser-known part plays an important role in your system’s health and longevity.

What Is a Condenser Pad?

Simply put, the condenser pad is the platform that holds up your condenser unit. Your condenser isn’t light equipment—most units weigh several hundred pounds—so the pad needs to be strong enough to support this weight.

The pad serves several crucial functions:

  • Provides structural support for the heavy condenser unit
  • Keeps the unit level for proper operation
  • Prevents sinking into soft ground over time
  • Creates clearance between the unit and ground, improving airflow
  • Reduces contact with moisture from rain and soggy soil
  • Helps keep dust, debris, and bugs from entering the condenser from below

Your condenser pad should be part of your HVAC’s yearly checkup to ensure it remains structurally sound.

Do You Need a Condenser Pad?

Absolutely. Without a condenser pad, HVAC technicians can’t properly install your system. Beyond providing necessary structure, the pad prevents your heavy unit from gradually sinking into the ground, which would compromise performance and potentially damage components.

Choosing the Right Condenser Pad

Since your condenser pad is important for system health and performance, what should you consider when selecting one?

Durability: Your pad must support several hundred pounds for 15-25 years (the typical lifespan of an HVAC system). You don’t want to replace the pad before the unit—lifting and moving a condenser to install a new pad requires serious effort.

Water and Weather Resistance: Since the pad sits on the ground outdoors, it must withstand rain, soggy soil, snow, and UV exposure. Look for weatherproof options that resist moisture damage and won’t degrade in sunlight.

Height: Depending on your soil type and drainage, you may need a pad that sits higher off the ground. If you live in an area prone to flooding or have soft soil, extra height protects your investment. While condensers can handle rain, complete flooding is another matter.

Materials: Concrete is the most common material, but not your only option. Modern pads include composite materials, eco-friendly recycled plastics, and even carbon fiber. Newer materials often provide excellent UV resistance and water protection. As condenser units become lighter, material options expand.

If this seems overwhelming, consult your local HVAC service provider. They can guide you through the selection process and recommend the right pad for your situation.

Common Causes of Condenser Problems

When things go wrong with your condenser, you’ll definitely feel it in your home’s comfort level. Here are the most common causes of condenser malfunctions:

Debris and Obstructions

Your condenser needs room to breathe. Direct airflow is essential to operation—when debris or obstructions block this airflow, cooling performance suffers.

The best prevention is adding “clear debris around outdoor unit” to your monthly maintenance checklist. Keep at least two feet of clearance around your condenser. Trim back vegetation, remove leaves and twigs, and ensure nothing blocks the unit. This simple maintenance prevents headaches and costly repairs.

Dirty Condenser Coils

Just as debris can clog your condenser’s exterior, the condenser coils themselves can accumulate dirt and grime. Dirty coils prevent proper airflow and heat exchange, causing your system to perform poorly—putting warm air through your vents and making your home muggy.

Include condenser coil inspection and cleaning in your maintenance routine. Neglecting this can cause your system to overheat, potentially damaging both the compressor and condenser itself.

Pressure Problems

Your HVAC system operates within specific pressure ranges. Abnormal pressure can cause condenser failure. You can check this by examining the pressure gauge on your outdoor unit—consult your user manual for proper operating pressure ranges.

If readings are abnormal, call a professional. While you might think you can fix pressure issues yourself, improper handling can lead to expensive damage. The average full unit replacement costs around $5,000—professional diagnosis is worth the investment.

Refrigerant Leaks

Refrigerant is the lifeblood of your system. Your AC relies on an intimate balance of pressure and temperature changes throughout the refrigerant cycle. When leaks occur through cracks, holes in lines, or worn fittings, this delicate balance is disrupted.

Refrigerant leaks mean your condenser can’t do its job properly. Only professional HVAC repair technicians should handle refrigerant issues—these substances require special handling and equipment.

Electrical Issues

Your condenser relies on steady electricity to function. Problems with electrical relays, wiring, or capacitors can cause malfunctions or complete failure.

Warning signs include:

  • Clicking sounds when the unit starts
  • Unit won’t turn on at all
  • Frequent circuit breaker trips


If you hear clicking every time your unit starts, you likely have failing relays that need replacement. For any electrical problems, always consult a professional—home electrical safety is paramount. You don’t want to damage equipment or risk personal injury.

Preventing Condenser Problems

Schedule Regular Professional Service

Have your AC system professionally serviced at least twice yearly. Technicians will inspect the condenser, clean coils, check electrical connections, verify refrigerant levels, and identify potential problems before they cause failures.

Monthly Maintenance Checklist

Between professional visits, perform these simple tasks:

  • Clear debris from around the outdoor unit
  • Visually inspect condenser coils for dirt buildup
  • Check that the condenser pad remains level
  • Ensure at least two feet of clearance on all sides
  • Listen for unusual sounds when the system runs

When to Call for Professional Help

While basic maintenance like clearing debris is DIY-friendly, condenser repairs require professional expertise. Call for service when you notice:

  • Warm air from vents despite running AC
  • Unusual sounds from the outdoor unit
  • Visible refrigerant leaks or ice formation
  • Electrical issues or frequent breaker trips
  • Significant performance decline
  • Any physical damage to the condenser unit

Trust Dial One Johnson for Condenser Solutions

At Dial One Johnson Plumbing, Cooling & Heating, our certified technicians bring decades of experience to every service call. We understand how critical your condenser is to home comfort, especially during Texas summers.

Whether you need condenser repair, replacement, routine maintenance, or guidance on condenser pad selection, we’re here to help. We’ll diagnose issues accurately, explain your options clearly, and provide solutions that make sense for your home and budget.

Don’t let condenser problems compromise your comfort. Our team can address your AC needs quickly, efficiently, and at a fair price.

For professional AC service you can trust, contact Dial One Johnson Plumbing, Cooling & Heating at 972-291-0740 or reach out online to schedule an appointment.

Posted in

HVAC Maintenance: Benefits, Tasks, and Best Practices

North Texas weather puts your HVAC system through its paces—from ice storms in winter to blistering summer heat. Your heating and cooling system works overtime to keep your home comfortable, making regular maintenance essential for performance, efficiency, and longevity.

At Dial One Johnson Plumbing, Cooling & Heating, we’ve been helping homeowners maintain their HVAC systems for over 50 years. This article covers everything you need to know about HVAC maintenance, from why it matters to what you can do yourself and when to call the professionals.

Why HVAC Maintenance Matters

Regular HVAC maintenance isn’t just recommended—it’s essential for safety, comfort, and protecting your investment. Here are the key benefits:

1. Fewer Repairs and Emergencies

When you follow a strict maintenance schedule, you’re far less likely to face expensive emergency repairs. During scheduled service visits, technicians spot issues and solve them before they cause further damage.

Professional maintenance includes clearing vents, changing filters, lubricating moving parts, and inspecting components for wear. This proactive approach ensures your system runs when you need it most—not breaking down on the hottest day of summer or coldest night of winter.

2. Lower Energy Bills and Reduced Consumption

If you’ve experienced higher-than-average energy bills, your HVAC system could be the culprit. When you skip maintenance, mechanical parts wear out from friction and debris accumulates in vents. A struggling system works harder to heat or cool your home, consuming significantly more energy.

Studies show that proper HVAC maintenance can reduce overall energy consumption by up to 20%. Even simple tasks like replacing clogged filters can reduce energy consumption by 15%. Maintaining proper refrigerant levels can result in energy savings up to 20%.

Regular maintenance keeps your system running efficiently, and technicians recalibrate thermostat controls to ensure accuracy. Even small thermostat drift can significantly impact utility bills.

3. Extended System Lifespan

HVAC systems should last 15-20 years, but this varies dramatically based on maintenance. Well-maintained systems can exceed 20 years, while neglected systems often fail prematurely.

Since replacing an HVAC system represents a major expense—often $5,000-$10,000 or more—maximizing your system’s lifespan through maintenance protects your investment. Maintenance actions like replacing worn parts, changing filters, and lubricating moving components minimize friction and stress on motors, helping your system last longer.

4. Improved Safety

Neglected HVAC systems pose serious safety risks:

Carbon monoxide hazards: Gas furnaces with cracked heat exchangers can leak deadly carbon monoxide into your home

Fire risks: Loose or frayed electrical wires, overheating motors, and accumulated debris can cause fires

System failures during extreme weather: Breakdowns during sub-zero temperatures or extreme heat threaten vulnerable family members, especially babies, children, and elderly residents

Regular professional maintenance identifies these hazards before they endanger your family.

5. Better Indoor Air Quality

Your HVAC system filters air to remove particles and contaminants. However, you must change filters regularly to maintain clean air supply.

During maintenance visits, technicians check filter condition and replace when necessary. Clean filters trap dust, debris, allergens, and pollutants, ensuring you inhale only clean air at home. This is especially important for family members with asthma or respiratory issues.

6. Warranty Protection

Most HVAC manufacturers require regular professional maintenance to keep warranties valid. The fine print typically specifies maintenance by licensed technicians at prescribed intervals.

Following maintenance requirements protects you from unexpected expenses on newer systems. Manufacturers implement these requirements to reduce risks of major repairs caused by neglect.

7. Consistent Comfort

A well-maintained HVAC system runs efficiently year-round, keeping your home comfortable regardless of outdoor conditions. You won’t experience rooms that are too hot or too cold, and your system will reach desired temperatures quickly without struggling.

How Often Should You Schedule HVAC Maintenance?

HVAC experts universally recommend biannual maintenance—twice per year. The optimal schedule is:

Spring (before cooling season): Prepare your air conditioning system for summer demands

Fall (before heating season): Ensure your furnace or heat pump is ready for winter

This timing allows technicians to prepare each system before peak usage, identify potential problems, and complete necessary repairs before you desperately need heating or cooling.

Some situations may require more frequent maintenance:

  • Older systems (10+ years)
  • High-usage environments
  • Homes with pets
  • Areas with excessive dust or allergens
  • Commercial properties with higher demands

DIY HVAC Maintenance Tasks

Between professional visits, several maintenance tasks help keep your system running smoothly.

1. Change Air Filters Regularly

This is the single most important DIY task. Your filter is where your system breathes. Clogged filters cause insufficient airflow, forcing your system to work harder and potentially causing components to freeze or shut down.

Best practices:

  • Check filters monthly
  • Replace every 1-3 months (more frequently with pets)
  • Keep spare filters on hand
  • Choose appropriate filter quality for your needs

Skipping this simple task often leads to expensive emergency service calls.

2. Check Your Thermostat

Your thermostat communicates with your HVAC system, making its proper function essential:

  • Verify it’s set to the correct mode (heat or cool)
  • Confirm fan is set to “auto” rather than “on” (reduces unnecessary wear)
  • Replace batteries as needed
  • Test by adjusting temperature and listening for system response
  • Ensure new thermostats are compatible with your system

Consider upgrading to a programmable or smart thermostat to reduce strain on your system and save energy by automatically adjusting temperatures when heating or cooling isn’t necessary.

3. Clean Around Outdoor Units

Your outdoor unit needs clear space to function efficiently:

  • Remove leaves, twigs, grass clippings, and debris from around and inside the unit
  • Trim bushes, trees, and vegetation to maintain at least 2 feet of clearance
  • Wipe down the exterior with a damp rag
  • Turn off power before cleaning
  • Use a garden hose to gently clean condenser coils (spray from inside out)

Debris buildup forces your system to work harder, increasing energy consumption and reducing lifespan.

4. Inspect Vents and Ducts

Proper airflow requires unobstructed vents:

  • Ensure furniture, curtains, or decor don’t block vents
  • Keep all vents open (closing unused room vents creates pressure imbalances)
  • Vacuum vent covers to remove dust buildup
  • Check for visible duct damage or disconnections
  • Look for signs of air leaks around ductwork connections

5. Seal Air Leaks

Ensure spaces around doors and windows are properly caulked to prevent air leaks. Check that ductwork is properly sealed so conditioned air doesn’t escape into unused areas like attics before reaching living spaces.

6. Monitor System Performance

Pay attention to your HVAC system’s normal operation:

  • Listen for unusual noises (grinding, squealing, banging)
  • Note if it takes longer than usual to reach desired temperatures
  • Watch for frequent cycling on and off
  • Monitor energy bills for unexpected increases

Early detection of performance changes allows you to address problems before they become emergencies.

What Professional HVAC Maintenance Includes

While DIY tasks help, they can’t replace professional service. HVAC technicians bring years of training and experience to ensure every component functions optimally.

Comprehensive professional maintenance includes:

  • Thermostat calibration checks
  • Electrical connection inspection and tightening
  • Lubrication of moving parts
  • Belt inspection and adjustment
  • Internal system controls and timing verification
  • Refrigerant level checks and adjustments
  • Condensate drain inspection and cleaning
  • Burner inspection and cleaning (heating systems)
  • Heat exchanger inspection for cracks or corrosion
  • Evaporator and condenser coil cleaning
  • Blower component inspection
  • Safety control testing
  • Overall system performance evaluation
  • Filter replacement
  • Identification of worn parts before they fail

This thorough approach catches problems early, prevents breakdowns, and ensures optimal efficiency.

Maintenance Types: Reactive vs. Preventative vs. Predictive

Understanding maintenance strategies helps you make informed decisions:

Reactive Maintenance: Also called “run-to-fail,” this approach involves maintenance only when problems occur or systems break down. This is the most expensive long-term strategy.

Preventative Maintenance: Regularly scheduled maintenance on a set timeframe (biannually). Technicians perform prescribed tasks, replace worn parts before failure, and thoroughly clean systems. This is the recommended approach for homeowners.

Predictive Maintenance: Based on intimate understanding of component behavior and lifespans, maintenance is performed based on current system condition. This requires detailed monitoring and is typically used in commercial settings.

For homeowners, preventative maintenance offers the best balance of cost, convenience, and system protection.

residential hvac repair

Additional Ways to Extend HVAC System Life

Ensure Proper Insulation

Adequate insulation traps conditioned air inside your home, reducing how hard your HVAC works. Check your attic insulation—this is often where homes lose the most conditioned air. Proper insulation helps your system maintain temperatures with less effort.

Use Thermostats Wisely

Set your thermostat to “auto” rather than “on” for the fan setting. This ensures the fan only runs when the system actively heats or cools, reducing wear and preventing warm air circulation during cooling mode (or cool air during heating mode).

Address Issues Promptly

Don’t ignore warning signs like unusual noises, declining performance, or rising energy bills. Small problems compound quickly. What starts as an inexpensive repair can escalate to thousands of dollars in damage if left unaddressed.

Consider System Age When Making Decisions

If your system is 10-15 years old and requiring frequent repairs, replacement might be more cost-effective than continued repairs. Modern systems offer significantly better efficiency, potentially offsetting replacement costs through energy savings.

When to Call the Professionals

While DIY maintenance helps, some situations require professional expertise:

Call immediately for:

  • No heating or cooling when needed
  • Strange noises (grinding, squealing, banging)
  • Unusual odors (burning smells, gas odors)
  • Visible damage to components
  • Refrigerant leaks (ice forming on coils)
  • Electrical issues
  • Carbon monoxide detector alerts

Schedule professional service when:

  • It’s time for biannual maintenance
  • You’re experiencing rising energy bills
  • System performance has declined
  • You’re planning to buy or sell your home
  • You’ve purchased a new system

Remember: HVAC systems involve electricity, gas, fire, and complex mechanics. Attempting repairs beyond basic maintenance can damage equipment, void warranties, or create safety hazards.

Trust Dial One Johnson for HVAC Maintenance

At Dial One Johnson Plumbing, Cooling & Heating, we understand how essential your HVAC system is to your comfort and safety. Our family-owned business has served the Dallas area since 1965, providing expert maintenance, repairs, and installations.

We offer comprehensive maintenance plans that include scheduled service reminders, priority service, and annual cost savings. Our certified technicians bring decades of combined experience to every service call, ensuring your system operates at peak efficiency.

Don’t wait for breakdowns or emergencies. Proactive maintenance protects your investment, keeps your family comfortable, and provides peace of mind knowing your HVAC system is ready when you need it.

Contact Dial One Johnson Plumbing, Cooling & Heating today at 972-291-0740 or reach out online to schedule your HVAC maintenance appointment.

Posted in

Understanding ERCOT Grid Conditions and Preparing for Texas Power Challenges

As Texans, we understand the unique challenges of managing home energy, especially during extreme weather conditions. Whether it’s the scorching heat of summer or unexpected winter storms, our state’s power grid faces significant demands that can sometimes lead to rolling blackouts and energy conservation requests.

At Dial One Johnson Plumbing, Cooling & Heating, we believe that understanding these challenges—and having a solid preparation plan—brings peace of mind to you and your family. This guide will help you understand ERCOT grid conditions, the importance of energy conservation, and practical steps to keep your home comfortable and powered no matter what the Texas grid brings.

Understanding ERCOT and Texas Grid Conditions

The Electric Reliability Council of Texas (ERCOT) manages the electrical grid for more than 26 million customers across the Lone Star State. Their responsibility extends beyond ensuring a reliable grid—they oversee the electricity market, coordinate with various stakeholders, and plan for future energy needs.

How ERCOT Monitors Grid Health

ERCOT operates a comprehensive dashboard that provides real-time insights into Texas’s power network. The system categorizes the grid’s operational status into five color-coded levels, each representing different conditions:

Green (Normal Conditions): The system is stable with over 3,000 megawatts (MW) of operating reserves available. Everything is running smoothly.

Yellow (Conservation Needed): Operating reserves have dropped below 3,000MW. This is when ERCOT asks consumers and businesses to reduce electricity use to help maintain grid reliability.

Orange (Emergency Level 1): Operating reserves have fallen below 2,300MW and may not recover within 30 minutes. Additional measures are implemented to avoid further depletion of reserves. No controlled outages at this stage.

Red (Emergency Level 2): A more serious situation with operating reserves below 1,750MW and no expectation of recovery within 30 minutes. This indicates a higher risk of outages if conditions don’t improve.

Black (Emergency Level 3): The highest state of emergency. Controlled outages begin as operating reserves dip below 1,000MW. These rolling blackouts are a last resort to prevent a more extensive, uncontrolled blackout across the state.

On the ERCOT website, you can monitor real-time data on energy supply, operational reserves, energy demand, and system-wide wholesale electricity prices. By staying informed about these conditions, you can adjust your energy usage accordingly and contribute to grid stability.

What Causes Grid Stress and Rolling Blackouts

Several factors can strain Texas’s power grid and lead to rolling blackouts:

Extreme Weather Impacts: Both severe heat waves and winter storms can drastically increase electricity demand while simultaneously impairing power generation. Many of the state’s power plants face operational challenges during temperature extremes, creating an imbalance between heightened demand and reduced supply.

Isolated Grid System: Texas’s electrical grid operates largely independently, making it difficult to import electricity from other regions during crises.

Natural Gas Supply Disruptions: The state relies heavily on natural gas for electricity generation. During extreme weather, the natural gas supply chain can experience disruptions, from frozen wellheads to inoperative pumps.

Infrastructure Limitations: Some power generation facilities, including renewable energy sources, may not be fully equipped for extreme weather conditions that fall outside normal operating parameters.

Understanding these factors helps you recognize when grid stress is likely and when conservation efforts become most critical.

Why Texas Energy Conservation Matters

Energy conservation isn’t just a buzzword—it’s a practical strategy for maintaining our state’s energy reliability and efficiency. Your role as a homeowner in conserving energy, especially during peak times, can significantly impact the overall stability of the Texas grid.

The Real Impact of Conservation

When thousands of Texans simultaneously reduce their energy consumption during peak demand periods, it can prevent the grid from reaching emergency levels. This collective effort helps ERCOT maintain adequate operating reserves and avoid the need for controlled outages.

Recent power challenges across Texas have underscored how conserving energy alleviates strain on the grid, ensuring stability during times of stress. By working together as a community, we can create a more resilient energy system for all Texans.

Your Air Conditioning System's Role

During hot Texas summers, air conditioning can account for a significant portion of your energy use. By optimizing your AC’s efficiency and ensuring regular maintenance, you contribute substantially to reducing overall energy demand during the times when the grid needs relief most.

Practical Energy Conservation Steps

Wondering how you can effectively conserve energy? Here are simple yet impactful steps you can take to reduce your home’s energy consumption:

Optimize Your HVAC System

  • Schedule professional AC maintenance at least twice yearly
  • Replace air filters regularly (every 1-3 months)
  • Set your thermostat a few degrees higher in summer and lower in winter
  • Use a programmable or smart thermostat to automatically adjust temperatures during peak hours

Upgrade Your Lighting and Electronics

  • Switch to LED bulbs: They’re significantly more energy-efficient than traditional incandescent bulbs and last much longer
  • Unplug electronics when not in use: Many devices consume energy even when turned off
  • Use smart power strips: These detect when devices are in standby mode and cut off power automatically

Improve Your Home's Efficiency

  • Insulate properly: Good insulation keeps your home cooler in summer and warmer in winter, reducing HVAC demands
  • Seal air leaks: Check windows, doors, and other openings for drafts
  • Opt for Energy Star appliances: When replacing appliances, choose models that meet energy efficiency guidelines

Adjust Daily Habits

  • Turn off unnecessary lights, especially during peak demand hours (typically 3-8 PM)
  • Run major appliances like dishwashers and washing machines during off-peak hours
  • Keep blinds and curtains closed during the hottest part of the day
  • Be mindful of energy consumption during ERCOT conservation alerts

Participate in Conservation Programs

  • Sign up for energy alerts: ERCOT and utility companies issue conservation notices—staying informed helps you respond when it matters most
  • Join demand response programs: Many utility companies incentivize consumers to reduce electricity use during peak times
  • Monitor your usage: Smart meters or energy monitoring systems help you understand and manage consumption more effectively

Preparing Your Home for Rolling Blackouts

While conservation efforts help prevent grid emergencies, it’s wise to prepare for the possibility of rolling blackouts. Having a solid preparation plan ensures your family’s safety and comfort during power outages.

Understanding Rolling Blackouts

Rolling blackouts are controlled, temporary outages that utility companies implement to prevent the entire grid from being overwhelmed. These outages are planned in a controlled manner to minimize disruption, often rotating through different areas so no single location is without power for extended periods.

These outages are most likely during:

  • Extreme weather conditions (heat waves or severe storms)
  • Periods when electricity demand spikes
  • Times when energy grid infrastructure faces challenges

While the exact duration of rolling blackouts can vary, understanding when they’re more likely helps you prepare appropriately.

The Importance of Backup Power

One of the most reliable ways to prepare for rolling blackouts is investing in a backup generator. Generators keep essential appliances running—like refrigerators, medical equipment, and heating or cooling systems—ensuring your home remains safe and comfortable during outages.

Types of Generators to Consider:

  • Portable Generators: More affordable and movable, these are ideal for powering a limited number of essential appliances during occasional outages.
  • Standby Generators: Permanently installed outside your home, these automatically activate during an outage, providing uninterrupted electricity to your entire house without any action required on your part.
  • Inverter Generators: Known for quiet operation and efficiency, these generators provide stable power output suitable for sensitive electronic devices.

Each type has advantages depending on your needs, home size, essential appliances, and budget. Our team can help you determine which option provides the best solution for your situation.

Choosing the Right Generator

When selecting a generator, consider these factors:

Fuel Source: Generators run on gasoline, diesel, propane, or natural gas. Each fuel type has pros and cons regarding availability, storage safety, and running costs. Gasoline is readily available but has a shorter shelf life, while natural gas generators can connect directly to your home’s gas line.

Power Output: Determine which appliances and systems you need to power during an outage. This will dictate the generator size required.

Safety Features: Look for built-in safety features like carbon monoxide detectors and automatic shut-offs to enhance safe operation.

Installation Requirements: Standby generators require professional installation and permits, while portable units offer more flexibility but require manual setup.

Alternative Power Solutions

Beyond traditional generators, consider these options:

Solar Power Systems: Solar panels can provide electricity using the sun’s energy. With battery storage, solar systems can keep your home powered even during extended outages, reducing dependence on the grid entirely.

Battery Backup Systems: For homes with solar panels, battery storage systems can store excess energy for use during outages or peak pricing periods.

Essential Emergency Supplies

Having a well-stocked emergency kit helps you navigate rolling blackouts successfully. Beyond backup power, keep these supplies readily accessible:

Lighting and Communication:

  • Flashlights with extra batteries
  • Battery-powered or hand-crank radio for news and weather updates
  • Candles and matches (use with caution)
  • Fully charged portable phone chargers

Food and Water:

  • At least one gallon of water per person per day for three days (for drinking and sanitation)
  • Non-perishable food items
  • Manual can opener

Comfort and Safety:

  • First-aid kit
  • Warm clothing and blankets (in case heating is affected)
  • Emergency contact list (physical copy in case phones die)

Vehicle Preparedness:

  • Keep your car’s gas tank at least half full
  • This ensures you can charge devices or seek shelter if needed

Safety Measures During Power Outages

When power outages occur, prioritize safety:

Generator Safety:

  • Never overload generators—understand their capacity and only connect essential appliances
  • Always operate generators outdoors in well-ventilated areas, never in garages or enclosed spaces
  • Follow all manufacturer guidelines for safe operation

Electrical Hazards:

  • Stay away from downed power lines and treat every line as live
  • Report downed lines to your utility company immediately
  • Unplug appliances and electronics to prevent damage from power surges when electricity returns
  • Leave one light on so you know when power is restored

Food Safety:

  • Keep refrigerator and freezer doors closed to maintain temperature
  • A closed refrigerator can keep food cold for about four hours
  • A full freezer can maintain temperature for approximately 48 hours

Community Support:

  • Check on elderly or vulnerable neighbors who may need assistance
  • Share information about outage duration and safety tips

Stay Informed:

  • Sign up for alerts from your utility company and ERCOT
  • Monitor local news and weather forecasts for updates on grid status
  • Use social media and community groups for real-time information
  • Download apps that provide notifications for power outages and emergency situations

How Dial One Johnson Supports Your Energy Management

At Dial One Johnson Plumbing, Cooling & Heating, we understand the importance of reliable energy management and the peace of mind that comes from being prepared. Our family-owned business has been serving the Dallas area for decades, and we’re committed to helping you navigate Texas’s unique energy challenges.

Our Generator Services

We offer comprehensive generator services to keep your home powered when you need it most:

HVAC Efficiency Solutions

Beyond backup power, we help you maximize your home’s energy efficiency:

  • AC maintenance and tune-ups: Regular service improves efficiency and reduces energy consumption
  • System upgrades: Modern, energy-efficient HVAC systems that reduce your overall energy demand
  • Expert advice: Guidance on optimizing your home’s energy use for both comfort and conservation

Why Choose Dial One Johnson

As a family-owned business serving Cedar Hill, Midlothian, Grand Prairie, and South Dallas, we bring:

  • Local expertise: We understand Texas weather patterns and grid challenges
  • Honest, transparent service: Fair pricing with no surprises
  • Technical excellence: Highly trained, certified technicians committed to quality workmanship
  • Community focus: We’re your neighbors, invested in strengthening our shared community

Moving Forward With Confidence

Texas energy conservation and power outage preparation are more than responsibilities—they’re community efforts where each of us plays a vital role. By understanding ERCOT grid conditions, implementing energy conservation practices, and preparing your home with backup power solutions, you can maintain comfort and safety for your family regardless of grid conditions.

The challenges our Texas grid faces are real, but with proper preparation and community cooperation, we can navigate them successfully. Whether it’s through efficient HVAC maintenance, smart energy conservation, or reliable backup power systems, Dial One Johnson Plumbing, Cooling & Heating is here to support your efforts.

Remember, small actions add up. When thousands of Texans conserve energy during peak times and prepare their homes for potential outages, we collectively create a more stable and resilient energy system. Together, we can ensure reliable power and comfortable homes for all Texans.

For more information about generator services, HVAC maintenance, or energy conservation solutions for your home, contact our team at 972-291-0740 or reach out online. Let’s work together to keep your home safe, comfortable, and powered.

Posted in

Why Is My AC Producing Excess Condensation or Water Sounds?

If you’ve ever noticed water dripping from your air conditioner—or heard what sounds like running or gurgling water—you’re not alone. Moisture is a normal byproduct of the air conditioning process, but excess condensation or persistent water noises are signs something isn’t working correctly.

Understanding what causes these issues can help you know when a quick fix is possible—and when it’s time to call a professional before minor moisture turns into major damage.

The Role of Water in Air Conditioning

Air conditioners don’t create cold air. Instead, they remove heat and humidity from the air inside your home. During this process, moisture naturally forms as warm, humid air passes over cold evaporator coils.
This moisture collects as condensation and is designed to:

  • Drain into a condensate pan
  • Flow through a drain line
  • Exit the system safely
  • When everything is functioning properly, you’ll never notice this process.

When something goes wrong, condensation may become excessive—or audible.

What Is Condensation?

Condensation occurs when water vapor in warm air cools and turns into liquid. A common example is water droplets forming on a cold glass on a hot day.

Inside your AC system, condensation forms when warm indoor air meets the cold surface of the evaporator coil. Some condensation is normal. Excess condensation is not.

When condensation doesn’t drain properly, it may:

  • Drip from the unit
  • Pool near the system
  • Produce running, dripping, or gurgling sounds

Is It Normal to Hear Water Running From an AC?

Occasional, brief water sounds—especially when the system first starts—can be normal. However, frequent or loud water noises should never be ignored.

Sounds that may indicate a problem include:

  • Continuous dripping
  • Flowing or rushing water
  • Gurgling noises
  • Sloshing inside the unit


These sounds often mean condensation is not draining as intended.

Common Causes of Excess Condensation and AC Water Noises

Several issues can interfere with proper moisture control. Many of these problems overlap, which is why condensation and water sounds often appear together.

Dirty Air Filters

A clogged air filter restricts airflow, which can cause evaporator coils to become too cold. This may lead to frozen coils that later thaw and release excess water all at once.

Clogged or Blocked Condensate Drain Line

Dust, algae, and debris can clog the drain line, preventing water from exiting the system. This leads to backups, pooling, and audible dripping or gurgling.

Damaged or Misaligned Drain Pan

If the condensate pan is cracked, rusted, shifted, or improperly installed, water may leak instead of draining cleanly.

Broken Condensate Pump

Some systems rely on a pump to move water out of the unit. When the pump fails, condensation can accumulate quickly.

Poor Air Circulation

Blocked vents, dirty coils, or airflow restrictions can all disrupt normal condensation levels and drainage.

Refrigerant Issues

Low refrigerant levels can cause coils to freeze, creating excessive condensation when the ice melts. Refrigerant leaks are a serious issue and require immediate professional attention.

Age or Lack of Maintenance

Older systems or units that haven’t received routine maintenance are far more likely to experience drainage and moisture issues.

Why Excess Condensation Is a Serious Problem

Ignoring condensation issues doesn’t just affect your AC—it can impact your home, comfort, and health.

Water Damage

Excess moisture can damage flooring, walls, furniture, and nearby appliances. Over time, this may lead to mold growth or structural issues.

Reduced Air Quality

Standing water can promote bacteria and mold, which may circulate through your HVAC system and worsen allergies or respiratory conditions.

System Damage

Moisture can damage electrical components, corrode internal parts, and shorten the lifespan of your HVAC system.

Higher Repair Costs

What starts as a clogged drain line can quickly turn into compressor failure or extensive water damage if left unaddressed.

When to Call for AC Repairs

You should contact a professional if you notice:

  • Persistent dripping or pooling water
  • Ongoing running or gurgling sounds
  • Water leaking into living spaces
  • Rising indoor humidity
  • Reduced cooling performance
  • Musty odors from vents

How to Prevent AC Condensation Problems

Preventive maintenance is the best way to avoid moisture-related issues.

Schedule Regular HVAC Maintenance

Professional tune-ups allow technicians to:

  • Clean evaporator and condenser coils
  • Clear condensate drain lines
  • Inspect drain pans and pumps
  • Check refrigerant levels
  • Identify early signs of failure

Most systems benefit from two maintenance visits per year—one before peak cooling season and one afterward.

Replace Air Filters Regularly

Check filters monthly and replace or clean them every 30–90 days, depending on usage and household conditions.

Keep the Area Around the Unit Clear

Ensure nothing blocks airflow around the indoor or outdoor unit. Proper airflow helps regulate coil temperature and condensation levels.

Address Small Issues Early

Unusual sounds, reduced airflow, or minor leaks should never be ignored. Early repairs are almost always less expensive.

Trust Dial One for AC Condensation & Drainage Repairs

Excess condensation and water noises are warning signs—ones that shouldn’t be dismissed. Dial One provides expert air conditioning repair, maintenance, and emergency service to help protect your comfort and your home.

Whether your AC is dripping, making unusual sounds, or struggling to keep up, help is just a phone call away. Call 972-291-0740 to schedule AC service or request emergency HVAC repairs.

Posted in

AC Compressor Problems: Signs, Causes, and Solutions

When the Texas heat arrives, your air conditioner becomes essential to your comfort. At the heart of your cooling system is the AC compressor—often called the “heart” of your HVAC system. Understanding how your compressor works and recognizing when it’s having problems can help you avoid costly repairs and keep your home comfortable year-round.

What Does an AC Compressor Do?

Your air conditioning system operates through two interconnected systems working together to cool your home:

Air Circulation System: Pulls in room air, filters out contaminants, and pushes it over evaporator coils to cool it down before recirculating it back into your space.

Condenser Unit: Refrigerant cycles through the evaporator coils to keep them cool, then moves through the condenser system to bring its temperature back down.

The Compressor's Role

When refrigerant exits your AC evaporator, it’s a low-pressure gas. Your compressor increases the pressure on these gas molecules—this is where physics comes into play. To release heat effectively, the refrigerant needs to be in a high-pressure form.

The compressor packs the refrigerant molecules together, making it both higher in temperature and pressure. The high-pressure refrigerant pushes to the outdoor condenser coil where it releases heat and turns back into liquid. The cooled refrigerant feeds back into the system, travels indoors, evaporates into gas again, and absorbs heat from your home’s air.

Without a functioning compressor, your refrigerant won’t cool down, and you’ll get warm, humid air instead of the cool comfort you expect.

Signs Your AC Compressor Might Be Failing in Midlothian, TX

Warning Signs Your AC Compressor Is Failing

Recognizing early warning signs can save you from complete system failure and more expensive repairs. Here’s what to watch for:

Warm Air Instead of Cool Air

One of the most obvious signs—your AC runs but blows warm or room-temperature air. This happens when the system isn’t compressing refrigerant effectively, preventing it from absorbing heat from your home.

Before assuming compressor trouble, check your thermostat settings and air filter. A faulty thermostat or clogged filter can cause similar symptoms. If those aren’t the problem, it’s time to call for service.

Unusual Noises

A healthy compressor operates with a consistent, relatively quiet hum. Changes in pitch, tone, or volume signal trouble. These sounds usually indicate internal damage:

  • Screeching
  • Clunking
  • Grinding
  • Rattling

Turn off your AC if you hear these noises—continuing to run a damaged compressor leads to complete failure.

Short Cycling

Your AC turns on and off much more frequently than normal, sometimes running just a few minutes before shutting down. This drives up energy bills and strains your compressor further.

A damaged compressor can cause short cycling, which damages the compressor even more—a problematic loop. However, a malfunctioning thermostat or severely clogged filter can also cause this issue. If addressing those doesn’t help, you need professional diagnosis.

Tripped Circuit Breaker

If your breaker keeps tripping when the AC runs, the compressor may be drawing too much electricity—a sign of overheating or imminent failure. Don’t just keep resetting the breaker; an overworked compressor pulling excessive power creates a fire risk.

Shaking or Vibrating

A healthy outdoor unit operates with minimal movement. Visible shaking or vibrating when starting—often called a “hard start”—means the compressor is struggling. These hard starts wear out internal components and accelerate failure.

Refrigerant Leaks or Ice Formation

Compressors need proper refrigerant levels to operate efficiently. Refrigerant leaks or ice forming on coils indicate the compressor is under stress or wearing out. Low refrigerant damages the compressor, and a failing compressor struggles to circulate refrigerant—a problematic cycle requiring professional attention.

Reduced Airflow and Cooling

Your home takes much longer than usual to cool down, even when outdoor temperatures aren’t extreme. Your system may eventually reach the desired temperature, but takes progressively longer, driving up energy bills and leading toward breakdown.

The Compressor Won't Turn On

Before assuming the worst, check these simpler issues:

  • Tripped circuit breaker or blown fuse
  • Thermostat malfunction: Confirm it’s set to “cool” with a target temperature lower than current room temperature; check batteries
  • Loose electrical connections at the terminal
  • Faulty capacitor: This component sends power to start the compressor; if broken, the compressor won’t work
Why Is My AC Compressor Not Turning On

Common Causes of AC Compressor Failure

Many compressor problems are preventable with proper maintenance.

Blocked Suction Lines

Clogs in refrigerant lines cause pressure buildup, forcing your compressor to work much harder. This typically shows up as poor cooling performance.

Dirty Condenser Coils

Dust and grime prevent proper heat expulsion. The harder it is to disperse heat, the harder your compressor works. Overworked components fail faster. Regular coil cleaning should be part of your maintenance routine.

Refrigerant Leaks

Leaks through cracks or loose fittings reduce system effectiveness immediately. Low refrigerant can cause overheating, damaging multiple components and eventually destroying the compressor.

Low Lubricant Levels

Inadequate lubricant means your compressor isn’t operating correctly. Left untreated, this leads to failure. Proper AC maintenance keeps lubricant at appropriate levels.

Lack of Regular Maintenance

Many compressor problems develop gradually and could be prevented with routine professional service. Skipping maintenance allows small issues to become major failures.

What to Do When You Have Compressor Problems

Stop Using Your AC Immediately

If you notice warning signs, stop running your air conditioner. Continuing to operate a failing compressor risks complete burnout, turning a repairable problem into expensive replacement.

Call for Professional Diagnosis

Compressors require professional expertise—refrigerants are hazardous, and DIY mistakes get costly. A qualified technician can assess your compressor and offer solutions:

Compressor Replacement: If under warranty, replace just the compressor component.

Condenser Replacement: Replace the compressor, fan, and condenser coil together. Depending on system age, this can cost nearly as much as full replacement.

Complete HVAC Replacement: For older systems with persistent problems, full replacement may be most cost-effective long-term. Modern systems offer significantly higher efficiency and lower energy costs.

Your technician will provide honest guidance about which solution makes sense for your situation and budget.

Don't Attempt DIY Repairs

HVAC technicians undergo years of training to safely work on compressors. DIY attempts risk exposure to hazardous refrigerants, electrical dangers, making problems worse, voiding warranties, and personal injury.

Preventing Future Compressor Problems

Schedule Regular Professional Maintenance

Have your AC serviced at least twice yearly. Technicians will check refrigerant levels, clean condenser coils, inspect electrical connections, monitor lubricant, test compressor operation, and identify potential problems before they cause HVAC failures.

Keep Up with Filter Changes

Replace air filters every 1-3 months. Dirty filters restrict airflow, forcing your entire system to work harder.

Maintain Clear Space Around Your Outdoor Unit

Keep at least two feet of clearance around your AC unit. Trim vegetation, remove debris, and ensure proper airflow to prevent overheating.

Address Small Problems Quickly

Don’t ignore unusual sounds, slight performance decreases, or occasional short cycling. Early intervention prevents major failures.

Trust Dial One Johnson for Compressor Solutions

At Dial One Johnson Plumbing, Cooling & Heating, we understand how crucial your air conditioner is during Texas summers. Our certified technicians bring expertise and honesty to every service call.

Whether you’re dealing with a compressor that won’t turn on, unusual noises, warm air, or any other cooling problem, we’re here to help. We’ll diagnose the issue accurately, explain your options clearly, and provide solutions that make sense for your home and budget.

Don’t let compressor problems leave you uncomfortable. Our team can address your AC needs quickly, efficiently, and at a fair price.

For professional AC service you can trust, contact Dial One Johnson Plumbing, Cooling & Heating at 972-291-0740 or reach out online to schedule an appointment.

Posted in

Outdoor AC Unit Clearance and Maintenance

   
When it comes to your outdoor air conditioning unit, two factors play a crucial role in its performance and longevity: proper clearance and regular maintenance. Whether you’re planning a new HVAC installation or maintaining an existing system, understanding these essentials will help keep your home comfortable while avoiding costly repairs.

Understanding Proper Clearance Requirements

For your HVAC system to work properly, it needs room to breathe. Proper airflow is an essential component to keeping things running smoothly, and poor airflow is one of the most common problems with household AC units.

Why Clearance Matters

Obstructed airflow can cause undue stress on critical components like the air compressor and condenser. Additionally, proper clearance is necessary to keep your system running efficiently. Without adequate space, your system could perform poorly—often leading to insufficient cooling power and increased energy consumption.

General Spacing Guidelines

As a general rule, you’ll want to ensure at least 12 inches (one foot) of clearance on all sides of your outdoor unit. However, spacing requirements can vary depending on your particular unit. Some systems require up to two feet of clearance for proper operation.

Before installation, it’s important to have an HVAC specialist conduct a site inspection. During this assessment, your technician will evaluate the environment and conditions where the outside unit will be placed, with special attention to clearance considerations. If your inspector doesn’t mention clearance, always ask—it’s better to address potential issues before installation than deal with problems down the road.

Common Obstructions to Watch For

To ensure your system has the space it needs to run efficiently, be aware of anything that might cause obstructed airflow:

Mechanical Obstructions

Kitchen exhaust vents and dryer outlet vents that come through the wall can present challenges to proper airflow when an outdoor unit is placed too close. Maintain adequate distance from these outlets to prevent interference.

Landscaping

While it might seem like a good idea to hide your outdoor unit behind bushes or shrubs, any landscaping placed too close to the condenser can cause obstructions. Broken twigs, leaves, and other debris can clog your system and reduce efficiency.

Best practice: Maintain at least two feet of cleared space around your entire unit. Cut back any vegetation that encroaches on this zone.

Construction Elements

Fences and walls fall into this category. If you’re installing your outdoor unit near such structures, add an extra foot to the clearance guidelines in your owner’s manual. If the unit is near a door or window, ensure the condenser exhaust doesn’t blow directly into your home.

Special Clearance Situations

Beyond the common obstructions, consider these additional spacing requirements:

  • Heat Pumps: If your home has a heat pump, ensure plenty of clearance between it and your outdoor AC unit
  • Multiple Units: When two units are close together, they compete for the same air. Most HVAC specialists recommend at least four feet of clearance between units
  • Top Clearance: In most cases, this won’t be an issue, but in special circumstances (such as units under eaves or awnings), provide at least 60 inches of vertical clearance for proper airflow

Essential Maintenance for Your Outdoor Unit

While scheduling professional AC maintenance is the best thing you can do for your outdoor unit, there are several maintenance tasks you can handle yourself to keep your system running efficiently.

Benefits of Regular Outdoor AC Maintenance

Consistent care for your outdoor air conditioning unit provides multiple advantages:

  • Increases efficiency: A clean outdoor AC unit doesn’t have to work as hard to produce the same cooling output
  • Reduces repair risks: Regular maintenance keeps the unit functioning well, substantially reducing the likelihood of unexpected repairs
  • Lowers energy bills: Improved efficiency means your system uses less energy to cool your home
  • Extends lifespan: Proper maintenance can mean the difference between a unit lasting 20 years with few repairs versus 15 years with frequent problems

1. Clean the Condenser Coils

Your outdoor unit contains condenser coils that expel heat from your home. For these coils to function properly, they need maximum surface area exposed to air. When dust settles on the coils or debris blocks them, efficiency drops significantly.

Cleaning steps:

  1. Turn your thermostat to “off”
  2. Use a vacuum to remove large clumps of dust or debris from the coils
  3. Wipe the coils with a damp rag (or use condenser coil cleaner) to remove remaining dirt

This simple cleaning helps the coils efficiently expel heat and maintain system performance.

2. Clear the Surrounding Area

Just as condenser coils need air exposure, your entire unit requires adequate space to properly expel heat. This means maintaining at least two feet of clearance around the unit.

Remove any toys, tools, or other items near the unit, and trim back landscaping that may be encroaching on this zone. This ensures your unit can effectively transfer heat outside and keep your home comfortable.

3. Realign the Fins

The thin metal plates running along the outside of your unit are called fins. Over time, these fins can become bent, flattened, or misaligned, reducing the space available for air to escape the condenser.

Realignment process: Using a thin butter knife or fin alignment tool, carefully insert it between the fins—just enough to maneuver them—and work to straighten any bent sections. While this task can be time-consuming and meticulous, it’s an effective way to increase efficiency and reduce the need for air conditioning repairs.

4. Remove Internal Debris (Advanced)

For homeowners comfortable with more technical tasks, the most thorough cleaning method involves accessing the inside of the unit:

  1. Use a screwdriver to remove the top grill
    Gently lift out the fan (be careful not to disturb the connected wires)
  2. Remove debris from the fan and wipe it down with a damp cloth
  3. Using a garden hose, spray the fins from the inside out for a deep clean
  4. Reassemble the unit

This deeper cleaning removes debris that accumulates inside the cabinet over time.

Professional Maintenance Recommendations

While DIY maintenance helps, professional service remains essential. It’s highly recommended to schedule air conditioning maintenance at least twice a year to keep your unit properly functioning. Professional technicians can identify issues before they become major problems and ensure your system operates at peak efficiency.

During a professional maintenance visit, technicians will thoroughly inspect clearance requirements, clean components more comprehensively than DIY methods allow, and address any potential problems with your system.

Ready to Optimize Your Outdoor AC Unit?

Whether you need guidance on proper clearance for a new installation or professional maintenance for your existing system, Dial One Johnson Plumbing, Cooling and Heating is here to help. Our HVAC specialists have been serving the area for years and can address your AC needs quickly, efficiently, and at a fair price.

To schedule an appointment or learn more about our services, reach out to our team at 972-291-0740 or contact us online.

Posted in

How Often Should AC Coils Be Cleaned?

Your air conditioning system works hard to keep your home comfortable—especially during the warmest months of the year. One of the most important (and most overlooked) parts of AC maintenance is keeping the system’s coils clean. Dirty coils can reduce efficiency, increase energy costs, and lead to unnecessary repairs.

Here’s what homeowners should know about AC coils, why they need to be cleaned, and how often professional cleaning should be scheduled.

What Are Air Conditioner Coils?

Air conditioners don’t create cold air—they remove heat from your home. That heat-transfer process depends on two key components: evaporator coils and condenser coils.

Evaporator Coil

The evaporator coil is located inside the home, near the air handler. As warm air from your home passes over the coil, refrigerant inside the coil absorbs heat and humidity. The cooled air is then circulated back through your home.

If the evaporator coil becomes dirty, it can’t effectively absorb heat, which reduces cooling performance and strains the system.

Condenser Coil

The condenser coil is located in the outdoor unit. Once heat is absorbed by the refrigerant, it’s transferred to the condenser coil, where that heat is released outside.

Because condenser coils are exposed to outdoor elements, they can easily collect dirt, debris, grass clippings, and dust—making regular cleaning essential for proper airflow and heat release.

Why AC Coils Need to Be Cleaned

For your AC system to run efficiently, coils must be clean and able to transfer heat freely. When dirt and debris build up, they act as insulation, preventing proper heat exchange.

Dirty AC coils can lead to:

  • Higher energy usage and utility bills
  • Reduced cooling capacity
  • Longer run times and system strain
  • Frozen evaporator coils
  • Overheating outdoor units
  • More frequent repairs
  • Shortened system lifespan


In fact, dirty coils can increase energy consumption significantly while making your home less comfortable at the same time.

Benefits of Clean AC Coils

Regular coil cleaning is one of the simplest ways to protect your HVAC investment. Benefits include:

  • Lower energy costs due to improved efficiency
  • Better cooling performance throughout the home
  • Reduced wear and tear on system components
  • Fewer unexpected breakdowns
  • Longer equipment lifespan


Clean coils help your entire system operate the way it was designed to—without unnecessary stress or wasted energy.

How Often Should AC Coils Be Cleaned?

For most homes, professional AC coil cleaning should be done at least once per year. However, many systems benefit from twice-yearly cleaning, especially when combined with seasonal HVAC maintenance.

Factors that may require more frequent cleaning include:

  • High dust, pollen, or pollution levels
  • Homes with multiple pets
  • Older HVAC systems
  • Heavy system usage throughout the year

The safest and most effective approach is to include coil cleaning as part of routine HVAC maintenance.

AC Maintenance and Tune-Ups

Routine air conditioner maintenance plays a major role in keeping coils clean and preventing costly repairs. Most HVAC professionals recommend two system tune-ups per year:

  • Spring maintenance to prepare for cooling season
  • Fall maintenance to check system health after heavy use

During a professional HVAC tune-up, a technician will typically:

  • Clean evaporator and condenser coils
  • Replace or clean air filters
  • Check refrigerant levels
  • Inspect electrical components
  • Identify worn or loose parts
  • Ensure proper airflow and system performance

Preventive maintenance helps catch small issues early—before they turn into major repairs.

How Homeowners Can Help Keep Coils Cleaner

While coil cleaning should largely be left to professionals, homeowners can help reduce buildup between service visits:

  • Check air filters monthly and replace or clean them every 30–90 days
  • Keep at least 2 feet of clearance around the outdoor unit
  • Remove leaves, grass, and debris from around the condenser
  • Gently rinse the outdoor unit with a hose (with power off)

Important: AC coil fins are extremely delicate and can be easily bent or damaged. Avoid aggressive cleaning or tools, and leave deep cleaning to trained HVAC technicians.

Trust Dial One for Professional AC Coil Cleaning & Maintenance

When it comes to air conditioner maintenance, experience matters. Dial One provides reliable HVAC maintenance, repairs, and emergency service to keep your system running efficiently year-round.

Whether you’re due for routine maintenance or concerned about system performance, we’re here to help—day or night.

Call 972-291-0740 to schedule AC maintenance or speak with an HVAC service professional today.