Experiencing an emergency? Call 972-914-0833

Ready to Experience the Dial One Johnson Difference?

Your go-to resource for HVAC and plumbing solutions, DIY guides, and home maintenance tips.

Got an emergency? Call 972-914-0833 or …

Explore by topic:
Posted in

How to Choose a Reliable 24 Hour Emergency Plumber

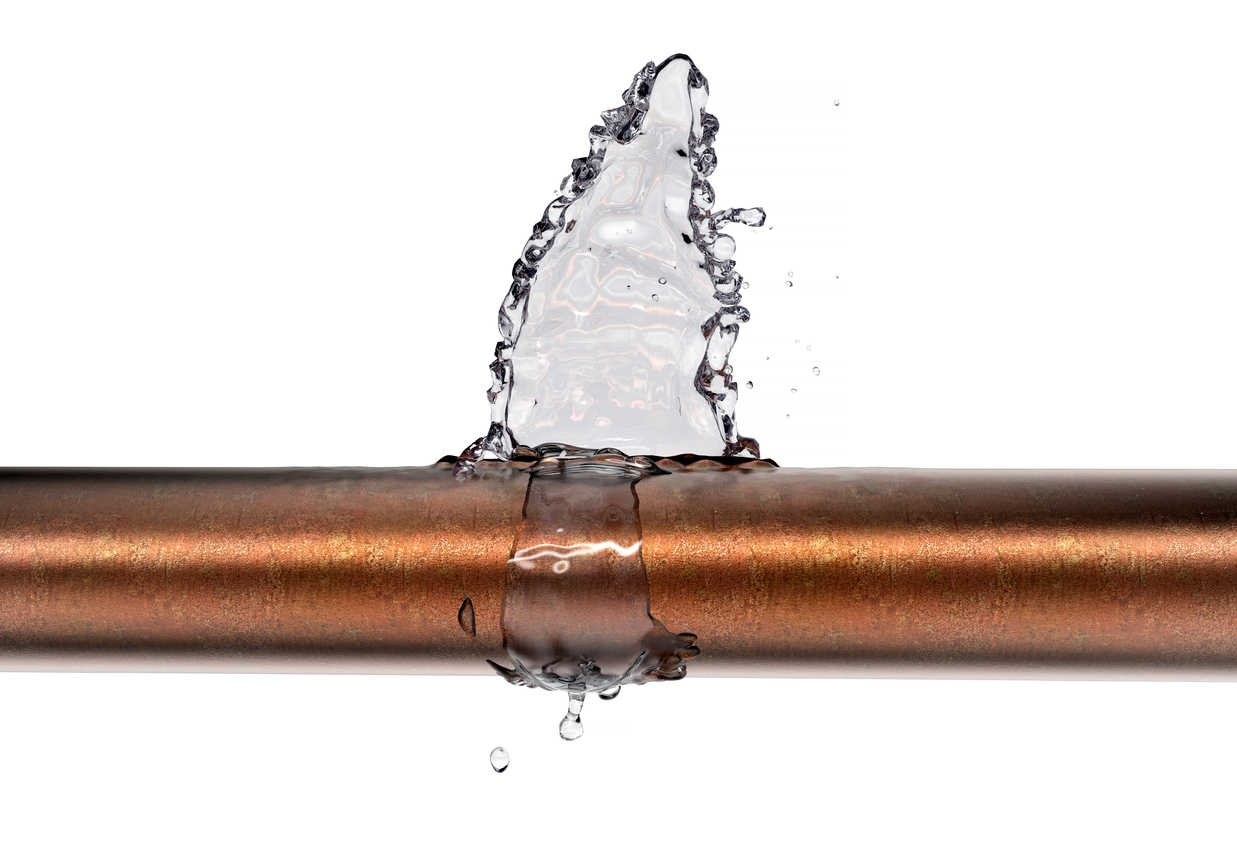
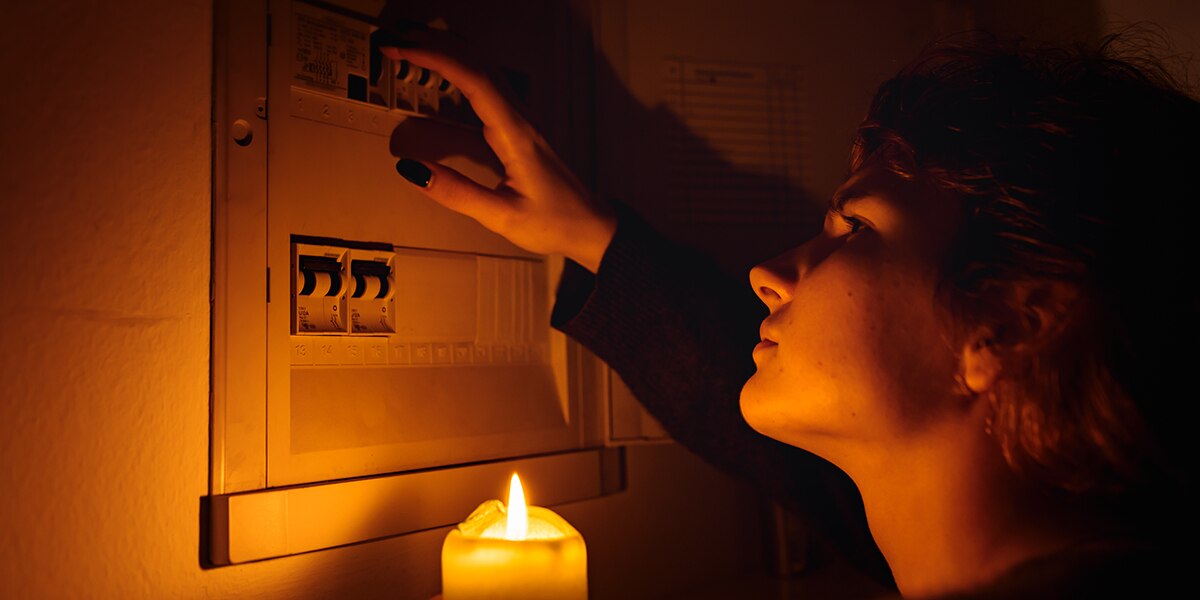
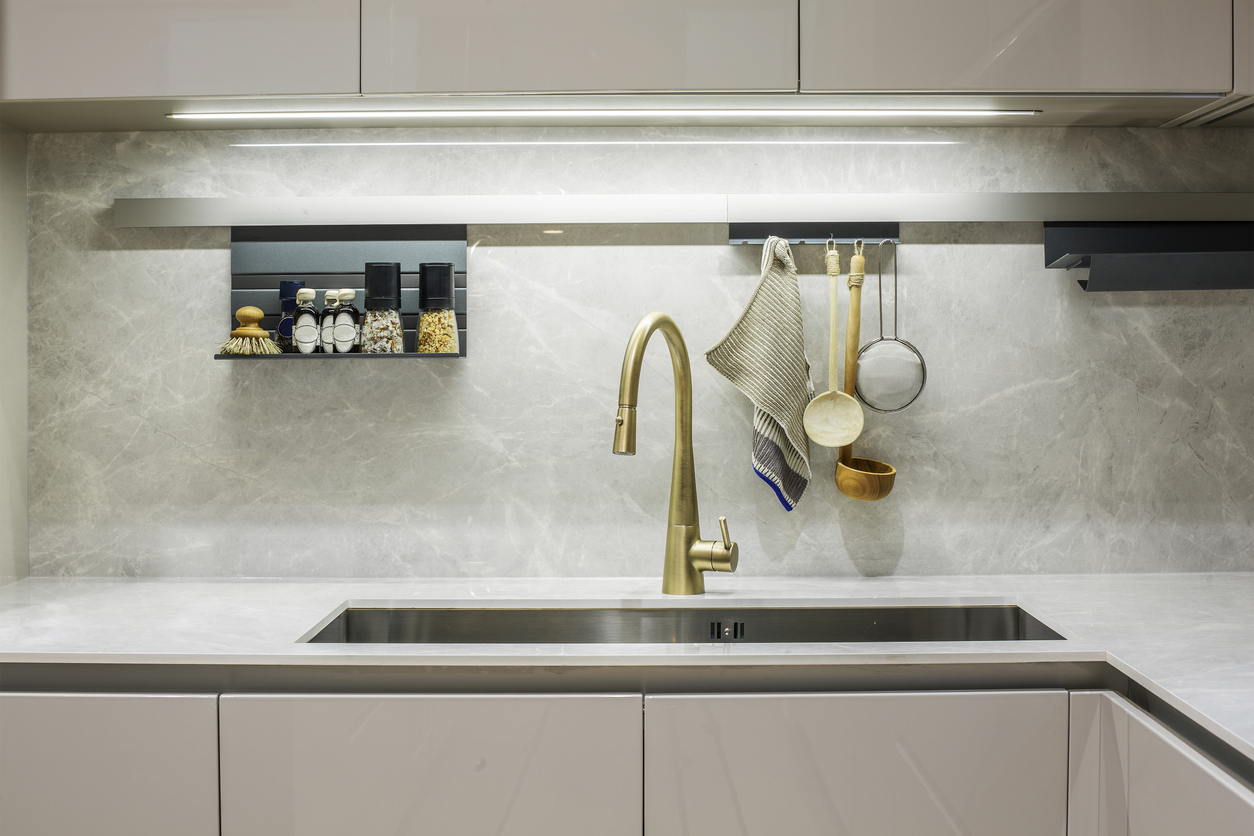
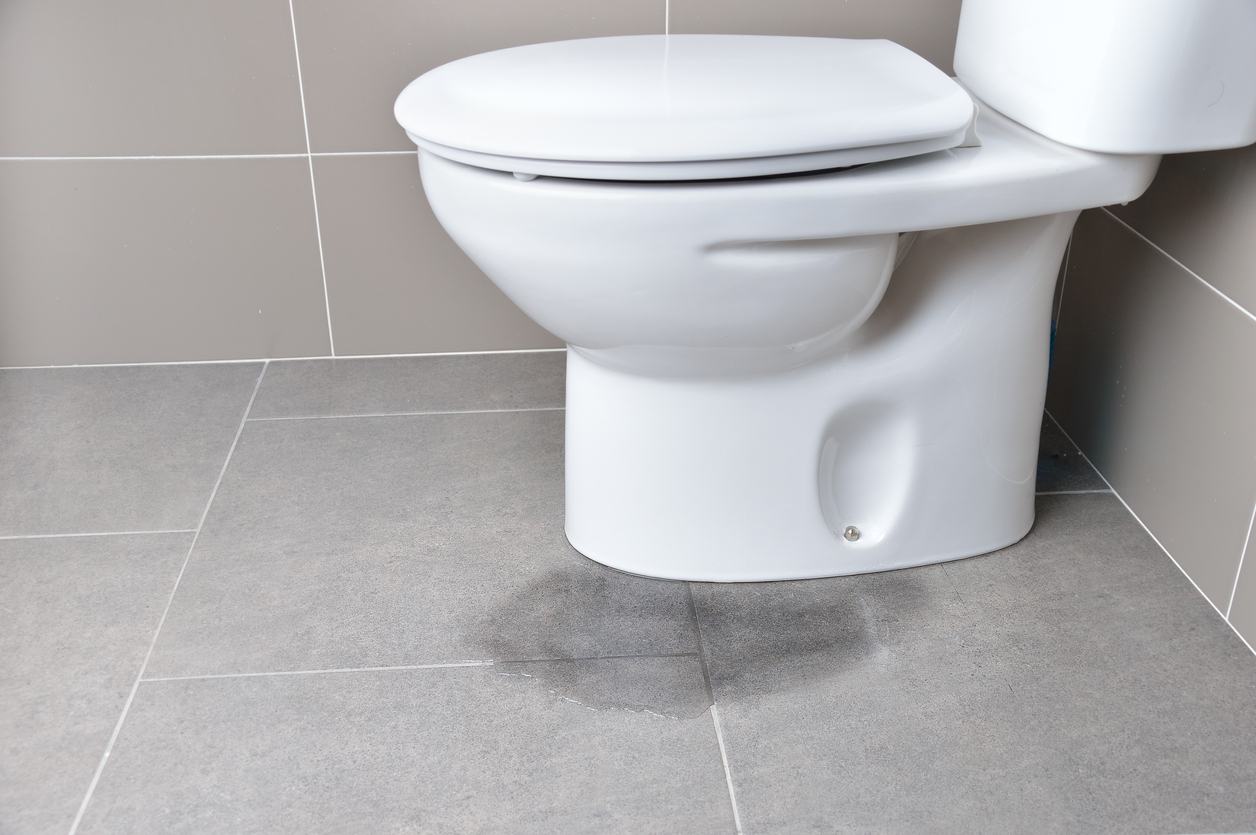
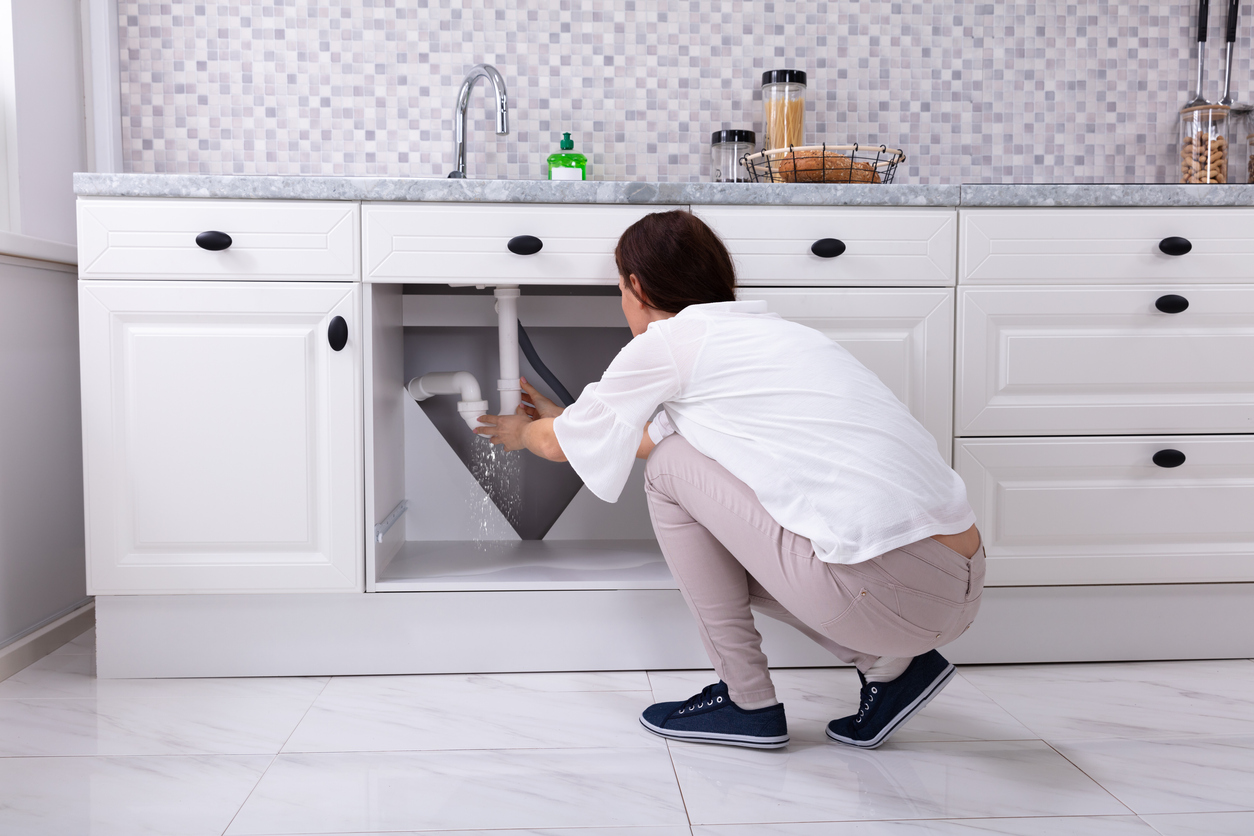
Plumbing emergencies don’t wait for business hours. A burst pipe, overflowing toilet, or failed water heater can happen late at night, early in the morning, or on a weekend—often when it’s most inconvenient. Knowing how to choose the right emergency plumber before a crisis hits can save you time, money, and a lot of stress.

Here are the most important factors to consider when choosing a reliable 24 hour emergency plumber—and why having a trusted professional on speed dial matters.

1. A Real Person Answers the Phone

When you call during a plumbing emergency, every minute counts. A dependable emergency plumbing company should have a real person available to take your call—not just an answering machine or delayed callback.

Pay attention to how the call is handled. Are they calm, professional, and willing to answer your questions? Good customer service from the first interaction is often a strong indicator of how the entire experience will go.

2. Strong Reviews and a Solid Reputation

Online reviews can tell you a lot about what it’s like to work with a plumbing company. Look for consistent feedback about professionalism, response time, and quality of work.

Third-party sources such as Google reviews and the Better Business Bureau can offer helpful insight into a company’s reliability and how they handle customer concerns. A history of positive reviews—and transparent responses to complaints—signals a company that stands behind its work.

3. Proven Experience

Experience matters, especially in emergency situations. A seasoned plumbing team has likely seen—and fixed—just about every type of plumbing problem imaginable.

More experience often means:

  • Faster and more accurate diagnosis
  • Better access to parts and tools
  • Fewer surprises during repairs

When possible, look for plumbers with many years in the industry and a proven track record handling urgent repairs.

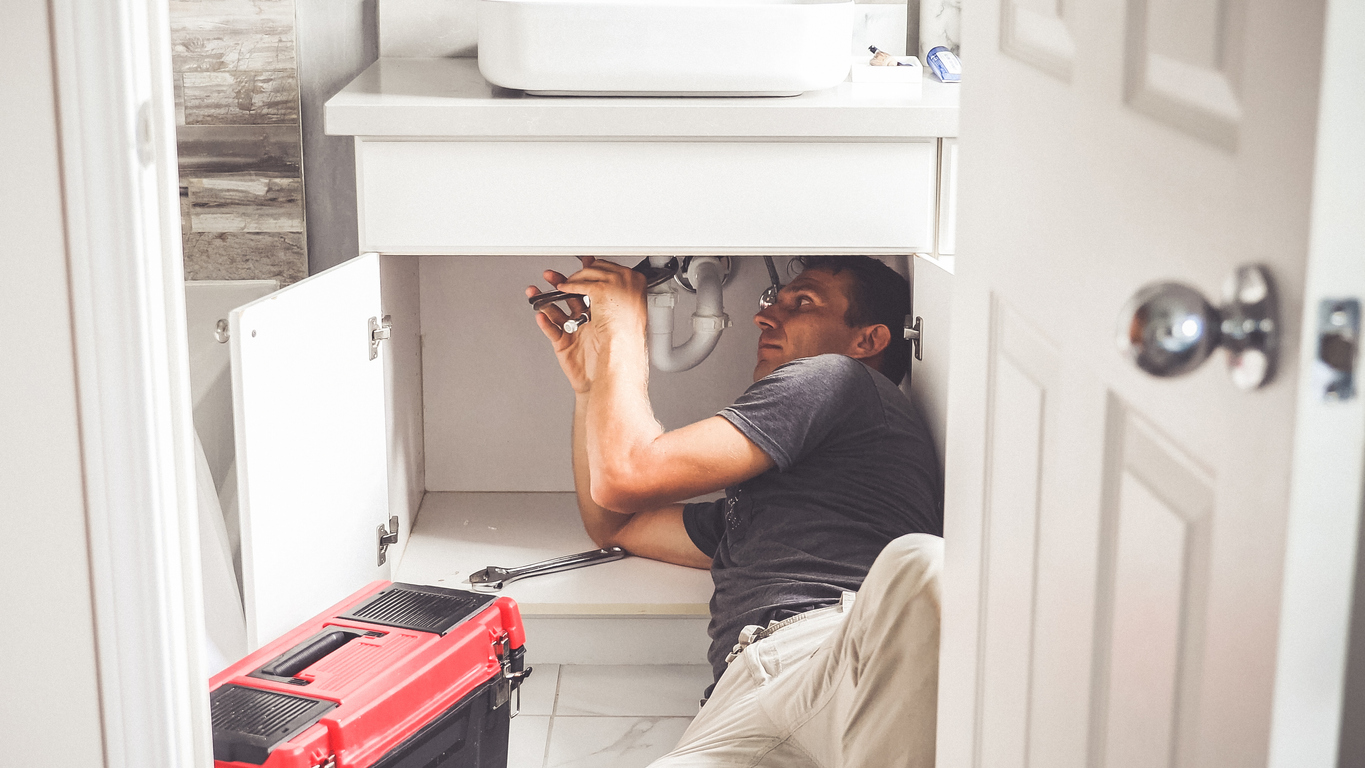
4. An In-Person Inspection Before Pricing

Be cautious of plumbers who offer firm estimates over the phone without seeing the issue. Industry best practice is to inspect the problem first to provide an accurate assessment.

A proper inspection helps prevent unexpected charges and ensures the repair addresses the root cause—not just the visible symptoms. Whether the inspection is free or paid, it’s an important step in protecting your home and your budget.

5. Proper Licensing and Qualifications

Licensing isn’t optional—it’s essential. A licensed plumber has completed the required training and testing to perform work safely and correctly.

Licensed plumbing professionals may hold different credentials, such as Master or Journeyman licenses, but all legitimate plumbers should meet state licensing requirements and operate under proper supervision when applicable. This protects you as a homeowner and ensures the work meets professional standards.

6. True 24/7 Emergency Plumbing Services

Not all plumbers who advertise “emergency service” are available around the clock. A true 24 hour plumber should be accessible nights, weekends, and holidays.

If you’re unsure, ask how emergency calls are handled after normal business hours. When water is flooding your home or a pipe has burst, you shouldn’t have to wait until morning for help.

7. Fast Response Time

In a plumbing emergency, response time can make a big difference in limiting damage. While exact arrival times vary, an emergency plumber should be able to respond quickly and communicate clearly about when help is on the way.

Checking reviews or asking directly about typical response times can help set expectations before an emergency ever happens.

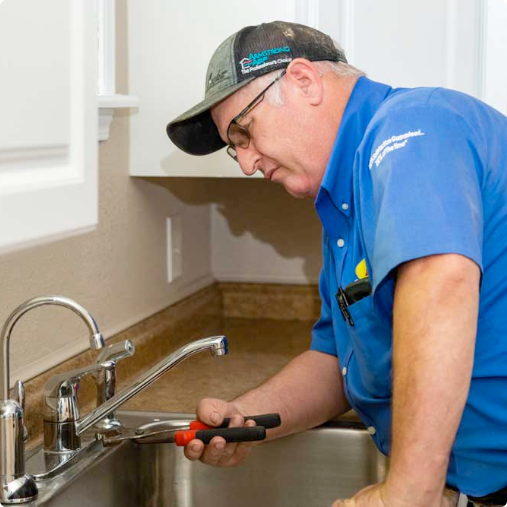
8. Professionalism and Preparedness

Professional plumbing companies value safety, respect, and preparedness. Uniformed technicians, marked vehicles, and well-stocked service trucks all contribute to a smoother, safer experience.

A prepared plumber should arrive with the tools and equipment needed to resolve most emergencies in a single visit—helping restore your home as quickly as possible.

Why Homeowners Trust Dial One for Emergency Plumbing

When a plumbing emergency strikes, you want a team you can trust to respond quickly and get the job done right. Dial One Plumbing is committed to providing dependable, high-quality emergency plumbing services whenever you need them.

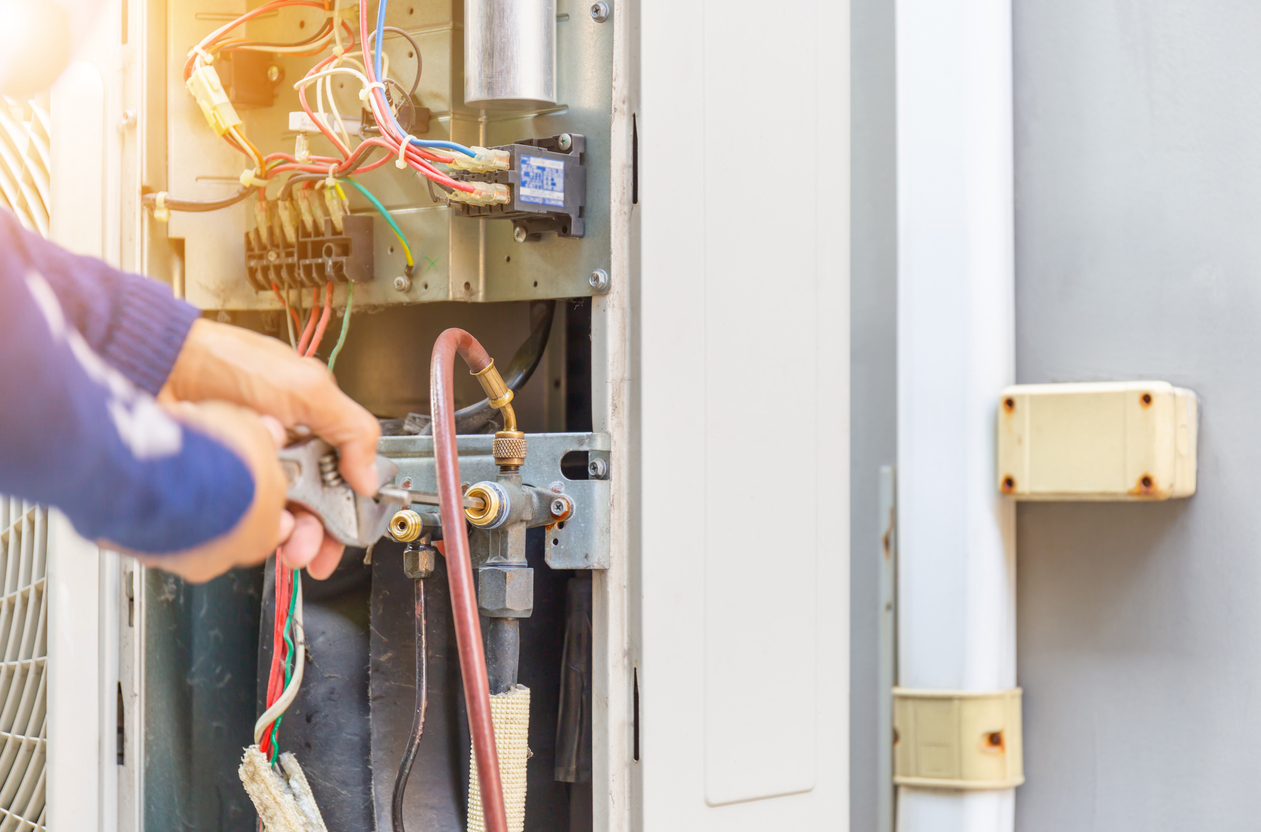
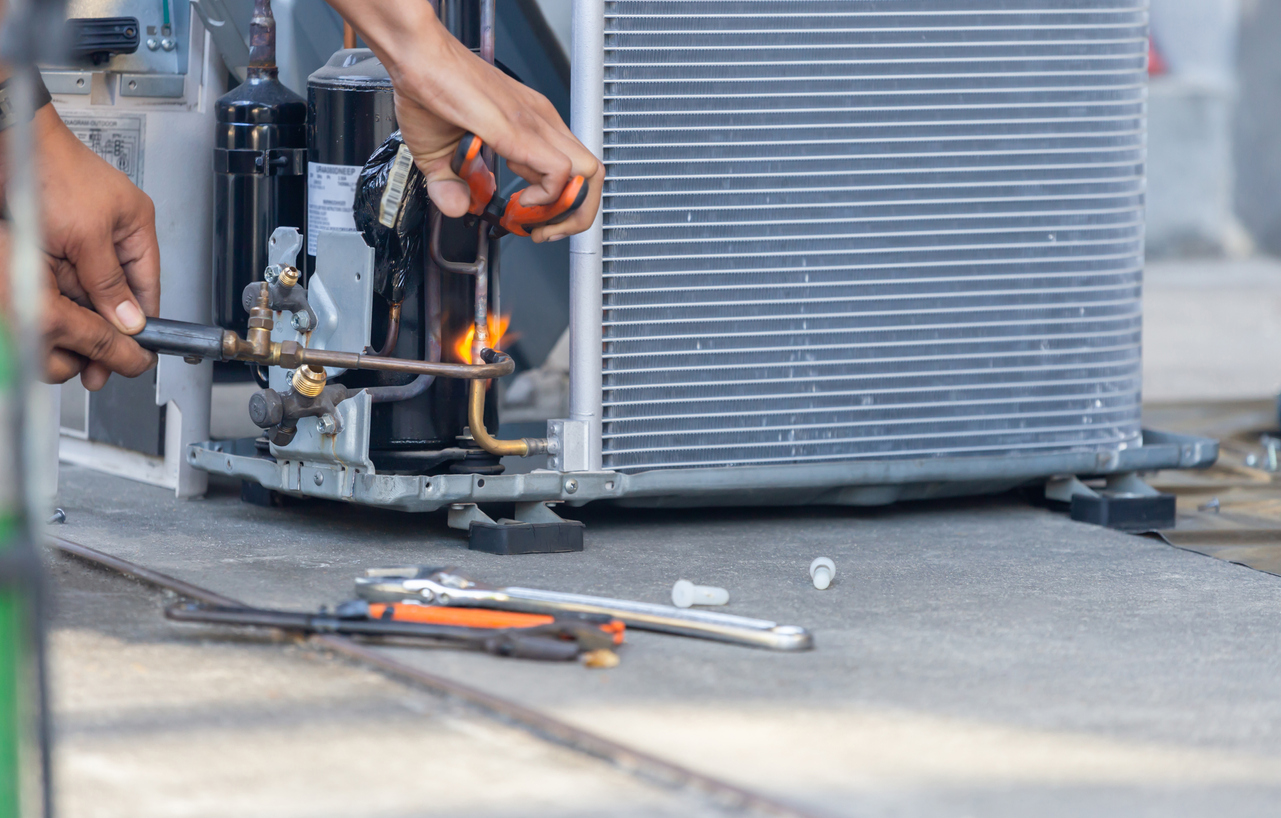
Our licensed and experienced plumbers are equipped to handle urgent issues such as:

  • Burst or leaking pipes
  • Sewer and drain backups
  • Flooding and water damage
  • Broken or leaking water heaters
  • Clogged toilets, sinks, and drains

We understand how stressful plumbing emergencies can be. That’s why our team focuses on fast response times, clear communication, and reliable repairs that restore comfort and peace of mind.

If you need a 24 hour emergency plumber, help is just a phone call away.

Call 972-291-0740 to schedule emergency plumbing service or get help right away.

Posted in

How to Install Pipe Insulation: A Simple Step-by-Step Guide

Protect your pipes from freezing in less than an hour with this easy DIY tutorial.

Reading Time: 3 minutes
DIY Time: 30-60 minutes
Cost: $10-30
Skill Level: Beginner

When temperatures drop below freezing, uninsulated pipes can freeze, expand, and burst, causing thousands of dollars in water damage. The good news? Protecting your pipes is simple, inexpensive, and takes less than an hour. Watch our quick video tutorial, then follow the step-by-step instructions below.

Watch: How to Install Pipe Insulation

Our service technician demonstrates the professional method for installing foam pipe insulation to protect your home from freeze damage.

What You’ll Need

Materials (Available at any hardware store):

  • Foam pipe insulation sleeves ($2-5 per 6-foot section)
  • Zip ties or electrical tape
  • Star Foam outdoor faucet covers ($3-5 each)
  • Old towels or extra insulation (optional)

Tools:

  • Scissors (to cut insulation to length)
  • Wire cutters (if using zip ties)

Total Cost: $10-30 for materials to protect an average home

Step-by-Step Installation

Step 1: Slide Foam Insulation Over Pipe

Start with your exposed pipes. Foam pipe insulation comes pre-slit, making installation easy.

  • Align the slit in the foam sleeve
  • Slide it over the exposed pipe section
  • Make sure the pipe is completely covered with no gaps

Pro Tip: If your insulation doesn’t come pre-slit, use scissors to cut a lengthwise slit and wrap it around the pipe.

Step 2: Secure with Zip Ties

Once the foam is in place, you need to secure it so it doesn’t shift or blow off in wind.

  • Place zip ties every 12-18 inches along the pipe
  • Pull snug but don’t over-tighten (foam should compress slightly)
  • Trim excess zip tie length with wire cutters

Why zip ties instead of tape? Zip ties won’t lose adhesion in cold or wet weather. Tape can deteriorate and come loose, leaving your pipes exposed.

Step 3: Install Outdoor Faucet Covers

Your outdoor faucets need protection too, not just the pipes.

  • Place Star Foam cover over the outdoor faucet
  • Push firmly against the wall to eliminate gaps
  • Ensure it’s snug and secure

Critical reminder: Remove all outdoor hoses BEFORE installing faucet covers. Hoses prevent the faucet from draining properly, which can cause freezing inside the wall.

Step 4: Add Extra Protection (Optional)

For extremely cold weather or very exposed locations, add an extra layer.

  • Wrap an old towel over the foam insulation and faucet cover
  • Secure the towel with additional zip ties
  • This creates a wind barrier for extra protection

Where to Insulate First

Not all pipes are equally vulnerable. Focus on these high-risk areas:

Priority 1 (Most Critical):

  • Outdoor faucets and hose bibs
  • Pipes in unheated garages
  • Exposed pipes on exterior walls

Priority 2:

  • Attic plumbing
  • Crawlspace pipes
  • Basement pipes (if unheated)

Priority 3 (Bonus Benefits):

  • Hot water lines (keeps water hotter, reduces energy costs)
  • Cold water lines (prevents condensation and mold)

Why This Matters

The Problem: When water freezes inside a pipe, it expands by about 9%. This creates enormous pressure (up to 40,000 PSI) that can crack or burst the pipe.

The Cost: The average burst pipe repair costs $5,000-$10,000 when you factor in water damage to drywall, flooring, furniture, and mold remediation.

The Solution: $10-30 in foam insulation and 30-60 minutes of your time.

When to Install Pipe Insulation

Best Timing: Install in fall (October-November) before the first freeze. One-time installation lasts 3-5 years with quality materials.

Emergency Timing: If a freeze is predicted within 24 hours and you haven’t insulated yet, focus on outdoor faucets and the most exposed pipes first. Even partial insulation is better than none.

Additional Winter Prep Tips

Installing pipe insulation is just one part of protecting your home from freeze damage. Also remember to:

  • Remove outdoor hoses from all faucets
  • Know where your water shut-off valve is located
  • Let faucets drip when temperatures drop below 28°F
  • Open cabinet doors on exterior walls to allow warm air circulation
  • Keep your thermostat at minimum 55°F, even when away

Download our complete Winter Storm Preparation Checklist: [Link to checklist]

Common Questions

Q: Can I use regular duct tape instead of zip ties?
A: We don’t recommend it. Tape deteriorates quickly in outdoor conditions and loses adhesion in cold weather. Zip ties are more reliable and easier to replace if needed.

Q: Do I need to insulate hot water pipes?
A: While hot water pipes are less likely to freeze, insulating them provides other benefits: keeps water hotter longer, reduces energy costs by 8-10%, and minimizes wait time for hot water at fixtures.

Q: How long does foam pipe insulation last?
A: Quality foam insulation typically lasts 3-5 years. Check it annually for cracks, compression, or deterioration from sun exposure. Replace as needed.

When to Call a Professional

While installing pipe insulation is a simple DIY project, some situations require professional help:

  • Pipes located inside walls or under slabs
  • Heat tape or heat cable installation (requires electrical work)
  • Already frozen or burst pipes
  • Unsure which pipes are most vulnerable
  • Want a comprehensive whole-house assessment

Dial One Johnson Plumbing is available 24/7 for emergencies:
Emergency Line: 972-914-0833
Regular Service: 972-291-0740

Serving North Texas Since 1965

Dial One Johnson Plumbing, Cooling & Heating has been helping North Texas families protect their homes through freezing weather for three generations. Our licensed technicians have the experience and expertise to handle any plumbing emergency, from frozen pipes to burst pipe repairs.

Licensed, Bonded & Insured
Texas Plumbing License #41416 | TACLA 0076152E

Take Action Today

Don’t wait until temperatures drop to protect your pipes. Spend an hour this weekend installing foam insulation, and you’ll have peace of mind all winter long.

Watch the video above, gather your materials, and get started. Your pipes (and your wallet) will thank you.

Already dealing with frozen pipes? Don’t attempt to thaw them yourself with torches or high heat—this can cause pipes to burst.

Have questions? Call us at 972-291-0740. Our team is here to help!

Posted in

Are Partial Power Outages Dangerous?

Don’t wait for a minor electrical issue to become a major hazard. Call us today and experience peace of mind with our expert electrical services.

Experiencing a partial power outage can be both puzzling and alarming. You might find some lights dimming while others remain bright or some rooms in your home losing power entirely. This phenomenon raises an important question: Are partial power outages dangerous?

At Dial One Johnson Plumbing, Cooling & Heating, we understand the concerns and confusion that can arise from such situations. As the leading provider of generator service in Dallas, we can explain the potential dangers of partial power outages and how to safeguard your home.

What Are Partial Power Outages, and What Causes Them?

A partial power outage can manifest in various ways, such as lights flickering in one room or appliances in a specific part of your house not functioning. These outages can be perplexing and may lead you to overlook the potential risks associated with your electrical system’s irregular performance. 

It’s essential to recognize that these symptoms can indicate more significant issues lurking within your home’s electrical infrastructure. Early detection and resolution of these causes are key to ensuring the safety and reliability of your electrical system.

Tripped Circuit Breakers

Tripped circuit breakers are often a result of overloaded circuits or short circuits. This safety mechanism protects your home by automatically shutting off power when it detects excessive electricity flow. 

Poor Connections

Loose or deteriorated wiring can disrupt the flow of electricity, leading to partial power outages or flickering lights. These issues can also increase the risk of electrical fires. 

Faulty Electrical Panels

Aging or damaged panels may fail to distribute power evenly, which can result in partial outages or even pose a fire risk. You should update or replace electrical panels that are old, show signs of damage, or cannot handle the current electrical load of your home. 

Damaged Power Lines

External factors such as storms or construction work can damage the lines feeding electricity to your home, leading to partial or complete power outages. It’s important to report any visible damage to power lines to your utility provider immediately. Avoid touching or approaching downed power lines, as they can be extremely dangerous.

Overloaded Power Grids

High demand on the electrical grid, especially during peak usage times or extreme weather conditions, can lead to partial outages in certain areas. 

Ground Fault Issues

Ground fault issues occur when electricity takes an unintended path to the ground, affecting specific circuits. This can happen due to damaged insulation or the presence of moisture and can pose serious electrocution risks. 

The Dangers of Ignoring Electrical Issues

Are partial power outages dangerous? The answer is that they can be.

Electrical problems can escalate quickly, often without warning, turning a seemingly minor inconvenience into a critical emergency. Taking immediate action is crucial and can significantly mitigate risks and ensure the safety of your household.

Potential dangers of ignoring electrical issues include:

  • Electrical fires
  • Electrocution risks
  • Power surges
  • Increased energy costs
  • System failures
  • Compromised security systems

By recognizing the early signs of electrical problems and acting swiftly to address them, you can avoid these dangers and maintain a safe, efficient home. Consulting a professional electrician at the first sign of trouble is the best way to protect your home and loved ones from the potential perils of electrical issues.

Safety Measures and Solutions

When faced with a partial power outage, the first step is to check your circuit breakers. If any have tripped, try resetting them. However, if the problem persists or you notice other signs of an electrical issue, it’s time to call a licensed electrician. A professional can diagnose and resolve the problem, ensuring your home’s safety and restoring power.

To further protect your home from electrical hazards, consider regular inspections and maintenance of your electrical system. This proactive approach can help identify potential issues before they lead to partial power outages or other dangerous situations. Additionally, upgrading outdated wiring and installing surge protectors can enhance your home’s electrical safety.

Dial One Johnson Plumbing, Cooling & Heating: Your Partner in Electrical Safety

Are partial power outages dangerous? Yes, they can indicate underlying electrical problems that pose risks to your home and safety. At Dial One Johnson Plumbing, Cooling & Heating, we emphasize the importance of addressing these issues promptly and professionally. For additional safety tips, especially during emergencies, don’t miss our useful tips for emergency heating.

If you’re experiencing a partial power outage and need to restore power safely, call Dial One Johnson Plumbing, Cooling & Heating.

Posted in

Tips on Finding the Right Plumber

When it comes to scheduling plumbing service, you want to hire a team of qualified plumbers who don’t overcharge and will prioritize the job. Trying to find the right plumber is one of those “necessary evils” of homeownership. Or, it used to be. Dial One is a mainstay in the Red Oak area and you’ll find out pretty fast that we stick around, are true to our word and have a skilled team. Whether you hire us or someone else, we want you to find what you’re looking for. So, we’ve assembled a list of tips.

Instead of searching for ‘plumber near me,’ choose the plumber that Red Oak residents trust: Dial One Johnson Plumbing, Cooling and Heating. Give us a call at 469-557-2703 to schedule an appointment. 

Read Through Reviews and Complaints

The first place you should start is on review pages. You can use Yelp, Google or another review website to get an idea of what customers think about a local plumber. Read a mix of reviews, good ones and bad ones. You should want to see why customers gave a plumbing company five stars and why they gave a company only a couple stars.

A more reliable source to look at reviews is the Better Business Bureau (BBB). Here, you can read reviews, go through customer complaints and view the BBB rating. This will give you a great idea of how the business treats its customers. You should aim to find a plumber with a BBB rating of A and very few customer complaints. 

Make Sure Plumber is Licensed and Insured

Before you call for any kind of plumbing repair, you should make sure that the plumber is licensed and insured. Each state has its own licensing requirements for plumbers. In Texas, for example, plumbers are required to get one of the following licenses from the Texas State Board of Plumbing Examiners:

  • Tradesman – Plumber Limited
  • Journeyman
  • Master
  • Plumbing Inspector

You should also verify that the plumber is insured. This protects both you and the plumber from any damages that may occur during a repair visit or replacement. 

Check for Years of Experience

While years of experience does not guarantee excellent customer service or workmanship, it can be a good sign that a company has a track record of success. Business with many years of experience have made partnerships with manufacturers and other companies in the area. Not to mention that after so many years in the industry, plumbing companies are able to quickly assess and repair problems. 

Look at Additional Services

While you may be searching for plumbing repair, maintenance and replacements, there are other services that you may also want to look for. These include:

The last thing you would want is to hire a plumbing company for one job only to find out later that they can’t complete another service that you need. Emergency plumbing services are especially important. If it so happens that a clogged pipe causes your home to flood or a sewer line starts to back up into your home, you’ll want a plumber to come as soon as possible. 

You also may want to check if the company also provides HVAC services. It makes things much more convenient if you can call the same company for both HVAC and plumbing services. 

Check if Financing Options Are Offered

In case you need a replacement, installation or major repair, you may require financing. Having a plumber that provides this option can make an enormous difference for your finances.

Some plumbers also offer coupons. These could be for money off on leak detection repair or reduced price for water heater installation. Hiring a plumber that has special offers is a great way to save money on services. 

See if a Maintenance Plan is Offered

Scheduling regular maintenance is the best way to take care of your plumbing system. Here are the benefits scheduling maintenance:

  • Longer system lifespan
  • Increased efficiency
  • Reduced risk of repairs
  • Lower water bills

Although maintenance is essential, they can become pricey. Fortunately, many plumbing companies offer maintenance plans. The plans may include inspections, sewer line camera inspections and water heater flush and inspection. When you schedule maintenance with an experienced professional, you get numerous benefits. 

Get a Written Estimate

You should always be given a written estimate. If a company offers to provide you with an exact number estimate over the phone, you may want to reconsider. Over the phone estimates are often inaccurate, as most plumbers need to inspect the system before they can provide an estimate. While giving a range is fine, an estimate should be provided in writing.

When you call the plumber, ask for an inspection first. After the inspection, you can ask for a written estimate. You should also ensure that the estimate is itemized, so that you can see exactly what the company is charging you for. It should always be your goal to find a plumber that believes in cost transparency. 

Keep Track of Response Time

When you call for plumbing repair, be sure to keep track of the response time.Look for a plumber that can arrive at your home quickly or, if you scheduled an appointment, on time. This is especially important for emergency services. You should feel confident that you won’t have to wait days, or even hours, for a plumber to arrive. 

Dependable Plumber in Red Oak, TX

Trying to find a reliable plumber is not easy – but it’s not impossible. If you’re living in Red Oak, Texas, then Dial One Johnson Plumbing, Cooling and Heating is the company for you. Our team of experienced professionals are dedicated to providing only the best service possible. In fact, at Dial One Johnson, we have a 100% satisfaction guarantee.

We want our customers to feel confident that their plumbing problems will be solved quickly and correctly. Our team also provides many services in addition to regular plumbing services. These include emergency services, drain and sewer, water heater services, sump pumps and much more. Don’t settle for a mediocre plumbing company; hire Dial One Johnson Plumbing Cooling and Heating.

To schedule an appointment, give us a call at 469-557-2703 or contact us online. 

Author Bio:
Sherrie Johnson-Hartsock
Dial One Johnson Plumbing, Cooling & Heating is now owned and operated by Sherrie Johnson-Hartsock, with his grandson, Daniel Johnson, a third-generation plumber who is also the Service Manager.

Posted in

Get HVAC Contractors Involved in Your Project Early

When designing a new commercial building, it is easy to think about things like aesthetics and functionality before thinking about the inner workings of the building. What color should the walls be? Should I install a coffee station? What furniture should I pick out? These are the questions you may be asking yourself in the early stages of the project. But, what about your heating and cooling system?


Commercial spaces need great HVAC systems. There will be tons of people working, using and visiting the building daily. It is important that they can stay comfortable all throughout the year. A comfortable workspace is a productive workspace. The best way to ensure that you have a high quality HVAC system is to get your HVAC contractor involved in the project early.


Our team at Dial One Johnson Plumbing, Cooling and Heating have worked with tons of commercial building developers and owners. We know the ins and outs of the industry and are ready to get the job done and save you money while we’re at it. To contact our team for commercial HVAC service, give us a call at 469-240-5618. 


Continue reading to learn more about why and how you can get your contractors involved early. 

Benefits of Working With an HVAC Contractor Early

There are so many benefits to involving your HVAC contractor early on in the building process. 

The first is that they can be there to answer any questions throughout the process. While you are designing the building or beginning the actual building process, you may have questions for your HVAC contractor. 


Where will the indoor unit go? How should we design the ductwork? What is the best way to position the workspace so that all workers stay comfortable? These are the kinds of questions that would be best answered by an HVAC contractor. The answers will have a much bigger impact on the final product than you may initially realize. 


The next is that HVAC contractors are prepared to handle the unexpected. If you include your HVAC contractor in the building process, then they can be there in the case that things go awry. For instance, if there is an issue with the ductwork or insulation, an HVAC contractor can help to right the ship. When you use a commercial HVAC contractor throughout the building process, you ensure a better functioning and more efficient HVAC system. 

Working With an HVAC Contractor in a New Building

Aside from the previously listed benefits that you receive when working with an HVAC contractor on a new building, they can also aid in the process from beginning to end. It’s easy to leave the hiring of a contractor until you need commercial furnace installation, but they can actually provide quite a bit of wisdom during the entire process.

Installation Process For New Building

There are many steps that go into designing and building a brand new commercial space. Even though the HVAC system is but a small part of the process, it is an important one. Take a look at the steps of the building process and how an HVAC contractor can help:


  1. Design: the design of a commercial building is incredibly important. While the aesthetics and architecture of the design are important, we are talking about the structural design of the building. An HVAC contractor can help you design a more energy conscious space. Did you know that even the way that your windows face can substantially affect your energy costs? It’s these kinds of tips and tricks that HVAC contractors know and can pass along to you throughout the process. Things such as how to design the hallways and workspaces to ensure the best airflow or where to install vents can make a big impact on the final building. 
  2. Rough building: when the builders start to put walls and ceilings up, your HVAC contractor should be called in to place ductwork. While it may be easy to get your HVAC contractor, electrician and plumber to install these systems at the same time, this is not always a great idea. Ductwork takes up quite a bit of space in a building, whereas wiring and piping are more flexible. Let your HVAC contractor install the ductwork first to ensure optimal cooling and heating efficiency.
  3. Equipment installation: it is probably obvious that you will need your technician to complete commercial AC installation. Be sure to talk with them first about what kind of system is best for your building. Also be sure to let them size the unit first. If they don’t then you may end up with higher monthly energy bills or a unit that prematurely fails. 
  4. System start-up and walk through: finally, once all of the electrical, plumbing and HVAC systems are installed, your contractor will come in to start the system up. Here, they will inspect everything and make sure that all systems are a go. A great contractor will walk around to all of the vents to check for good airflow and that the thermostat is properly working. Your HVAC contractor will also show you how to work the thermostat and where to find air filters. They may even show you how to fix simple issues such as clogged outdoor units or stuck blower fans. 

Commercial HVAC Repair in Grand Prairie, TX

No matter what your next commercial building project is, it is imperative that you bring an HVAC contractor in as soon as you begin. They can offer the insight that many other contractors and specialists can not. This is why you need to ensure that you are getting the best bang for your buck, which means hiring an HVAC contractor for your new building right away.


At Dial One Johnson Plumbing, Cooling and Heating we have been working with commercial building owners for over 50 years. You can trust us to lead your building in the right direction so that you can save money and time. 


To schedule an appointment for commercial HVAC service, give us a call at 469-240-5618 or contact us online

Author Bio:
Sherrie Johnson-Hartsock
Dial One Johnson Plumbing, Cooling & Heating is now owned and operated by Sherrie Johnson-Hartsock, with his grandson, Daniel Johnson, a third-generation plumber who is also the Service Manager.

Posted in

Ways to Unclog a Bathroom Sink

It is much more common for toilets to get clogged than it is for bathroom sinks to get clogged. This is because we typically don’t put much down the sink other than soap, toothpaste and water. However, if your bathroom sink does get clogged then there is no need to fear. There are plenty of options as to how to unclog your bathroom sink. 


To schedule bathroom sink repair in Waxahachie, TX, contact our team at Dial One Johnson Plumbing, Cooling and Heating at 469-518-2809. 


Continue reading for a few different ways to unclog your bathroom sink. 

Baking Soda and Vinegar

This is one of the best ways to unclog your sink because it is the least caustic to your piping. All you have to do is pour equal parts baking soda and vinegar down the drain. It is best to start with one third of a cup of vinegar followed by one third of a cup of baking soda. Wait a minute or two and then pour boiling water down the drain. Continue to do this until you hear the clog start to break up. This doesn’t always do the job, but it is a great way to begin breaking down the gunk that may be coating your pipes.  

Boiling Water

If you don’t have any baking soda or vinegar handy, boiling water may just do the trick. Sometimes what is clogging the sink can be dissolved by boiling water. Soap scum and dissolvable paper, for example, will be easily taken care of by boiling water. If it doesn’t work on it’s own, first try a bit of baking soda or vinegar followed by the boiling water. This could help to work on breaking down those nasty clogs. At this point you may want to call for plumbing a camera pipe inspection

Baking Soda and Salt

Are you starting to figure out that baking soda is a huge help in removing clogs? If you don’t have any vinegar on hand, try baking soda and salt. Mix together half of a cup of each and pour it down the drain. Wait fifteen minutes and follow with boiling water. Try it a few times if it doesn’t work the first time, but no more than three times. Sometimes this mixture is not enough to help remove a clog, but it is worth a shot. 

Wet/Dry Vacuum

Not everyone owns a wet and dry vacuum, but those of us that do are in luck. If the clog is located near the surface of the pipe, then a vacuum could very well do the trick. All you have to do is place the vacuum directly over the drain. Be sure to remove the stopper completely before you do this. When you place the nozzle over the drain you should try to form a complete seal. This will allow the vacuum to completely suck whatever is inside the drain. Turn the vacuum on and see if you can get the clog out. 


If the clog is too condensed with materials such as hair and other objects, a wet dry vacuum may not be strong enough to get it all out. However, it may be able to bring it up closer to the top. You may want to contact a certified plumber to complete drain and sewer plumbing services and get the entire clog out. 

Wire Hanger or Drain Stick

If you have a wire hanger somewhere around the house you can use this to get the clog out. Cut the wire hanger so that you only use one wire. Bend the end of the wire into a hook shape and insert it into the sink drain. Try to wiggle it around and scoop up and down. If the clog is made out of hair, then this method may be able to do the trick. If you pull the wire hanger out and there is nothing on it then the clog may not be made of solid material or the hanger actually pushed the clog deeper.


While professional drain snakes are expensive and large, you can actually find smaller, plastic toothed drain sticks at home improvement stores. These sticks are an excellent way to get clogs out, especially hairy ones. If this doesn’t work then you may want to call for expert plumbing services

Pipe Cleaning

If your bathroom sink has a sink trap underneath then you may want to try this method. First you need to place a bucket underneath the trap to catch whatever comes out. Then you will need to loosen any nuts or bolts that hold the trap in place. Some sinks require you to unscrew the trap out after you loosen the fasteners. 


Once you have removed it you should hold it upside down over the bucket and use a small brush to get rid of any gunk. Even if this doesn’t remove the entire clog it should help to at least move some of the debris that is keeping the clog from budging. 

Plunger

While it sounds strange to try a plunger on a sink, sometimes it can work. Fill your sink with two to three inches of water and place your plunger over the drain. Make sure that a seal has formed between the plunger and the sink. Then begin to plunge straight up and down. The plunging motion should at least loosen the clog or bring it upwards slightly. 

Reliable Clogged Drain Repair in Waxahachie, Texas

If none of these methods work and you need to call for clogged drain repair, give Dial One Johnson Plumbing, Cooling and Heating a call. Our team has got all of the tools necessary for effective bathroom sink repair. We also provide heating and cooling repairs, replacements and maintenance. No matter what your problem is, big or small, trust Dial One Johnson to get the job done. 


To schedule an appointment today give Dial One Johnson Plumbing, Cooling and Heating a call at 469-518-2809 or book an appointment online

Author Bio:
Sherrie Johnson-Hartsock
Dial One Johnson Plumbing, Cooling & Heating is now owned and operated by Sherrie Johnson-Hartsock, with his grandson, Daniel Johnson, a third-generation plumber who is also the Service Manager.

Posted in

5 Garbage Disposal Myths and and Tips

Most homes contain a garbage disposal to make after-meal clean ups easier. Garbage disposals can be both a blessing and a curse. While they make life more convenient, they are also difficult to maintain since they are hard to access. It’s important that you properly maintain your garbage disposal and listen to expert advice on what to do and not to do. 

If you are ready to schedule a plumber, give our team at Dial One Johnson Plumbing, Cooling and Heating a call at 469-557-2703. 

Continue reading to learn more about garbage disposal myths and how to properly maintain your garbage disposal. 


Garbage Disposal Myths

There are many myths surrounding the use of garbage disposals. From using lemons to clean them to running hot water while in use, you’ve probably heard it all. Here is a list of the five most common garbage disposal myths. 

1. Any Food Waste Can Go Down the Garbage Disposal

Many homeowners assume that the garbage disposal can handle just about anything. However, this is not true. Here is a list of things that you should never put down the garbage disposal:

  • Coffee grounds
  • Shells, nuts, seeds and pits
  • Animal bones
  • Onion layers
  • Fibrous roots and vegetables
  • Egg shells
  • Oil, fat and grease
  • Potato peels
  • Non-food items

While it may seem like garbage disposals are equipped to process anything and everything, the truth is that they are sensitive. The above listed items can easily break, clog or stall your garbage disposal. Before throwing everything into the disposal, consider what you should throw in the trash first. 

2. You Should Sharpen Garbage Disposal Blades

You may have heard to pour ice, or some other hard substance, into the garbage disposal to sharpen the blades. This may come as a surprise, but garbage disposals don’t have blades. Instead, garbage disposals use many sharp teeth that spin at a high speed to process the food. 

However, putting ice down your garbage disposal is good for other tasks, such as helping to clean the disposal. This will help to keep your disposal from getting smelly. Even though ice can help with these things it is still true that the more you use your garbage disposal, the more you will wear it out. 

3. Use Lemons To Clean Your Garbage Disposal

Using lemons and limes to clean your garbage disposal does have some benefits, but probably not the ones you’re thinking of. If you need something to mask a yucky smell coming from the disposal, then lemons or limes are probably your best bet. However, if the bad odor continues to persist then you need to call for plumbing repair.

While lemons make great air fresheners, they can also cause harm to your garbage disposal. The disposal is mostly made up of various metal parts. As durable as this metal is, the acid found in citrus can actually corrode the metal over time. A lemon here and there won’t hurt much, but if you’re dumping citrus into your garbage disposal every week then you may end up with a bigger issue down the road. 

4. You Have to Run Hot Water When Using the Garbage Disposal

It makes sense to think that running hot water when using the garbage disposal will help to break up food particles. However, it can actually cause more problems. If you are putting grease and fat down the garbage disposal, the hot water will turn these into liquid form. This will cause them to easily travel through the plumbing. That is, until it all starts to cool and sticks to the pipes. 

Using cold water instead will keep the grease and fat in solid form, which allows the garbage disposal to grind it up into smaller pieces. These tiny pieces of fat and grease are less likely to cause any blockages. You should always choose cold water over hot when putting your garbage disposal to use. 

5. No Clog Means My Garbage Disposal is Fine

It’s easy to dismiss garbage disposal maintenance and service when there are no clogs present. Although, just because there are no clogs doesn’t mean that your disposal doesn’t need kitchen plumbing maintenance. Just like all of your other plumbing systems, maintenance helps to diagnose existing problems and prevent any future problems. 

Be sure to schedule plumbing maintenance so that an expert can complete a camera pipe inspection. In the meantime, if you notice anything strange going on with your disposal, call a technician straight away. 


Tips for Garbage Disposal Maintenance

To keep your garbage disposal in tip top shape, there are a few things that you should do. Take a look at these maintenance tips for your garbage disposal:

  • Know what not to put down your garbage disposal. The harder that you make your garbage disposal work, the quicker it will develop issues and require a replacement.
  • Be careful as to how you clean your disposal. Never pour chemical drain cleaners into your sink as it actually does more harm than good. Instead, use natural cleaners such as vinegar and baking soda. You should also be consistent as to how often you clean the disposal. Once every two weeks is the perfect schedule to follow for cleaning.
  • After your garbage disposal is done grinding up food, run the faucet for about 30 seconds to a minute to ensure that all waste has been flushed down the drain. This will help to prevent clogs.

No matter what, call a licensed plumber if there is a problem with your garbage disposal. 


High Quality Plumbing Companies

For reliable plumbing services, you need Dial One Johnson Plumbing, Cooling and Heating. Our plumbing team has got the knowledge and expertise to get the job done right the first time. When you hire our team, you can be sure to receive the best service possible. 

At Dial One Johnson we provide repairs, replacements and maintenance for all kinds of HVAC and plumbing systems.

To schedule an appointment with our team, give us a call or contact us online

Posted in

5 Big Factors That Affect Your AC Installation Cost

Installing a new air conditioner is often a bittersweet experience. While it is exciting to know that you are in for higher quality comfort in your home, the cost alone is enough to bring on some anxiety and frustration. 


One of the best ways to save money on your AC installation is to plan ahead. If you know that you have an older HVAC unit and it has been encountering more frequent issues, then replacement is probably near. Instead of waiting for it to fail, consider replacing it ahead of time. This way you have time to save up money and look for an excellent company to complete the installation. 


For quality Desoto air conditioning and heating installation, give Dial One Johnson Plumbing, Cooling and Heating a call at 469-557-2703. 


Continue reading for five factors that can affect the cost of your AC installation. 

1. Type of AC System

There are all kinds of air conditioning systems available. Ductless mini-splits, packaged units, window air conditioners and central units are only a few of the different kinds of AC systems. A large fraction of the installation cost will be based on what kind of unit you choose. 


Some homes will require packaged or central HVAC systems due to their size. While other, smaller homes can use window units or ductless mini-splits. You will also have to choose what brand of air conditioner you want. Some AC brands, such as Lennox products and Trane, offer durable and long-lasting systems with high efficiency. However, these come at a higher price. Goodman and Ameristar are examples of some lower cost brands that offer moderate durability and lifespan.


If you aren’t sure what kind of unit you need or what brand you should choose, talk to your HVAC technician.

2. Size of the Unit

Before an HVAC system is installed, the technician will size the unit. This means that they will calculate how much heating and cooling power you need in a system based on the size of your home and household needs. This is one of the most important steps of any AC replacement. If the system is too big then your bills will substantially increase. If the system is too small then your home won’t be efficiently cooled. 


Although you don’t really get to choose what size unit you need, it will factor into the total cost. Expect to pay more for a unit and installation if you have a larger home. To get an accurate estimate, have an HVAC contractor come to your home and complete a system sizing for you. 

3. Seasonal Energy Efficiency Ratio 

Higher efficiency systems are better for your home and wallet. When a system is more efficient, it will last longer, lower your energy bills and cost you fewer repairs. The way to determine the efficiency of a system is through the Seasonal Energy Efficiency Ratio (SEER). 


The minimum SEER rating is 13 and the maximum is around 25. Although 13 may be the minimum, it does not mean that an AC unit with a 13 SEER rating is low quality. Think about it this way: an AC unit purchased 20 years ago probably has a SEER rating of 8 or 9. All that has happened is that standards have gone up, making the minimum SEER rating much higher than it used to be.


One of the best ways to quickly filter through systems is to look for an Energy Star label. Air conditioners can only qualify for an Energy Star if they have a SEER rating of 14.5 or higher. Contact your local HVAC technician for more information on Energy Star systems. 

4. Accessory Component Installations

The sky’s the limit when it comes to air conditioner installations. There are many other accessory components that you can install at the same time as your air conditioner. Here are a few:


  • Whole house, ultraviolet purifier or de/humidifier
  • Smart thermostat that wirelessly connects to your smartphone
  • Temperature zoning thermostat


These are excellent additions to any heating and cooling system. Add-ons such as purifiers and dehumidifiers can substantially increase the indoor air quality of your home. Installing a smart thermostat can make your life much easier with the ability to change your home’s temperature from your phone.


Temperature zoning is an especially great investment. When you use temperature zoning, you can preset temperatures throughout the day. For example, in the summer you may preset your thermostat to increase during the day while you are at work and then to lower for when you are home. Not only do the preset temperatures and times make things more convenient, it also saves you money. 

5. Ductwork and Ventilation

Inefficient ductwork and ventilation can send an HVAC installation bill skyrocketing. When you get an HVAC system installed, the technician will most likely check out your ductwork and ventilation as well. If the ductwork system is old it may require new insulation or even a new pathway. This can cause a substantial increase in your cost.


Some homeowners need a new air conditioner installed because they have put an addition onto their home. If this is the case then you will definitely need to get your ductwork pathway redone and new vents installed. If you aren’t sure of the condition of your ductwork and ventilation, call an HVAC repairman. 


While, in most cases, new ductwork is an unforeseen added expense, some homeowners choose to get it replaced. This is especially common in older homes. Getting your ductwork and your air conditioner installed at the same time can actually save you money rather than doing one at a time. If you know you want to eventually get your ductwork replaced, consider scheduling it at the same time as your HVAC replacement. 

Reliable AC Repair: Desoto, TX

The most important part of any air conditioner installation is hiring the right company. For all of your Desoto air conditioner and heating needs, contact Dial One Johnson Plumbing, Heating and Cooling. Our team of expert technicians are ready to help get the job done right the first time.


To schedule HVAC or plumbing service, give our team a call at 469-557-2703 or contact us online. 

Author Bio:
Sherrie Johnson-Hartsock
Dial One Johnson Plumbing, Cooling & Heating is now owned and operated by Sherrie Johnson-Hartsock, with his grandson, Daniel Johnson, a third-generation plumber who is also the Service Manager.


Posted in

6 Steps to Fix a Toilet Leaking at the Base

Dealing with a toilet leak can be frustrating, even for experienced homeowners. Even so, water leaks are common home repairs that can often be resolved with a little plumbing knowledge and a little do it yourself spirit.


Because all homes are equipped with at least one toilet, there is a good chance that homeowners will eventually need to replace or repair parts as they wear down over time. The important thing to remember is to remain calm. Some issues are truly emergencies, but not all repairs should cause you to start searching for a nearby plumber.


For all plumbing maintenance and emergencies, find a plumber in Desoto, TX. Dial One Johnson Plumbing, Cooling and Heating is the one to contact. Give us a call at 469-518 – 2809. 

DIY Plumbing for a Leaking Toilet

When it comes to DIY repairs, a leaking toilet is generally one of the easier tasks to tackle. This is because toilets are among the simplest appliances that can be found in your home. In its simplest terms, water enters the bowl from the tank and is flushed down your main line. Because of this simplicity, finding the root cause of leaks can be found with a little patience.


Before you start ripping your toilet out of the floor, look for less invasive solutions. Here are six steps to help you resolve your leaking toilet.

1. Check for Condensation

You may have noticed that toilet water is not heated. In fact it can be much colder than the surrounding air temperature in your home, especially during the hot summer months here in north Texas. In turn, the cold water makes the bowl cold. As the air around the outside of the toilet warms up or is saturated with humidity, condensation can form and drip to the floor. 


Condensation will be unlike any of the other causes, as it will not be concentrated at the base of the toilet. Typically, it will form higher up on the exterior bowl or tank. To avoid condensation buildup try these tips:

  • Turn on the bathroom fan
  • Take shorter, cooler showers
  • Insulate the water tank
  • Check for a faulty flapper

Condensation will not happen immediately, so give it plenty of time before taking further action or reaching out for plumbing repair.

2. Tighten Tee Bolts

After checking for condensation, next double check the tee bolts that secure your toilet to the floor. You may be surprised that the toilet is only attached by two bolts, located on the sides near the base. Look for the small white knob. These covers are purely aesthetic and should just pop off.


Take an adjustable wrench and tighten down the nuts that are threaded on each bolt. By tightening the toilet to the ground, you are compressing a wax ring creating a water-tight seal with the flange that connects to your main line. Take care to ratchet down the nut slowly, alternating between the two. Tightening one side down first can prevent the ring from creating a proper seal.


Once tightened, dry the area and flush the toilet. Let it sit for another 15 minutes. If you don’t see any water leaks, you will know that your issue has been resolved. If water begins to pool up, you can move to the next troubleshooting tip.

3. Remove the Toilet

The next troubleshooting solution will be a bit more invasive and homeowners should consider consulting with a plumber to avoid any emergency issues. For those that choose to DIY, the process is not overwhelming but having an extra pair of hands will certainly help as you remove the toilet.


Before unbolting the toilet from the floor, turn off the water and disconnect the water line that connects at the base of the tank. Place extra towels around the base as you will need to get rid of any lingering water in the bowl or tank. Then flush to empty any remaining water.


Next you will need to remove the nuts that secure the tee bolts at the base. For older toilets this can be more problematic as they can corrode over time. The bolts are easily replaceable so use a hacksaw for easy removal of stubborn bolts. Once the nuts are removed, the entire toilet can be removed and placed on it’s side.

4. Remove and Replace the Wax Ring

With the toilet securely on its side, you will now have access to the wax ring. Unless the ring is severely damaged, chances are you will need to pry it off of the bottom of the toilet. The easiest way to do this is with a utility or putty knife.


Before installing the new wax ring, make sure that all remnants of the older ring are removed. Even a small amount can cause a gap and result in future leaks.


Once you are ready to install the new ring, make sure that the cone shaped side is pointing down. When compressed this will flare out, creating a water-tight seal.

5. Reinstall the Toilet

Now that the parts have been replaced, we can begin to work backwards, retracing our steps to reinstall the toilet. If you had to cut the bolts when removing the toilet, you will now want to insert the replacement bolts before mounting the toilet back in place.


Work with your partner to place the toilet back over the bolts and carefully place over the flange. Tighten down the nuts on both sides of the toilet to get the proper seal.

6. Reconnect the Water and Test

The final step is to reconnect the water to the tank. Once the line is secure, turn your water back on and wait for the tank to fill up. Take this time to double check that the area around the toilet is dry. 


Once full, flush the toilet and inspect the area around the base of the toilet. If the leak has been resolved, give yourself a pat on the back for a job well done.


If the problem persists, a call for bathroom plumbing services is the best option. Getting trained eyes on the issue may uncover additional issues that need to be addressed.

Finding a Plumber in Desoto, TX

Even the most experienced homeowner needs to have a team that can be trusted when problems surpass the DIY stage. Turning to a trusted source saves time and helps with peace of mind.


Dial One Johnson Plumbing, Cooling and Heating has served the residents of the Dallas area for over 50 years. Our team of professional, licensed plumbers can tackle everything from maintenance to emergency plumbing repairs.


Call us at 469-240-5618 or contact us online to schedule an appointment with our team.

Author Bio:
Sherrie Johnson-Hartsock
Dial One Johnson Plumbing, Cooling & Heating is now owned and operated by Sherrie Johnson-Hartsock, with his grandson, Daniel Johnson, a third-generation plumber who is also the Service Manager.


Posted in

Should I Repair or Replace my Furnace?

Waking up to a cold house on a winter morning can quickly go from frustrating to a minor crisis. During cooler months, we rely on our home’s furnace to keep our family comfortable and safe. When its reliability comes into question, the choice of repair or replace can be overwhelming.


Eventually all homeowners will be faced with the difficult decision of whether to continue to repair their home’s furnace or explore replacement options. Like other home systems, your furnace is not designed to last forever, even with regularly scheduled maintenance. 


Although the final decision is up to the individual homeowner, working with a trusted team can help you make the best choice for your home. When it comes to Midlothian heating and air service, the Dial One Johnson plumbing team can provide cost analysis and provide options that fit any budget.

Factors to Consider When Choosing HVAC Repair or Replacement

Replacing a furnace is a major home investment, so it makes sense that you want to do your due diligence. With home systems costing between $2000-$6000, avoiding the need to make a decision during an emergency situation will save money and unnecessary stress. 


In an ideal situation you would have ample time to research costs, different unit options and schedule a convenient time. The following factors should be considered any time you are considering a repair or heating replacement.

1. Age of Furnace

With the average life of a furnace ranging from 15-20 years, the age of your system will always come into question when repairs are needed. Even with regular maintenance, Midlothian HVAC repairs will increase in frequency. Older systems can have a repair completed on one day and a separate malfunction the next.


If your system is less than 10 years old, it is likely that your best option will be to repair. Check with your HVAC warranty as many will cover the unit up to 10 years. It should be noted that for most manufacturers the system will need to receive regular maintenance from a trained professional. Failure to do so may void the warranty prematurely.


If your system is 15 years or older, homeowners should consider replacement. The repair that is immediately needed may be used as a stop-gap, but it is likely that more frequent repairs are just around the corner.

2. Frequency and Cost of Repairs

At some point, the cost of continuing to repair the unit will outweigh the cost of replacing the system. This is especially true as the system ages, although newer systems are not immune. Multiple repairs in two years or less is considered excessive.


Frequent need for repair is a sign that the system is failing. It is likely that you will see costs increase with each repair and with your monthly utility bills. 


Work with a heating and air expert to put together an accurate cost analysis of projected costs. While a warranty can provide some cushion for unexpected repair cost there still may be out of pocket expenses. If the cost of the repair is half or more of a new system, you may be better off with a full system replacement. 

3. Furnace Efficiency 

Perhaps you are rigorous in your furnace maintenance, and you address any minor repairs as soon as they arise, even the most reliable system can start to operate inefficiently. Spikes in energy costs and an uncomfortable home despite what the thermostat reads are common signs that your system is not operating at peak efficiency.


Issues with efficiency can often boil down to poor maintenance, such as clogged filters or restricted airflow in the ductwork. But as a system ages, it will struggle to disperse warm air throughout the entire home. As it struggles, it will run longer, consuming additional energy.


During diagnostics, your technician should be able to narrow down the culprit behind the inefficient behavior.

4. Plans to Sell Your Home

Homeowners that are planning on selling their home within the next few years should also consider the cost of repair versus replacement. While repairs may be more cost effective in the short term, replacement may be needed to pass an inspection.


If you are planning on selling your home in a few years and your system is already starting to age you will benefit from a replacement sooner. Not only will the system be under warranty for the remainder of the time you own the house, it will also be less likely to fail an inspection when you do get ready to sell.


As mentioned, replacement will eventually be necessary. In the meantime, being attentive and paying attention to the performance of your system will help prevent the need for emergency HVAC services.

How to Avoid an HVAC Emergency

We would love to tell you that there is a fool-proof way to guarantee that you will never run into an HVAC emergency, but that simply isn’t the case. There are, however, measures that you can take to ensure that your family is comfortable and safe even when winter is at full force.


The overwhelming majority of heating repair is avoidable with regular maintenance. For homeowners, this includes regularly replacing filters, having ducts cleaned every 2-3 years and not allowing repairs to linger.


This should also include servicing from a cooling and heating expert at least once a year. Licensed technicians will be able to address immediate needs, catch potential issues earlier and provide suggestions to help your system stay reliable even through peak usage.


Texas Autumn is considerably more mild than other parts of the country, providing the perfect opportunity to have your furnace serviced. What could be a minor inconvenience in the fall, can quickly progress to an emergency with the temperatures dip during winter months.


Aside from avoiding a potential crisis, it will be easier to schedule a service appointment that works with your schedule with some proactive planning.

Finding Midlothian HVAC Repair

The choice of repair or placement can weigh heavily on a homeowner. Relying on your local HVAC experts can help you make the best financial decision for your home and help relieve stress.


The Dial One Johnson Plumbing, Cooling and Heating team has been helping homeowners with HVAC maintenance, repair and full system replacement for over 50 years. Our 24-hour emergency service and high quality workmanship mean that you can count on our team of professional, licensed technicians to get the job no matter the situation.


Call our team at 469-240-5618 or visit dial1plumbing.com to schedule an appointment with one of our HVAC experts today.

Author Bio:
Sherrie Johnson-Hartsock
Dial One Johnson Plumbing, Cooling & Heating is now owned and operated by Sherrie Johnson-Hartsock, with his grandson, Daniel Johnson, a third-generation plumber who is also the Service Manager.