
Our Blog: Heating, Cooling & Plumbing Insights
Your go-to resource for HVAC and plumbing solutions, DIY guides, and home maintenance tips.
Got an emergency? Call 972-914-0833 or …
Explore by topic:
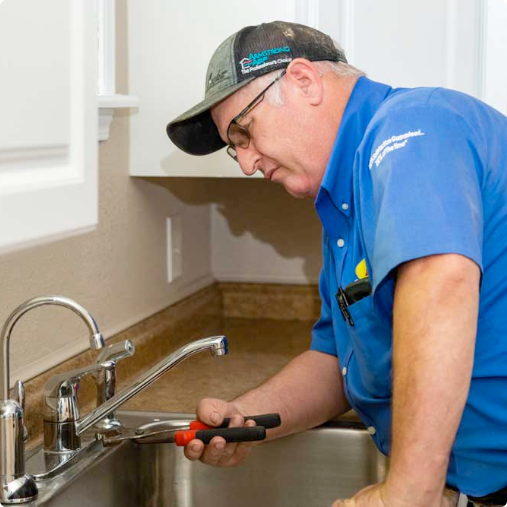
Why Do Pipes Freeze in the Winter?
Because plumbing pipes are out-of-sight, they are also out-of-mind. Because of this, many homeowners forget to take measures to protect their pipes from freezing. But these measures are essential to prevent freezing and protect your plumbing system from damage. It can be helpful to understand why pipes freeze in the first place.
Continue reading for information on signs your pipes may be frozen, why pipes freeze, the danger of frozen pipes and preventive measures.
If you are ready to schedule Winter plumbing service, contact our Dial One Johnson Plumbing, Cooling and Heating team at 469-518-2809.
Why Pipes Freeze in the Winter
Like all climate-based processes, there is a specific set of conditions that make your pipes freeze. Understanding why your pipes freeze in the winter is necessary to understanding the importance of taking preventative measures. The main condition under which your pipes freeze is temperature. If the water inside your pipes reaches a temperature below 32º F then they will begin to freeze.
However, water in motion is harder to freeze. This means that the water may not freeze right at 32º F, it may take several degrees lower than this to freeze the water. While this may be true, you still should take preventative measures to make sure that the temperature never gets to that point.
Signs Your Pipes May Be Frozen
In most situations, it can be pretty easy to tell if your pipes are frozen. Take a look at this list of signs that your pipes may be frozen:
- Lack of water when you turn the faucet on
- It is 32º F or lower outside
- Frost on visible piping
- Bad odors coming from the drain and sewer pipes
If any or all of these signs are present, you need to call a plumber to fix your frozen pipes. If they aren’t fixed right away you may encounter worse issues that are much more expensive and time consuming to fix.
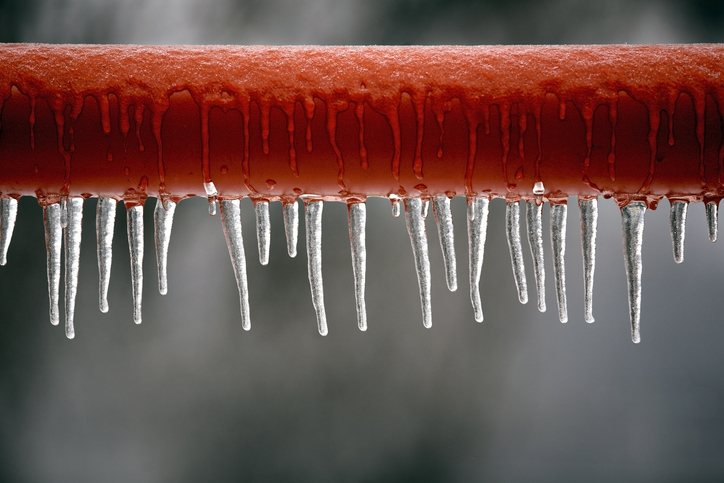
Dangers of Frozen Pipes
Frozen pipes can cause major damage to your home and plumbing system. The most common danger of frozen pipes is the high possibility of burst pipes. When water freezes, it expands. If the water begins to freeze and expand, eventually it will run out of space within the pipe. Under high pressure it may crack the pipe open.
When you have a frozen or burst pipe, you will also have a lack of running water. Think about all of the things you do during the day that require water: laundry, washing dishes, cooking, hydrating, bathing and more. Without running water, your household is put in an uncomfortable situation. The cost of insulating your pipes and putting other preventative measures in place is well worth the avoidance of such a frustrating and expensive inconvenience.
Preventing Frozen Pipes
There are many preventative measures that you can put in place to prevent your pipes from freezing over. Here are five tasks to complete so you can avoid frozen pipes:
1. Insulate Your Pipes
The most common method taken to protect against frozen pipes is insulation. You can purchase numerous kinds of pipe insulation from your local home improvement store. The easiest to apply and most widely available forms of pipe insulation are foam sleeves. Give your plumber a call if you need help applying insulation to your pipes.
Remember to apply insulation to the biggest areas of concern first. These include the exposed piping in your garage, attic, basement and other areas with poor insulation. While this task may seem like an inconvenience, it is preferable to a burst pipe and lack of running water.
2. Let Your Faucet Drip
While this may seem counterintuitive, letting your faucet drip can actually help in the case that your pipes do begin to freeze. When you let your faucet drip, the continuous flow of water relieves pressure within your pipes.
You don’t have to do this with every faucet in your home, but it is suggested that you at least do it for your kitchen sink and utility sink if applicable. Without insulation, letting your faucet drip may not completely prevent your pipes from freezing, but it may prevent them from bursting.
3. Keep Garage Door Closed
If you have exposed piping in your garage, then be sure to keep the garage door closed. It’s best to keep the hot air inside your home. Even exposing your pipes to the cold outside air can make your pipes freeze. While you may not have hot air registers in your garage, keeping the door closed keeps your pipes unexposed to low temperatures.
4. Seal Windows and Doors
This is an important tip not just to prevent your pipes from freezing but also to conserve energy costs. When temperatures begin to drop, it’s imperative that you seal the windows and doors in your home. This will keep the warm air inside, rather than it escaping outside.
You can purchase caulk and other sealants at any home improvement store. All you have to do is go around your windows and doors with the caulk. You should also ensure that all windows close completely and the rubber seals around doors are intact. This is an excellent way to save money on energy costs and keep your pipes at a nice temperature.
5. Keep Interior Doors Open
Another great way to save on energy costs and protect your pipes from freezing is to keep your interior doors open. This allows the heat to travel more efficiently throughout your home. It is especially for your interior piping so that all rooms are properly heated. Burst interior pipes are a much more complex plumbing repair, so be sure to protect those by keeping your doors open.
Reliable Duncanville Plumbers
For an excellent plumber in Duncanville, TX, you need Dial One Johnson Plumbing, Cooling and Heating. Our team of qualified plumbers is ready to help you with all of your piping insulation needs. We provide a variety of plumbing services, including maintenance, repair and replacements, for a variety of systems.
When you hire Dial One Johnson Plumbing, Cooling and Heating you can expect high quality workmanship and superior customer service. Duncanville residents can feel confident that they are getting only the best service possible when they hire Dial One Johnson.
To schedule a plumbing appointment with Dial One Johnson Plumbing, Cooling and Heating, give us a call at 469- 518-2809 or contact us online.
Author Bio:
Sherrie Johnson-Hartsock
Dial One Johnson Plumbing, Cooling & Heating is now owned and operated by Sherrie Johnson-Hartsock, with his grandson, Daniel Johnson, a third-generation plumber who is also the Service Manager.
Boost Your Home Value With a Plumbing Upgrade
Whether you are planning on selling your house or you are just looking to change things up, a plumbing upgrade is a great way to increase the value of your home. Many homeowners overlook plumbing and lean towards more aesthetic upgrades when it comes to home improvement. While there is nothing wrong with this, upgrading your plumbing can provide more benefits than just aesthetics. Continue reading to learn more about why you should upgrade your plumbing and six projects to consider.
To schedule an appointment with an excellent plumber Midlothian TX who can take you step by step through the project you are considering, give Dial One Johnson Plumbing, Cooling and Heating a call at 469-240-5618.
Why Should I Upgrade My Plumbing?
Upgrading your plumbing has many purposes. When you purchase a home, you want to feel confident that the plumbing equipment and fixtures are in good shape. The same applies to those who will be looking at your home when you decide to sell it. Even if you don’t plan to sell your home in the near future, upgrading your plumbing can provide you with many benefits as well.
Take a look at some of the benefits of upgrading your plumbing:
- Improve the fixtures and look of your bathrooms or kitchen
- Increase efficiency
- Save money on monthly water bills
- Better water pressure and functionality overall
You can receive all of these benefits and more when you upgrade your plumbing fixtures and equipment.
Six Plumbing Upgrades To Consider
There are many different plumbing projects to consider, some are more exciting than others, but all will improve your home and its functionality. Take a look at six plumbing upgrades that will increase the value of your home:
1. Modern Pipes
While this is probably the least exciting project to complete, it is one of the most important. Older homes typically have galvanized pipes which often become victim to corrosion. This can cause rusty water and burst pipes. Galvanized pipes are usually made out of lead or polybutylene, both of which pose serious risks to your health and your plumbing.
Replacing your piping now will save you lots of time and money in the future. If you do replace your pipes, consider replacing them with copper and PVC. These are durable and long-lasting, making sure that your home has intact pipes for many years to come.
2. Laundry Room
Another addition that could add thousands to your home value is a laundry room. Many prospective buyers look for a separate laundry room when searching for a new home. Whether you turn a large closet into a laundry room or you add a new section to your home, a laundry room is sure to increase your home value. Some homeowners add a utility sink and extra storage to their laundry room. You can make it as simple or as extravagant as you would like.
3. Water Heater
Think about how often you use your water heater. Washing dishes, taking a shower or bath, washing clothes and other activities all utilize your water heater. Now think about the last time your water heater was replaced? Older water heaters are more likely to corrode, leak, break down and cause high monthly energy bills. If your water heater has a tank, you may want to consider replacing it with a tankless water heater. They take up less space, are more efficient and will save you money month to month.
You should also consider what fuel type would be best for you. While electric is easier and less expensive to install, you will have higher monthly energy bills. Gas water heaters are more expensive to install but will save you a lot of money on energy costs. Talk to your plumber to learn more about what kind of water heater would be best for your household.
4. Upgraded Faucet
If you have an older kitchen faucet that does not have a pull out or pull down feature, you may want to consider replacing it. While it is not necessary to have this ability for a bathroom faucet, it can make kitchen tasks so much easier.
With a pull out faucet, you can bring the faucet head closer to dishes you are cleaning or to get to hard-to-reach spots. You can choose from many different finishes, styles and capabilities when upgrading your faucet which makes this a great opportunity to improve the aesthetics of your kitchen plumbing.
5. Bathroom Addition
If your home only has one bathroom, you may want to consider adding a second. While this is a much more expensive upgrade, it will add thousands of dollars to your homes value. Many prospective buyers look for a house with at least two bathrooms.
When adding a second bathroom you can choose between or a full or a half bath, which gives you the opportunity to save money or space. Some homeowners convert old closets into bathrooms and others add an entire new section to their home. To find out more, give your plumber a call to learn about their bathroom plumbing services.
6. Eco-Friendly Fixtures
One of the best parts about upgrading your plumbing is the ability to choose eco-friendly fixtures. These include low-flow faucets, energy star appliances and dual flush toilets. Not only do these help to conserve water and energy, they also save you money on your monthly bills. Eco-friendly plumbing installations typically last longer and have higher efficiency. This is an excellent way to add value to your home and to improve your plumbing functionality at the same time.
Reliable Midlothian Plumbing Services
If you are looking for an excellent company in Midlothian, Texas to help you give your home a plumbing upgrade, contact Dial One Johnson Plumbing, Cooling and Heating. Our team is highly experienced, trained and qualified to handle any plumbing installation job. We also provide maintenance, repairs, inspections and more. No matter what plumbing service you need, our team has got your back.
To schedule plumbing service with Dial One Johnson Plumbing, Cooling and Heating give us a call at 469-240-5618 or contact us online.
Author Bio:
Sherrie Johnson-Hartsock
Dial One Johnson Plumbing, Cooling & Heating is now owned and operated by Sherrie Johnson-Hartsock, with his grandson, Daniel Johnson, a third-generation plumber who is also the Service Manager.
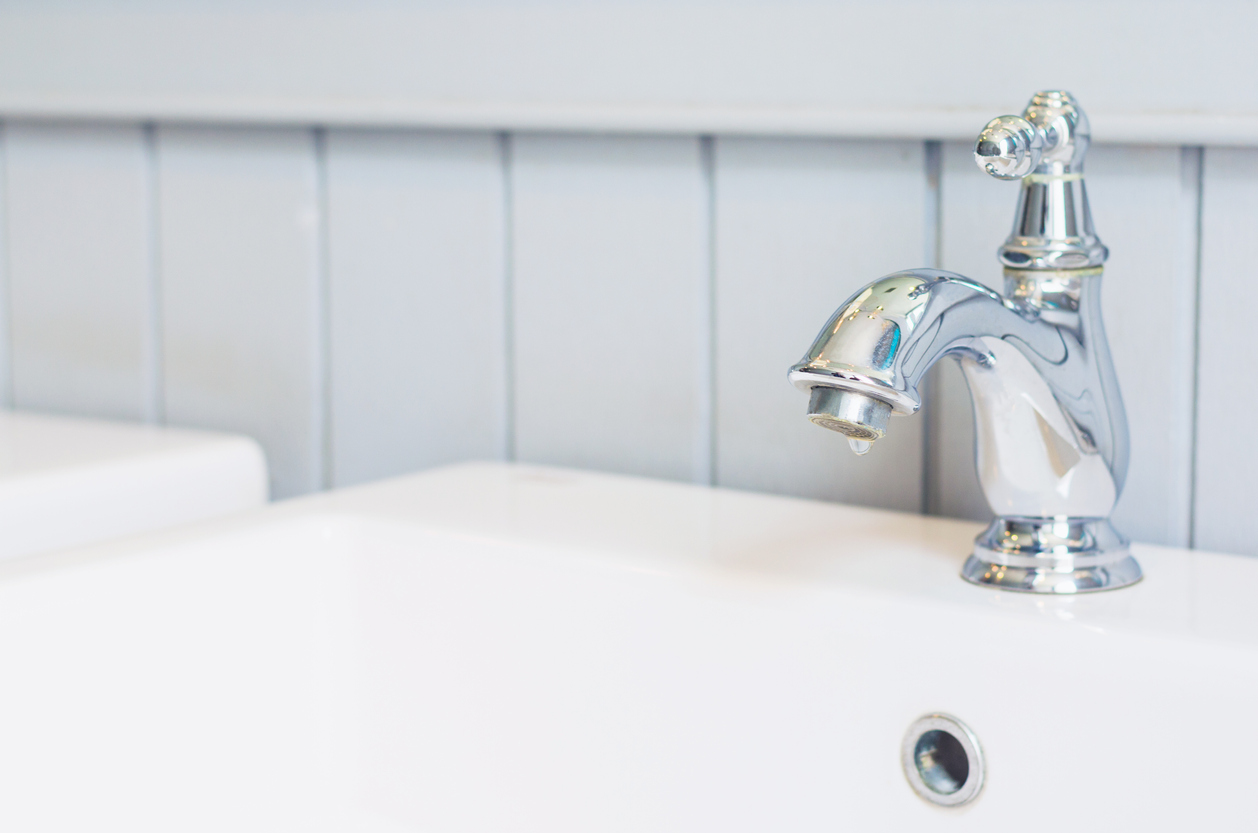
What to Do When a Faucet Won’t Turn Off
Turning on a faucet only to realize that you can’t turn it off can be concerning. Understanding why your faucet won’t turn off can help you to find the right solution. The first thing that you should do if your faucet won’t turn off is determine if there is a flooding risk.
For example, if you have a slow-draining drain then you may want to consider alleviating the build up in your pipes first. All you have to do is purchase a drain stick from your local hardware store. This will help to pull out any hair or waste that has built up in the drain.
Once you have determined that there is no risk of flooding, you can look for a reason why your faucet won’t turn off. Continue reading for causes and solutions for your running faucet.
If you are ready to schedule a plumbing appointment, you can contact Strittmatter Plumbing, Heating and AC at (940) 287-3777.
Causes and Solutions for a Running Faucet
Finding out why your faucet won’t turn off will help you arrive at the right solution. Some issues may require the assistance of a plumber while others can be done by people who know their way around tools and basic plumbing.
There are three main reasons why your faucet may not be turning off. Most of these are easy to fix if you feel comfortable doing so, although it is best to call a plumber to make sure that the entire issue has been resolved.
1. Damaged Faucet Handle
There are a few faucet handle problems that could be causing a running faucet. Take a look:
- Stripped handle: faucet handles are connected to the stem with threads. These threads make it so that when you turn your handle it stays in that position. If you turn your handle and it seems loose or doesn’t stay in any position then it is possible that these threads have worn out and stripped.
To fix this problem you will need to replace the handle. If your faucet has two handles then be sure to replace both. Unless you are comfortable with plumbing, it is best to call a plumber to complete this task. In some cases, it may be best to replace the entire fixture.
- Worn out handle seat: if you were to unscrew the handles on your faucet, you would notice the seat. This part allows your handle to turn. After many years of use it can get worn out. When the seat becomes worn out your handle may not be able to turn off.
To fix this you will need to call a plumber so that they can replace the part or repair it. Because this part is more complex and connected to important plumbing equipment, it is best that you leave this job to a professional.
- Stem washer needs to be replaced: in the faucet stem there is a washer that helps to keep the screw in place. The screw essentially holds the stem together. Without the washer, the screw would become loose and would not allow your faucet to turn off.
Washers can crack and wear down over time, allowing the screw to get loose. You may be able to replace the washer yourself, but it is best to let a plumber do this. They will lubricate the stem and replace the washer to keep the screw in place.
If none of these seem to be the reason for why your faucet will not turn off, then you may want to schedule plumbing services. While it may seem that a faucet is a simple device, it actually contains many different parts. If any of these parts become loose, damaged or worn out it could cause faucet problems. Be sure to ask your plumber to check those parts.
2. Worn Out Valves
If the problem is within your bathtub faucet, then the reasoning may lie with the valves. The pressure valves keep the water at a set pressure. If they are set too low then you will get a slow stream of water – too high and the fixtures will be blown out. Over time, these valves can get worn out. This can cause your faucet to keep running.
There are also pressure valves in sink faucets, however these are smaller and less likely to cause problems such as running water.
To fix this problem you will need to call a professional for bathroom plumbing. First, however, you should turn the water off so that you don’t continue to waste it. Then, you can call a plumber to inspect and possibly replace the valves.
3. Cartridge Needs to be Replaced
If you have a newer, two-handled faucet, then it’s likely that you have cartridges in your stem. These cartridges, typically made of plastic, help to regulate both temperature and flow of water. If these become damaged or worn out, your faucet may not turn off after you turn it on. To figure out which side needs to be replaced, try to turn the hot and cold water one at a time.
If the temperature changes with one handle but not the other, it’s possible that that is the one that needs to be replaced. You can purchase these cartridges at your local hardware store and replace them yourself if you feel comfortable doing so. Your plumber can also identify which needs to be replaced and replace it for you.
Reliable Cedar Hill Plumbing Services
If you are struggling to find a cause and solution of your water faucet problems, you should call a plumber. For dependable Cedar Hill water services, you need Strittmatter Plumbing, Heating and AC.
Our incredible team of technicians are ready to solve any problem you have. We provide maintenance, replacements, repairs and installations for all kinds of heating, cooling and plumbing equipment. From damaged water heaters to clogged air filters, we have got your back.
To schedule an appointment with one of our professional technicians, give us a call at 940-287-3777 or email us online.
Author Bio:
Sherrie Johnson-Hartsock
Dial One Johnson Plumbing, Cooling & Heating is now owned and operated by Sherrie Johnson-Hartsock, with his grandson, Daniel Johnson, a third-generation plumber who is also the Service Manager.
Should You Repair or Replace Your HVAC System?
Your HVAC system is one of the most important systems in your home. It provides you with reliable comfort all year long. When your heating or cooling system unexpectedly breaks down, not only does your home become uncomfortable but you are also left wondering if the system will need to be replaced.
It’s important to understand what kinds of issues are repairable and which ones mean you need a replacement. Knowing more about your HVAC system will leave you less vulnerable to dishonest companies that may overcharge.
Continue reading to find out whether your HVAC system needs to be repaired or replaced. If you are ready to schedule an appointment with a reliable Cedar Hill air heating and air conditioning company, call Dial One Johnson Plumbing, Cooling and Heating at 469-240-5618.
Common, Repairable HVAC Issues
If your heating system is showing signs of damage, then it’s possible that you may require a repair or replacement. There are a few ways that you can figure out whether or not it is time for a replacement. Be sure to contact a technician that you trust so that you can save money and get the best service.
Heating System
Before you become concerned about the costs of heating replacement, you may want to try to determine if the problem is repairable. There are many common heating system issues that are repairable. They include:
- Improperly installed equipment: it’s incredibly important for heating systems to be installed correctly. When heating systems are installed they should be sized and calibrated. If they aren’t calibrated correctly then they can easily break down. High gas bills can be a sign that your system has not been properly calibrated.
- Damaged blower motor: the blower fan helps to move the heated air into the ductwork and through the vents. If the motor fails, then the heater will not be able to move the air into your home. Your entire HVAC system may break down or you may notice that your air is not warm. The solution to this issue is as simple as a blower motor replacement.
- Dead capacitor: the capacitor gives your heating system the energy that it needs to start up. If the capacitor is dead then your system may not be able to start. This can be fixed by replacing the capacitor.
- Damaged starting components: when it comes to heating systems, there are a few parts that help to start the system other than capacitors. For example, a dead or dirty pilot light could keep your furnace from turning on. Some of these issues can become dangerous. A professional technician can help to replace or repair many of these parts.
- Cracked heat exchanger: the heat exchange transfers heat to one part of your system to another. If it develops cracks, your system can fail or become inefficient. Cracked heat exchangers can also become dangerous and leak carbon monoxide. A technician can replace the heat exchanger and fix the issue.
Cooling System
Air conditioning systems can develop damage as they are used over time. In some cases, damage does not always mean that the system has to be replaced. Here are some of the most common, AC repair issues that you may come across:
- Blown thermostat fuse: if the fuse connected to your thermostat becomes damaged, then your system may stop producing cool air. A professional technician will be able to replace the fuse so that your thermostat can communicate with your air conditioner once more.
- Blocked condensate line: the condensate drain collects the water that forms from your air conditioner. If the drain becomes clogged and overflows, the wet switch will turn your system off to avoid short circuiting any wires. All you have to do is call a technician to unclog the line.
- Low or leaking refrigerant: if your system begins to run low on or leak refrigerant, your system may begin to perform poorly. In some cases your system may even stop working. If it has a low refrigerant, the technician only needs to refill it and if the system has a leak, the technician will need to repair the leak.
- Dead capacitor: the capacitor helps start your cooling system. If it dies or becomes damaged your system may not be able to start. A professional will be able to recharge or replace the capacitor so that it can continue starting your system.
- Electrical issues: many air conditioners are electrical. If your breaker box becomes damaged through a power surge, short circuit or other damage, your air conditioner may stop working. This kind of repair should be left completely to professionals as there are safety risks associated with electrical work.
Signs You Need to Replace Your Heating or Cooling System
While many heating and cooling issues are repairable, some systems may just be too old or too damaged to continue providing comfort. Take a look at a few signs that you may need to replace your system:
- R-22 refrigerant: older air conditioners use R-22 refrigerant. In 2019, the EPA banned the production of this refrigerant. While air conditioners that previously used it can still continue to use it, R-22 is more expensive than other refrigerants.
- 15 years or older: if your HVAC system is 15 years or older, then you may want to consider replacing it. Some homeowners find that their system works perfectly fine after 15 years with regular maintenance and upkeep. Others may find that at 15 years their system will become slower, less efficient, more expensive and require more repairs.
- Frequent repairs: when systems become older and less efficient they also begin to require more repairs. If you notice that you are having to call your HVAC technician every six months or less, then it is time to replace your system. You will save time and money by replacing it rather than by repairing it over and over.
Some homeowners also choose to replace their HVAC system if they have growing safety concerns or mounting energy bills. Whatever your reason for replacing your system, be sure to determine whether it can be repaired first.
HVAC Cedar Hill, TX Repair and Replacement
For quality HVAC repair and replacement in Cedar Hill, Texas, you need Dial One Johnson Plumbing, Cooling and Heating. Our team of professionally trained technicians are ready to help you with any issue. From maintenance to installations we can provide a variety of services for all kinds of systems.
If you are struggling to determine whether your heating or cooling system requires a repair or replacement, we have got your back.
To get in contact with one of our certified technicians, give Dial One Johnson a call at 469-240-5618 or head to our website: https://dial1plumbing.com
Author Bio:
Sherrie Johnson-Hartsock
Dial One Johnson Plumbing, Cooling & Heating is now owned and operated by Sherrie Johnson-Hartsock, with his grandson, Daniel Johnson, a third-generation plumber who is also the Service Manager.
Top 5 Reasons For a Dishwasher Clog & How to Fix It
Have you noticed that your dishwasher isn’t draining as well as it used to? Or maybe it’s making weird noises? If this is the case then you may have a dishwasher clog. These clogs can definitely affect the function of your dishwasher. Having an improperly functioning dishwasher can be frustrating.
Continue reading for five reasons why you may have a dishwasher clog and how to fix it.
To schedule a plumbing appointment now, give Dial One Johnson Plumbing, Cooling and Heating a call at 469-518-2809.
Signs Your Dishwasher May Be Clogged
Dishwashers can have a few different, common issues. Before you call a clog in, be sure to have checked for common signs. Take a look:
- Gurgling noise: hearing a gurgling noise come from your dishwasher means that there is air trapped from the clog. Just as if you heard gurgling coming from the toilet, gurgling from the dishwasher is a sure sign there is a clog somewhere.
- Water back ups: if you run your dishwasher and water starts to back up through your sink, then you most likely have a clog. Because the water is trying to drain with no where to go, it goes through the path of least resistance, which is back up. Not all dishwashers are connected to the sink so this may not happen to yours.
- Water pooling: if after you run the dishwasher you notice water pooling at the bottom, then you may have a clog. This happens because the water cannot drain as quickly with a clog.
- Dirty dishes: unclean dishes after a full wash run could mean that your dishwasher isn’t properly functioning. A clog is only one reason why this could be happening so be sure to call a plumber.
If you notice one of these, or more, occurring in your dishwasher then you may want to read on and call for plumbing repair.
Reasons for a Dishwasher Clog
Understanding why you may have a dishwasher clog will help you to figure out if you can fix the problem on your own or if you need a plumber to help. Here are five reasons for a dishwasher clog:
1. Clogged Filter
All dishwashers contain filters that are meant to collect food, waste and other debris that gets cleaned off from your dishes. These filters help to protect your dishwasher from getting frequently clogged. If the filter becomes clogged then water may be slow draining or may not be draining at all.
It is recommended that you clean out your filter every three to six months. You can continue reusing the same filter until it is damaged. Once it becomes damaged you can purchase a new one and replacement.
2. Drain Hose Issues
All dishwashers use a drain hose to drain the water. As water drains over time the drain hose can accumulate residue along the hose. Eventually, this buildup may cause the dishwasher to drain slowly or not at all. You can flush out a drain hose yourself through a few different ways. However, you should never use a chemical drain cleaner to remove the residue from the hose.
3. Clogged Pipes
If the water pipes in your home are clogged, then you dishwasher may not drain. This is especially true if the clog is near to the appliance. It can be difficult to detect clogs that are in piping by yourself, so you may want to call a plumber for this issue.
If you are also having draining issues with your kitchen sink and other bathroom and kitchen plumbing fixtures then you may have a bigger issue on your hands. If this is the case then you need to call a plumber to locate the clog and remove it.
4. Sewer Line Damage
Your dishwasher piping eventually leads to your sewer line. If the sewer line is damaged by a clog, tree root infiltration, corrosion or other issue then it could cause problems for your dishwasher.
You may notice sewer line damage if you smell sewage coming from your drains or you notice brown puddles and lush patches of grass in your backyard. Sewer line damage needs to be taken care of right away so that it does not cause health problems.
5. New Garbage Disposal
Often when homeowners get a new garbage disposal installed, the knockout plug is not removed. The knockout plug allows water to drain through the garbage disposal. All you have to do to fix this issue is remove the knockout plug. You can find tutorials to remove the knockout plug online. If you are not comfortable doing this then you can always call a plumber.
How to Fix a Dishwasher Clog
If you are unsure as to why you may have a dishwasher clog and how to fix the exact problem you may be encountering, follow these steps:
- Turn on your garbage disposal. Doing this can help to release trapped air that may be keeping your dishwasher from draining.
- Open your dishwasher and look for blockages. Sometimes a piece of food may fall into where the water drains. Removing these kinds of blockages can help get your dishwasher back to normal.
- Clean the filter. Dishwashers contain filter cartridges that need to be cleaned every three to six months. All you have to do is run it under water and gently brush it with a sponge. If the filter looks old and worn you may want to replace it.
- Take a look at the drain hose. Sometimes if drain hoses develop kinks they can keep the dishwasher from draining properly. Be sure to straighten it out.
- Check the drain valve. At the bottom of the dishwasher you should have a drain valve. This valve should easily give when you push on it. If it seems to be stuck then you should call a plumber.
- Wash out the drain basket. This basket often becomes full of food waste. Cleaning it out will help to keep your dishwasher in excellent condition.
If you are still encountering issues after following these steps then you should call a plumber.
Reliable Red Oak Plumbing Services
For high quality Red Oak plumbing services, you need Dial One Johnson Plumbing Cooling and Heating. Specializing in all kinds of HVAC and plumbing services, our team is highly trained and qualified. We provide maintenance, repairs, installations and replacements for heating, cooling and plumbing equipment. From clogged dishwashers to faulty air conditioners, we have got your back.
Call Dial One Johnson Plumbing, Cooling and Heating at 469-518-2809 to schedule an appointment in Red Oak, Texas.
Author Bio:
Sherrie Johnson-Hartsock
Dial One Johnson Plumbing, Cooling & Heating is now owned and operated by Sherrie Johnson-Hartsock, with his grandson, Daniel Johnson, a third-generation plumber who is also the Service Manager.
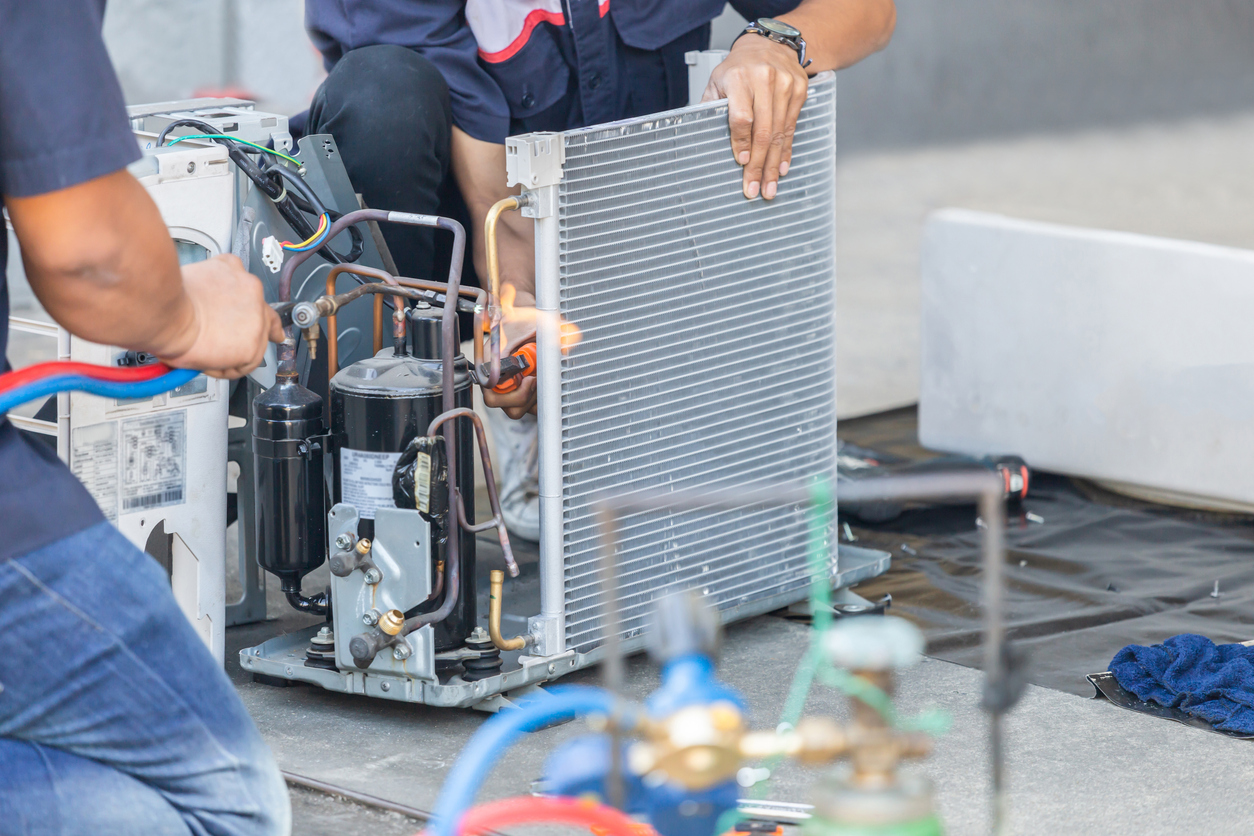
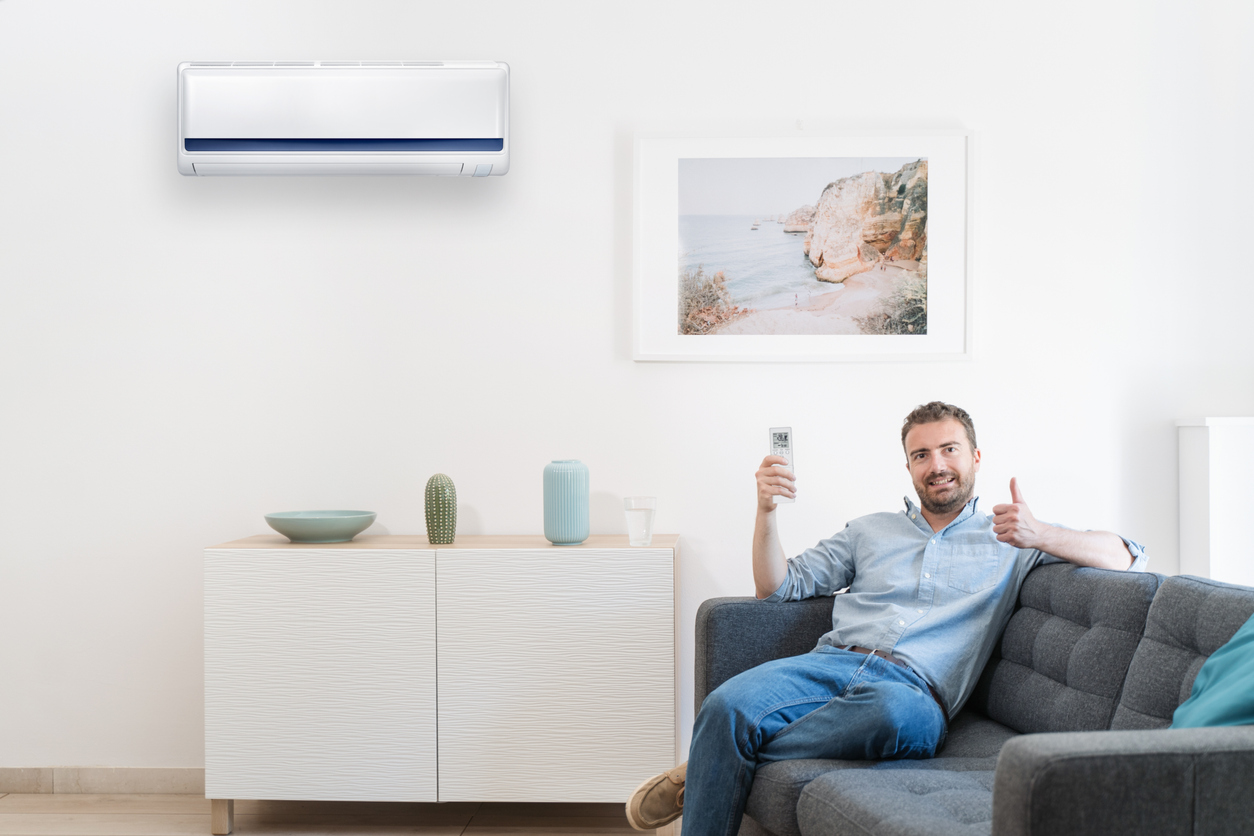
How to Clean Your Air Conditioner
Cleaning your air conditioner is one of the best things that you can do for your home. However, it can be a bit of a daunting task to do it yourself. Fortunately, cleaning your air conditioner doesn’t have to be difficult.
Most air conditioners only require a basic clean with a few steps. These steps are easy for any homeowner comfortable around tools to complete. Continue reading for step-by-step instructions on how to clean your air conditioner.
Before you search “air conditioning repair companies near me”, take a look at Dial One Johnson Plumbing, Cooling and Heating. We are here for all of your air conditioning maintenance needs. Call 469-518-4211 to schedule an appointment.
Importance of Air Conditioning Maintenance
It’s important to clean your air conditioner two times a year in addition to professional maintenance. Scheduling professional maintenance and completing your own maintenance provides you with many benefits:
- Long lasting system
- Fewer necessary repairs
- Higher efficiency
- Lower monthly energy costs
During maintenance appointments, technicians do much more than just cleaning. They usually replace filters, tighten loose joints and connections, lubricate moving parts and more.
It’s important to thoroughly clean your air conditioning system during the seasons in which you don’t have professional maintenance scheduled. When you schedule air conditioning maintenance and complete your own, you are keeping your system in excellent shape. This, in turn, ensures your year-round comfort.
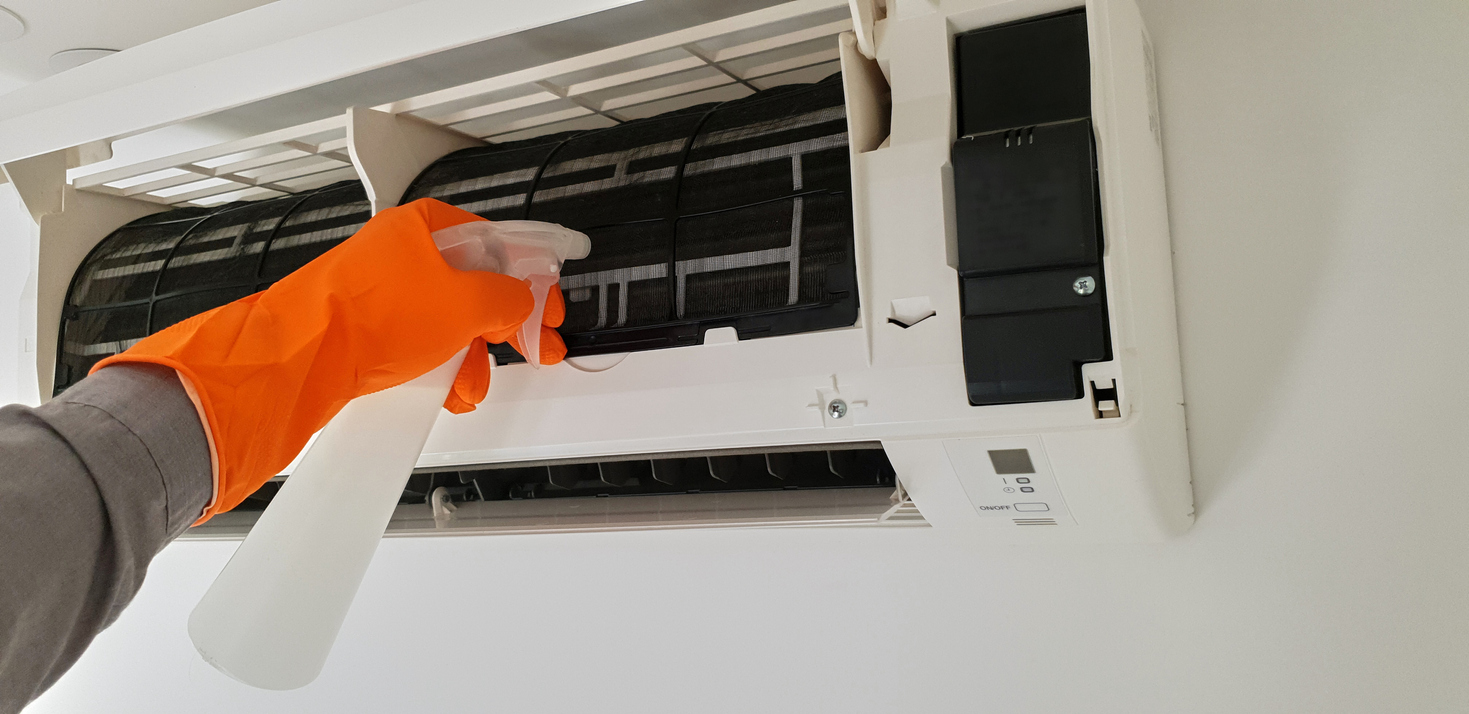
Cleaning Your Indoor Unit
Your indoor and outdoor units have different needs when it comes to cleaning. Indoor units can be a little more sensitive, so be gentle throughout the cleaning process. Follow these steps to properly clean your indoor unit:
- Turn off the unit. It’s always important to turn off the power to your system so that you can safely complete all of the tasks. You may want to grab a flashlight or complete the project during the day in case a few lights also turn off.
- Remove the door that obstructs access to the evaporator coils. Typically all this requires is a screwdriver. Once you remove the screws, you can lift the door off and gain access to the coils.
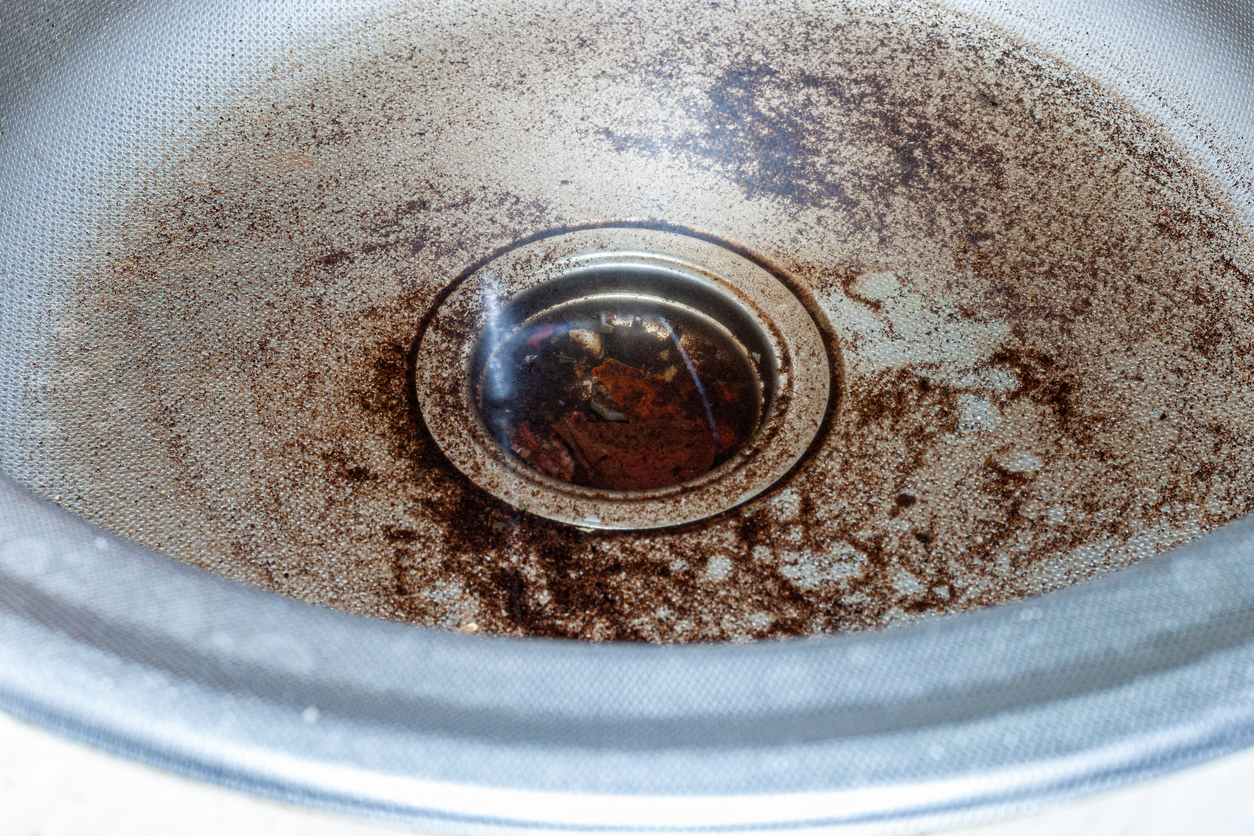
- Clean the evaporator coils. With a duster, remove any dirt, dust and debris from the coils. You can also purchase a coil cleaner at your local home improvement store. All you have to do is spray and leave it. The cleaner foams up and then starts to drip. The cleaner will drip into the drain pan so there is no need to wipe it down. This is best to do on a warm day so that the natural condensation of the system will help the cleaner to be washed away.
- Once the cleaner has completely drained, you can clean out the drain pan. It’s recommended to pour bleach and hot water down the drain to clean it out. Sometimes drain pans can develop algae and other build up so this solution helps to sanitize and clean.
- Re-attach the door with the same screws that were originally used. You may have to use foil tape to attach the door if that is what your door was originally attached with.
- Replace all filters in your home. Doing this helps to keep your system efficient. You can purchase filters at home improvement stores and even grocery stores.
Completing all of these steps will ensure that your indoor unit stays in excellent shape.
Cleaning Your Outdoor Unit
Your outdoor unit is a little more hardy due to the environmental conditions that it was designed to endure. However, it is important to remain gentle with this system as well. Take a look at the outdoor AC unit cleaning process:
- Disconnect the unit from power. This may mean flipping a power switch near the unit. Turning off the power keeps you safe as you are cleaning the system.
- Be sure to have at least two feet of clearance around the system. This means that you will need to trim landscaping and remove objects and debris that may be near the system. Two feet of clearance gives the system ample space to take in and exhaust air.
- Remove the unit grille. Usually the grille is located on top of the unit. You should be able to do this with a screwdriver. There may be wires connected to the grilled, but there is typically enough space where you can lean it against the wall.
- Remove debris from the bottom of the unit. You may have a pan at the bottom of your unit that collects debris; other models may not have this. Without the pan, you will have to take the debris out by hand or through a powerful vacuum. Typically this debris includes small twigs and leaves.
- Clean the condenser coils with water or with a coil cleaner. You can use a hose, set to a gentle setting, to clean off the coils. A coil cleaner also works well but is not necessary. Be careful with the coil cleaner as it can be irritable to the skin.
- Straighten the fins. Before you try to straighten the fins you’ll need to purchase a fin tool. Once you have purchased this tool you can straighten the fins one by one. Doing this increases efficiency and air flow.
- Replace the grille. Be sure to use the same screws originally used to put the grille in place.
These maintenance tasks are the best way to take care of your outdoor unit.
Red Oak Heating, Cooling and Plumbing
For high quality Red Oak HVAC and plumbing services, you need Dial One Johnson Plumbing, Cooling and Heating. Our team is made up of highly qualified technicians who are ready to tackle any challenge. We provide installations, maintenance, repairs and replacements for all kinds of systems. When you hire our team for your air conditioner maintenance services, you can be sure that you are getting excellent workmanship.
To schedule an appointment with our team at Dial One Johnson Plumbing, Cooling and Heating, give us a call at 469-518-4211 or contact us online.
Author Bio:
Sherrie Johnson-Hartsock
Dial One Johnson Plumbing, Cooling & Heating is now owned and operated by Sherrie Johnson-Hartsock, with his grandson, Daniel Johnson, a third-generation plumber who is also the Service Manager.
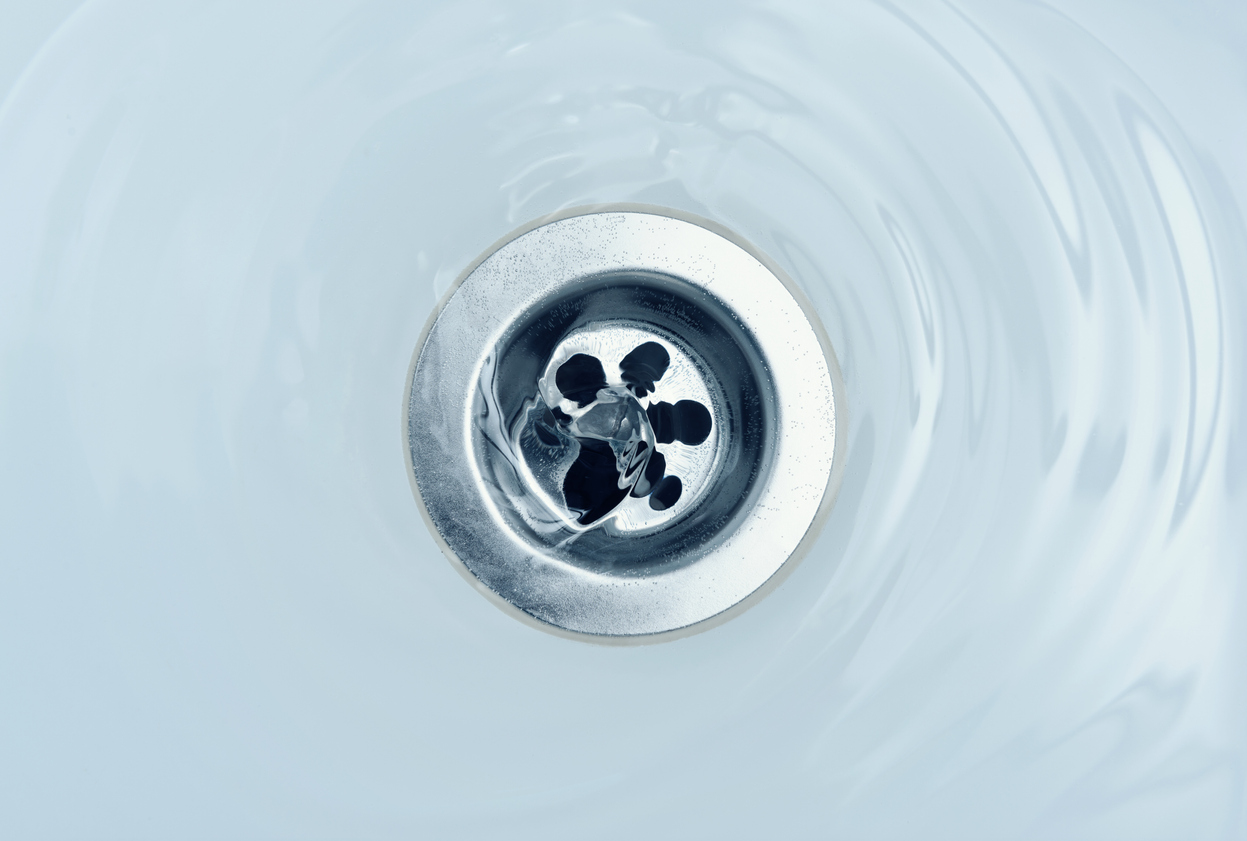
10 Really Easy Ways to Unclog Drains
Is your kitchen sink clogged? A clogged sink is one of the most frustrating problems there is. Considering how often we use our kitchen sink to complete tasks such as washing dishes, cooking and cleaning, a clog can be a huge disruption.
Instead of calling a plumber right away when your kitchen sink is clogged, try some of these ten easy methods to unclog your drain. They are not guaranteed to work, but typically if the clog is on the smaller side, it should be easy to dislodge.
If you do happen to need a plumber right away, call Dial One Johnson Plumbing, Cooling and Heating at 469-557-2703.
Continue reading for ten ways to unclog your drain.
1. Baking Soda and Vinegar
One of the best, and least harmful, ways to unclog your drain is with baking soda and vinegar. Pour one third of a cup of baking soda down the drain, followed by one third of a cup of white vinegar. The mixture should begin to fizz. Let the mixture sit for at least one hour (more is better) and then rinse with hot water.
2. Wire Hanger
If you happen to have a wire hanger on hand then this method is a great way to unclog your kitchen sink. Take the wire hanger and straighten it out. Once you have done this, bend one end to create a small hook. Put this into the drain and see if you can pull any gunk out. The only potential issue with this method is that you may end up pushing the clog further down the pipe, so make sure you are gentle.
3. Wet and Dry Vacuum
If you have a wet and dry vacuum then you may want to try this method. Set your vacuum to wet and cover up the drain as tight as you can. Make sure that the vent on the vacuum is closed so that you can avoid a mess. Turn the vacuum on to its highest setting and see if it can pull the clog out.
4. Caustic Soda
Caustic soda, known as Sodium Hydroxide, can be dangerous to use so be sure that you put on some gloves and protective eyewear. You can purchase caustic soda at your local hardware store. Put three quarters of a gallon of cold water into a bucket with three cups of caustic soda. Stir it with a wooden spoon until it begins to fizz. Pour the mixture into the drain, let it sit for twenty to thirty minutes and flush with boiling water. You can repeat this if the clog still seems to be present, however it is not recommended to use this method too much.
5. Dish Detergent
You can also try dish detergent which acts in a similar way as baking soda and vinegar. Pour a quarter of a cup of dish detergent into the drain, followed by boiling water. Once you have poured both into the drain, you will need to start plunging. This may not work for deep clogs in which case you will have to call for drain and sewer services.
6. Boiling Water
This is one of the easiest ways to unclog your kitchen plumbing. Boil half a gallon of water and pour into the drain. Be sure to steadily pour it in a single stream. In other words: don’t pour it all at once. Wait about 20 seconds between each stage. If the boiling water begins to fill up the sink, let it sit until it is completely cool. Then remove the water and try again. Once the water starts to drain you will know that you have successfully removed the clog.
7. Drain Snake or Stick
A drain snake is essentially a cable with a piece of metal at the end that is meant to pull out any clogs. If you have a drain snake on hand and know how to use it, try that first. You can also purchase a drain stick at your local hardware store or grocery store. These are shorter sticks of plastic with toothed edges. You insert this into the drain as far as it can go and pull it back up. Sometimes the clog is deeper than a drain stick will allow you to go. In this case you will need a drain snake.
8. Plunger
While it may seem strange to plunge your kitchen sink, some surface level clogs will actually come out using this method. First you should remove most standing water, leave enough to cover the head of the plunger. Once you have done this you can begin plunging with a cup plunger. Be sure to get a tight seal over the drain and only bring the plunger up as high as water level. If this method doesn’t work you may want to consider calling a plumber for emergency plumbing services.
9. Salt and Baking Soda
Similar to vinegar and baking soda, salt and baking soda is also a relatively potent drain cleaner. Mix half a cup of salt with half a cup of baking soda and pour the mixture into the drain. Let it sit for ten to twenty minutes and then follow with boiling water. The mixture should spark a chemical reaction that may dissolve some or all of the clog.
10. Garbage Disposal
If you have tried a few things and nothing seems to be working, you may want to check your garbage disposal. All you have to do is switch it on and see if you can hear it breaking through any food waste. If the disposal won’t run at all, you can press the reset button usually located at the bottom of the equipment. Try it again and see if this helps to remove some of the clog. Remember to never put your hand down a garbage disposal to try to remove waste manually.
Duncanville, TX Plumbing Services
Before you search “emergency plumber near me”, call Dial One Johnson Plumbing, Cooling and Heating. Our experienced technicians have the knowledge and tools necessary to remove any kitchen sink clog. At Dial One Johnson we also provide many other services such as maintenance, repairs and installations. No matter the issue, we have got your back.
To schedule an appointment with the Dial One Johnson team, give us a call at 469-557-2703 or contact us online.
Author Bio:
Sherrie Johnson-Hartsock
Dial One Johnson Plumbing, Cooling & Heating is now owned and operated by Sherrie Johnson-Hartsock, with his grandson, Daniel Johnson, a third-generation plumber who is also the Service Manager.
Easy Ways to Reduce Your Heating and Cooling Costs
Have you noticed your monthly energy bills steadily increasing? Or maybe you are hoping to save some money on heating and cooling costs? If that’s the case then you may want to consider implementing a few energy-saving habits.
You don’t have to purchase a brand new, environmentally friendly HVAC system in order to save money on your monthly costs. All you have to do is become more conscious of how you use your heating and cooling systems.
Before you search “heating air conditioning near me” to schedule an HVAC repair or maintenance appointment, give Dial One Johnson Plumbing, Heating and Cooling a call.
While scheduling maintenance is incredibly helpful and can have a tremendous impact on your monthly energy costs, you can implement new habits yourself.
Continue reading for ten easy ways to reduce your heating and cooling costs.
1. Utilize Your Windows
A great way to save money on heating and cooling costs is to use your windows more often. This means properly sealing them to make sure that your hot and cool air doesn’t escape. You should also install curtains or blinds if you do not already have them.
This way, you can open the coverings on the south facing window of your home when the sun is shining brightest during the winter. Or, you can keep them all closed during the summer to keep the heat from coming in through the windows. Learning how to best use your windows can help you save on your monthly energy bills.
2. Block the Chimney
If you have a chimney in your home, you may want to consider blocking it with a chimney cap or other material. Hot and cool air can escape through your chimney, so keeping it closed will help you to conserve energy. You can also install glass doors around the fireplace which make for an easier way to block and unblock your chimney as you need to.
3. Use Ceiling Fans
During hot weather, ceiling fans are an excellent way to cool down a room without touching your thermostat. In the summer you can set your fans to turn counterclockwise for the best cool air circulation. Using a ceiling fan can make a room feel significantly cooler. You can also use your ceiling fan during the winter by setting it to rotate clockwise. This helps to bring warm air down. Either way, running your ceiling fan all day or night is much less expensive than turning up the AC.
4. Keep HVAC Unit Clear
Your HVAC units can function better if they are kept clean and clear. This means that you need to remove any objects or debris within two feet of both your indoor and outdoor units. This allows for better circulation and does not require your HVAC system to work as hard, in turn saving you money.
5. Insulate Ductwork
Installing proper ductwork is an excellent way to lower your monthly energy costs. If you are not sure as to how well your ducts are insulated now, you can call a technician for heating and air conditioning inspection.
Sometimes ductwork can develop leaks or insulation can become worn out which reduces the efficiency of the system. Be sure to install quality insulation so that hot and cool air does not escape.
6. Replace Your Filter
While your air filters may not seem important when it comes to energy costs, they can actually make a big difference in how well your system runs. If your air filters become clogged, the efficiency of your system reduces. Regularly replacing your filter keeps the system running in great shape and improves indoor air quality which keeps costs down.
7. Change Your Thermostat
Adjusting your thermostat can also help you to save money on your heating and cooling costs. For example, turning your HVAC system off when you’re not at home is an excellent way to conserve energy.
You can also install a programmable thermostat so that the temperature automatically changes according to how you have set it. Another way to conserve energy is to turn the heat down during the winter at night and AC up during the summer at night. Talk to your HVAC specialist about ways to conserve energy with a standard or programmable thermostat.
8. Schedule Maintenance
Scheduling regular AC and heating service is the best way to keep your energy costs low. During a maintenance appointment, technicians will complete a variety of tasks designed to improve efficiency. They may lubricate moving parts, clean the units, change your filters, complete inspections and more. Not to mention that your system will also last longer and require fewer, unexpected repairs.
9. Heat and Cool Rooms You Use
Have you ever thought about which rooms you actually use on a daily basis in your home? Maybe you have a guest room or a basement that you rarely use. While the easiest way to choose which rooms you would like to heat and cool is with a whole-house temperature zoning system, there is an easier way to do this.
All you have to do is close the air registers in these rooms. This will make sure that the hot and cool air goes only to the rooms that you actually use, saving you money on energy costs.
10. Install a Dehumidifier
High humidity can make air feel much hotter than it actually is. The same goes for extremely low humidity and colder air. According to the Mayo Clinic, the ideal home humidity level is 30% to 50%.
By installing a dehumidifier or a humidifier you can easily alleviate this problem. There are excellent dehumidifiers that you can attach right to your HVAC system or you can purchase a portable one. Either way, doing this will make your home feel much more comfortable.
Heating and Cooling Services
For high quality, trustworthy “air conditioning and heating repair near me”, you need Dial One Johnson Plumbing, Cooling and Heating. We provide all kinds of services from regular maintenance to whole system installation for heating, cooling and plumbing systems. No matter what kind of issue you may be having, we are ready to help. Our technicians are dedicated to providing only the best customer service and craftsmanship.